SELECTING UTILITY STITCHES
U
tili
ty
S
tit
ch
es
59
3
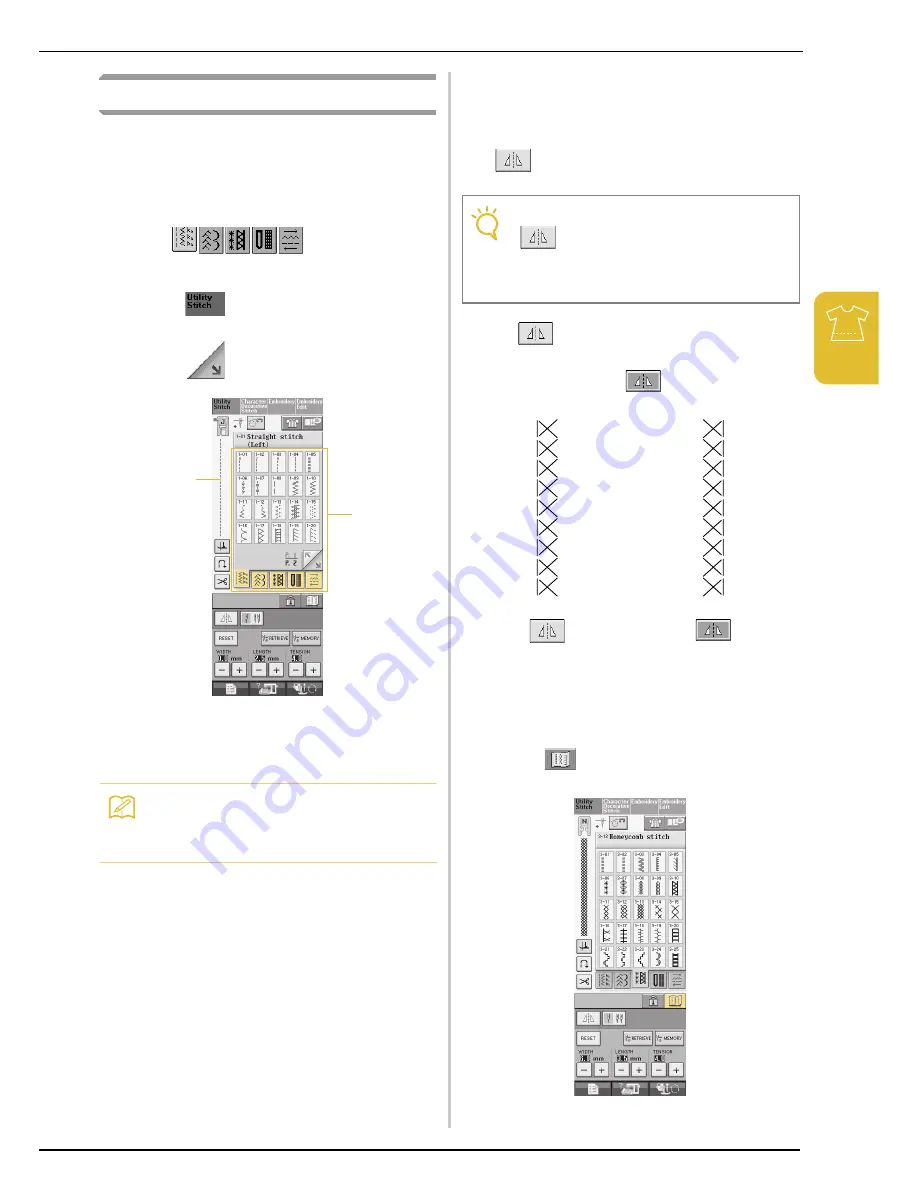
Selecting a Stitch
a
Turn the main power to ON.
→
Either “1-01 Straight stitch (Left)” or “1-03 Straight
stitch (Middle)” is selected, depending on the setting
selected in the setting screen.
b
Use
to select the
category you want.
*
Press
to view this screen if another screen
displays.
*
Press
to view the next page.
a
Preview of the selected stitch
b
Stitch selection screen
c
Press the key of the stitch you want to sew.
■
Using the Mirror Image Key
Depending on the type of utility stitch you select,
you may be able to sew a horizontal mirror image of
the stitch.
If
is lit when you select a stitch, it will be
possible to make a mirror image of the stitch.
Press
to create a horizontal mirror image of
the selected stitch.
The key will display as
.
■
Using the Image Key
You can display an image of the selected stitch. You
can also check and change the colors of the image
on the screen.
a
Press .
→
An image of the selected stitch is displayed.
Memo
For details on each stitch, refer to the
“STITCH SETTING CHART” at the end of this
manual.
a
b
Note
If
is light gray after you select a stitch,
you cannot create a horizontal mirror image of
the selected stitch (this is true of buttonholes,
multi-directional sewing, and others).
Summary of Contents for Ellegante2 BLG2-NZ
Page 1: ......
Page 2: ......
Page 7: ...v...
Page 12: ...Contents x...
Page 54: ...CHANGING THE NEEDLE 42...
Page 68: ...USEFUL FUNCTIONS 56...
Page 126: ...SEWING THE STITCHES 114...
Page 208: ...EMBROIDERY APPLICATIONS 196...
Page 236: ...USING THE MEMORY FUNCTION 224...
Page 254: ...UPGRADING YOUR MACHINE S SOFTWARE 242...
Page 265: ...Index 253...
Page 266: ......
Page 267: ......
Page 268: ...English 882 S95 XE2638 001 Printed in Taiwan...


