


Azure Imaging System User Manual
Page 9
3. CAPTURE SOFTWARE OVERVIEW
Azure Imaging System captures high quality images with an intuitive user interface. The icon based software
allows you to program multiple different applications with the touch of a button. There is no need to focus on
your sample. Simply put your sample in the system, select an exposure time, then hit capture.
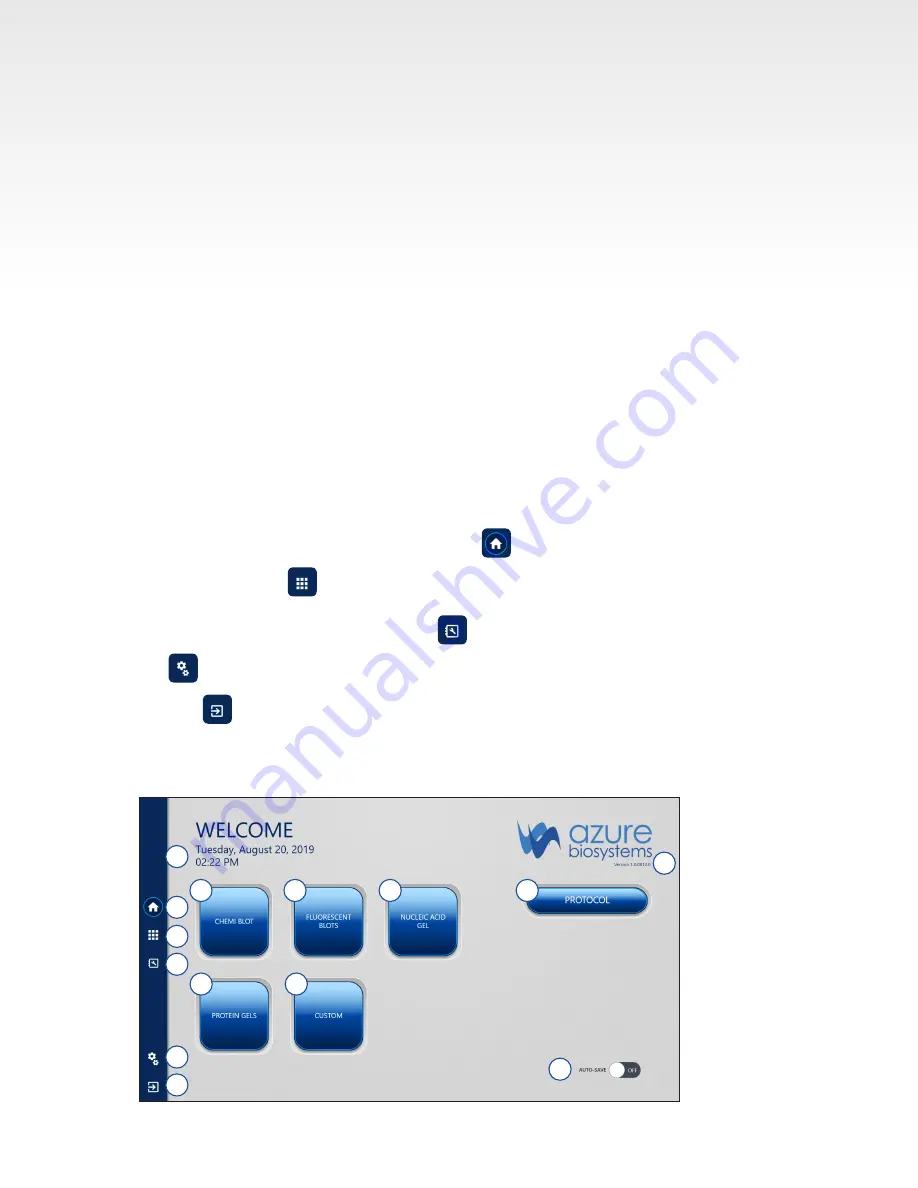
3.1 The home page contains the following imaging options:
1.
Chemluminescent Blot – for samples with chemiluminescent signals such as from HRP. See Section
3.3 for additional information.
2.
Fluorescent Blot – for samples with fluorescent signals in up to four channels (red, green, blue, and
grayscale) for multiplex imaging. See Section 3.4 for additional information.
3.
Nucleic Acid Gel – image nucleic acid blots. See Section 3.5 for additional details.
4.
Protein Gels – image protein blots. See Section 3.6 for additional details.
5.
Custom – select your preferred features from any of the other imaging modalities. See Section 3.7 for
additional details.
Other options include:
6.
Protocol selection – use to save and load custom imaging protocols. See Section 4.1 for details.
7.
Auto Save Functionality – automatically save any image taken during a session. See Section 4.1
for details.
On the left there are the following buttons:
8. Reach the home page at any time by clicking .
9. Go to the Gallery to edit and analyze images. See Section 4.1 for details.
10. Go to this guide at any time by clicking .
11. takes you to Settings. See Section 4.3 for details.
12. Click in the box to exit the program and return to the desktop.
13. Time and date based on Windows settings.
14. Software version number.
1
2
3
4
5
6
7
8
9
10
11
12
13
14