207Z
715ZC, 717ZC / 715ZD, 717ZD / 715Z, 715Z_V1.7
HIGH-END SERIES
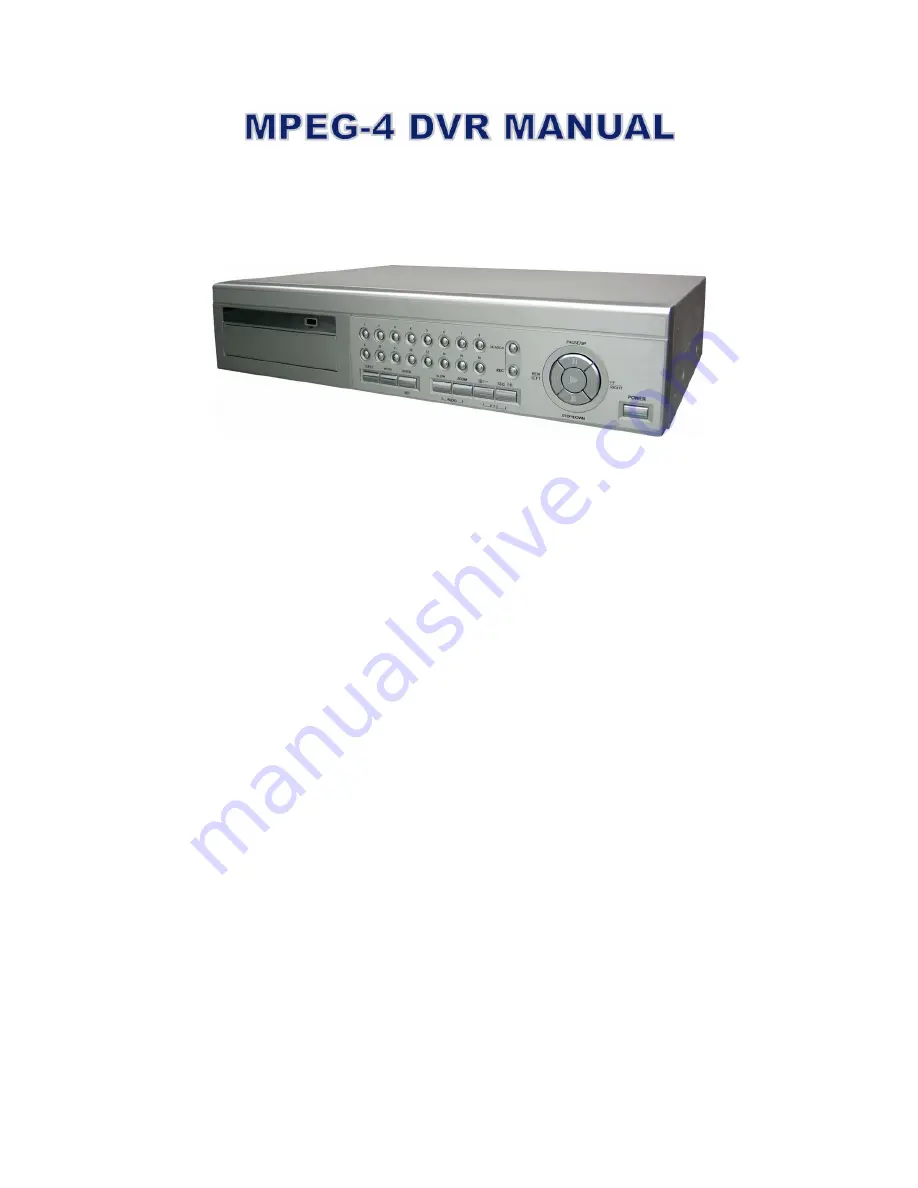
The image shown above may differ from the actual product appearance.
Page 1: ...207Z 715ZC 717ZC 715ZD 717ZD 715Z 715Z_V1 7 HIGH END SERIES The image shown above may differ from the actual product appearance...
Page 2: ...in this manual at any time We do not warrant or assume any legal liability or responsibility for the accuracy completeness or usefulness of this manual The content of this manual is subject to change...
Page 3: ...3 5 Date and Time Setting 10 3 6 LAN or Internet Setup 10 3 6 1 STATIC IP 10 3 6 2 DDNS Apply 11 3 6 3 Dynamic IP PPPOE 14 3 6 4 Dynamic IP DHCP 15 3 7 Password and User Name Setting 16 3 7 1 DVR Pas...
Page 4: ...layback Operation 51 7 4 1 AP Playback Functions 51 7 4 2 Convert the recorded file to AVI format 52 7 5 System Configuration 52 7 5 1 Network 53 1 DDNS 54 2 Mail 55 3 FTP 55 7 5 2 DVR 56 1 Device 56...
Page 5: ...al to have more storage capacity Backup Function Support CD or DVD writer backup optional USB flash drive backup network backup The backup file can be played directly in your PC via the supplied licen...
Page 6: ...ate 3 HDDs or 2 HDDs plus 1 independent disk array HDDs and disk arrays are optional HDD Quick Cleaning Quick clean up the index system of the recorded files 500GB under 2 seconds Recording Mode Manua...
Page 7: ...Off Daylight Saving YES Power Source DC 19V Power Consumption 64 W Operating Temperature 10 40 50 104 Dimensions mm 432mm W 90mm H 326mm D System Recovery System auto recovery after power reconnected...
Page 8: ...ding 2 USB To quickly backup or upgrade firmware OSD you can insert a compatible USB flash drive into this USB port There is another USB port at the rear panel Note For the list of compatible USB flas...
Page 9: ...angle Press UP DOWN LEFT or RIGHT buttons 12 1 8 for 8CH or 1 16 for 16CH Press one of the buttons to select the channel to display 13 SEARCH Press SEARCH button to enter the search menu 14 REC Press...
Page 10: ...lso be recorded 6 Audio OUT 2 audio out Connect to a monitor or speaker with 1 mono audio output 7 DISK ARRAY Connect to an independent disk array for extended storage 8 IR Connect to the IR receiver...
Page 11: ...orded 6 Audio OUT 2 audio out Connect to a monitor or speaker with 1 mono audio output 7 DISK ARRAY Connect to an independent disk array for extended storage 8 IR Connect to the IR receiver for remote...
Page 12: ...When using LOOP function set the impedance switch at your DVR rear panel to HI IMPEDANCE to decrease interferences The default setting is 75 3 2 1 Normal Camera Connection 1 Connect the camera with in...
Page 13: ...led please lock the HDD tray by using the HDD key supplied in the IDA package 2 Connect all IDA with SCSI cables hub IDA only Connect from one of the three DEVICE PORT at one IDA rear panel to the hos...
Page 14: ...LIGHT SAVING DAYLIGHT SAVING START 4TH SUN MAR 24 00 00 END 4TH SUN OCT 24 00 00 ADJUST 01 00 Note Please DO NOT change the date or time of your DVR after the recording function is activated Otherwise...
Page 15: ...tting 3 Login your DVR via an Ethernet or dial up network After setting up the network information of the DVR and connect it to the network you can use the IP address Port Account Password you just en...
Page 16: ...ll email the instructions to your specified E mail address for enabling your account You must complete the procedure according to the instructions in the mail That is to must visit the confirmation ad...
Page 17: ...BASIC OPERATION 13 Log in with your account information and click My Service Click Add Host Services Click Add Dynamic DNS Host Fill in and choose the desired host name...
Page 18: ...llowing default DVR settings The DVR default IP address 192 168 1 10 The DVR default account password admin The DVR default port 80 2 Set DVR network setting in SYSTEM CONFIG Network of the supplied A...
Page 19: ...e area network Please change the IP address of your PC NB into 192 168 1 X X can be the number between 1 255 except 10 and the subnet mask into 255 255 255 0 for communicate with the DVR Install the s...
Page 20: ...ser Name Setting 3 7 1 DVR Password Setting You can use the following buttons for menu setting BUTTON FUNCTION UP DOWN LEFT RIGHT Move the cursor Choose numbers selections ENTER Go to the submenu conf...
Page 21: ...rs on line at the same time for remote login to the DVR For detailed instructions please refer to 1 Account in the section 7 5 4 General at page 65 3 8 System Diagram After you finish all the connecti...
Page 22: ...ecording is scheduled by TIMER function Indicated by the wording TIMER RECORD on the monitor When the recording function is activated please DO NOT change the date or time on your DVR The recorded dat...
Page 23: ...deo playback In the Pause mode Press button once to get one frame forward Press button once to get one frame rewind Stop Pressing button under all circumstances will return this device to live monitor...
Page 24: ...o get 1 8X speed playback Audio Press SHIFT and AUDIO buttons at the same time to select to play either live L or playback P sound from one of the 4 audio channels AUDIO 1 L 1st audio channel live aud...
Page 25: ...MAIN MENU 21 5 MAIN MENU 5 1 Menu Tree...
Page 26: ...LEFT RIGHT Move the cursor Choose numbers selections ENTER Go to the submenu confirm the selection MENU Go to the menu list confirm the change exit the menu list The submenu items are described below...
Page 27: ...CIF 480 240 120 60 CIF 400 200 100 50 8CH FRAME 60 30 15 7 FRAME 50 25 12 6 CIF 240 120 60 30 CIF 200 100 50 25 10 TOTAL IPS SHARE This option is used to select how this device divides its total IPS...
Page 28: ...tems are described below 1 DATE Select from the following 11 options to schedule up to 7 sets of recording days SUN MON TUE WED THU FRI SAT MON FRI SAT SUN DAILY OFF If you plan to set the timer recor...
Page 29: ...are described below 1 DATE Set the current date and time The default order is YEAR MONTH DATE HOUR MIN SEC You can change the date format in FORMAT 2 FORMAT Select one date format from the following...
Page 30: ...EFT RIGHT Move the cursor Choose numbers selections ENTER Go to the submenu confirm the selection MENU Go to the menu list confirm the change exit the menu list 6 4 1 Camera In this submenu you can ma...
Page 31: ...hen this function is activated the symbol will be shown on the channel screen 5 PREV NEXT Only for 16CH model Select PREV to go to the previous page or NEXT to go to the next page 6 4 2 Detection In t...
Page 32: ...n The highest sensitivity setting is 00 and the lowest sensitivity setting is 15 The default setting is 03 Note The default setting of SS is 03 which means once an object is detected more than 3 grids...
Page 33: ...d is similar to TIMER Please refer to the section 6 2 Timer at page 24 6 4 3 Display In this menu list you can check and change some display settings Move the cursor to DISPLAY and press ENTER You wil...
Page 34: ...ove the cursor to OSD and press ENTER to go to the setup view You will see a similar screen as the following DISPLAY OSD SETUP TITLE DISPLAY ON MENU TITLE BACKGROUND GREEN DATE DISPLAY ON MENU BACKGRO...
Page 35: ...to OFF item 3 to item 7 will be disabled even though they are set to ON 3 KEY BUZZER Select to enable or disable the sound when pressing the buttons on the front panel ON OFF 4 VLOSS BUZZER Select to...
Page 36: ...tle of each channel set in CAMERA 2 DEVICE Select the device type CAMERA PTZ according to the connected camera for each channel 3 ID Set the ID number 0 255 for a PTZ camera After connecting to a PTZ...
Page 37: ...set the ID of the DVR 0 255 4 IR Press ENTER or button to enable or disable IR function ON OFF 5 PASSWORD Press ENTER to reset the password for accessing the DVR system ADMIN PASSWORD or GUEST PASSWOR...
Page 38: ...video format NTSC PAL 6 4 7 Network In this menu list you can set up the network For detailed network setup please refer to the section Note If the time and date settings return to their default valu...
Page 39: ...MENU FUNCTION 35 STATIC IP 160 121 346 236 GATEWAY 160 121 346 236 NETMASK 255 255 255 254...
Page 40: ...e this port number for added flexibility or security 6 4 8 Backup In this menu list you can choose to make a copy for a specified period time to a compatible USB flash drive or a CD or DVD for your ow...
Page 41: ...up HDD NUM Press ENTER to select the HDD containing the data you need BACKUP TO USB Press ENTER to start copying the chosen data to the USB flash drive To backup the video data with audio you need to...
Page 42: ...ile CD backup is processing users will see the backup completed percentage on the screen Note During the backup process a file player will also be copied into the disk and you will see a message BACKU...
Page 43: ...es for system errors For the meaning of each error code please see 8 1 FAQ in the section 8 TROUBLESHOOTING at page 70 4 OTHERS Show the information of power on off unlock and reset to default time 5...
Page 44: ...ST List the time of motion trigger recorded files 7 EVENT SEARCH Move the cursor to EVENT SEARCH and you will see a similar screen as the following SEARCH EVENT SEARCH HDD MASTER 1 DATE 2006 AUG 31 15...
Page 45: ...SELECTED RECORD LIST SYSTEM LIST ALARM LIST MOTION LIST EVENT SEARCH TIME SEARCH The submenu items are described below DATE Set the date and time you want to search for events SEARCH You can choose to...
Page 46: ...itch to PAL system Press the buttons until the monitor shows video images 6 6 3 Upgrade Note Do not disconnect the power of your DVR while the upgrade process is in progress or the DVR functions may n...
Page 47: ...these two buttons on the DVR front panel at the same time For detailed playback instructions please refer to section 4 2 Playback at page 19 For detailed playback instructions on the remote side pleas...
Page 48: ...he AP control panel to activate the R E T R function immediately Please refer to section 7 3 1 DVR Control Panel From IR transmitter Press R E T R or F3 button on the IR remote control to activate the...
Page 49: ...Setting After connecting to the DVR with local LAN you can modify the network settings in the DVR or in SYSTEM CONFIG menu of the software AP For the static IP network type please refer to section 3 6...
Page 50: ...lation files so users can keep all the settings of the video web server for next software installation on other PCs 5 Upgrade Firmware Press this button to upgrade DVR firmware or OSD language files T...
Page 51: ...individually see the live view of a single channel without changing the main display setting If you want to set a PTZ camera simply press the channel connected to the PTZ camera and you can set the PT...
Page 52: ...e recorded file is full a new recorded file will be saved as the second file If the HDD space is less than 200MB the program will stop recording j System Config Press this button to enter the setting...
Page 53: ...5 4 General at page 65 Press buttons to move the cursor and make the selection x R E T R Remote Event Trigger Recording Press this button to activate the R E T R function and press again to exit When...
Page 54: ...c of the channel a k Same as the DVR control panel a k l Preset 1 16 A preset position is a pre defined camera view that can quickly and easily been viewed m AUTO Press this button to enter the auto p...
Page 55: ...as clicking 3 times when users press one of the button up down left right 7 4 Playback Operation 7 4 1 AP Playback Functions a Playback Information Display the information such as Date Time Resolutio...
Page 56: ...Fast Forward e Snapshot Press this button to take a snapshot of the current image which will be saved in the specified destination f Close the Player Note When users use remote AP manual recording th...
Page 57: ...d recognized by their own unique IP addresses over the Internet Static IP provided by your ISP Internet Service Provider means the IP address of the computer is fixed and is suitable to build a websit...
Page 58: ...ce for transforming the dynamic IP corresponding to a specific Hostname Go to a website which provide free DDNS services and apply a Hostname For DDNS setup please refer to the section 1 DDNS at page...
Page 59: ...Mail from column to ensure E mails will not be blocked by SMTP For detailed information SMTP server username and password please check with your E mail service supplier b Some mail servers are require...
Page 60: ...type CAMERA PTZ according to the connected cameras for each channel Press Edit to enter the setting box The submenu items are described below a Device Type Choose either normal camera or PTZ camera b...
Page 61: ...he smaller the value is the higher the sensitivity for motion detection SS SS is to set the sensitivity for detecting the size of one object the number of the grids on the screen The smaller the value...
Page 62: ...eck Dynamic Download After entering the backup information press Start button to proceed the backup process Note For CD or DVD backup please install NERO disk burning program to your PC first Note Dur...
Page 63: ...y available player to play it Press OK to start making a CD backup or press CANCEL WRITING CD to only make a backup file to your PC When CD writing is processing DVR Network Backup window will show th...
Page 64: ...rch List and you will see the following options 1 HDD Number Select the HDD from which you want to search recording data in the drop down menu 2 List Type Select the event type you want to view from t...
Page 65: ...THU FRI SAT MON FRI SAT SUN and DAILY 6 START Enter the start time of timer recording 7 END Enter the end time of timer recording Press APPLY to confirm the setup or EXIT to quit without saving 6 Dat...
Page 66: ...In DVR Record Setting you can set DVR record settings Note The same settings can also be made in the DVR Please refer to the section 6 1 Record at page 22 for details 11 MANUAL RECORD Specify whether...
Page 67: ...alarm is triggered Email and or FTP a Email When this option is checked MJPEG pictures will be saved in the path assigned in General File Path Snapshot Path and a copy will also be emailed to the E m...
Page 68: ...u want to see and press Play to view the event recording Delete Choose the event item you want to remove and press Delete to remove it Refresh Press Refresh to update the alarm list Clear All Press Cl...
Page 69: ...es Mac address Show the information of the Mac address MAX LOG LIST Set the maximum number of log list Server Log Press Server Log button to enter the server log list window as following You can filte...
Page 70: ...MAL Control only a e and f functions GUEST Only a function can be used This level is only allowed to watch the live view For the function description please refer to the section 7 3 1 DVR Control Pane...
Page 71: ...nline user account information This view can be updated by pressing Info Refresh button 3 File Path In General File Path you can view and change the file path for saving snapshots and recorded data an...
Page 72: ...umber additionally The format is IP address port num such as 60 121 46 236 888 Step 2 Check if you already installed the supplied licensed software AP If no click Download AP and install the AP Step 3...
Page 73: ...a similar screen as the following when the login information is correct All the buttons and their functions on the control panel are the same as the ones on AP control panel except for the buttons in...
Page 74: ...licensed software AP Can t play the recorded data on my DVR There must be at least 8192 images of recorded data for playback to work properly If not your DVR will stop the playback For example if the...
Page 75: ...amera BRIG 110 Camera CONT 128 Camera SATU 128 Camera HUE 128 Camera COV NO Camera REC NO Detection OFF Detection LS 07 Detection SS 03 Detection TS 02 Detection RE 10 Detection Alarm OFF Network IP A...
Page 76: ...s If you plan to install three HDDs please set two HDDs to Master mode and one HDD to Slave mode and place them to the exact position according to the indication If you plan to install two HDDs please...
Page 77: ...Using RS 485 serial communication signals DVR can be controlled remotely by the keyboard of PC 13 EXTERNAL ALARM NO Under the normal operation COM disconnects with NO But when any alarm is triggered...
Page 78: ...52 R KEY_CH7 0x37 7 KEY_POWER 0x57 W KEY_CH8 0x38 8 KEY_REC 0x72 r KEY_CH9 0x39 9 KEY_PLAY 0x50 P KEY_CH10 0x41 A KEY_SLOW 0x53 S KEY_CH11 0x42 B KEY_ZOOM 0x5A z KEY_CH12 0x43 C KEY_KEY LOCK 0x4B K KE...
Page 79: ...supported by the DVR the USB ERROR message will be shown on the screen Note Please use your PC to format the USB flash drive as FAT 32 Compatible USB Flash Drives MANUFACTURER MODEL CAPACITY 256MB Tra...
Page 80: ...0 6L200R0 200GB 7200 rpm DiamondMax 10 6L200PO 200GB 7200 rpm MaxLine Plus Model 7Y250P0 250GB 7200 rpm DiamondMax 10 6L250R0 3 250GB 7200 rpm Maxtor DiamondMax 10 HDMA6L300RO 3 300GB 7200 rpm Barracu...
Page 81: ...Timer Record Setting 60 Audio Backup 42 Audio Playback 42 AVI Conversion 50 51 B Backup Advance Setting 35 Backup To CD or DVD At AP Side 58 Backup To PC At AP Side 57 Backup Via CD or DVD Writer 36...
Page 82: ...ing 38 Event Record 22 Event Search 39 External Alert 31 External Device Connections 9 F FAQ 69 Features 1 Firmware Upgrade 33 41 Front Panel 4 FTP Setting 54 G GUEST Password Setting 16 33 H HDD Info...
Page 83: ...Advance Setting 32 Remote Login Password Setting 17 Remote Login User Name Setting 17 Remote Operation Via IE Browser 67 Reset Default 33 RS 232 Protocol 73 S Search Available IP At AP Side 45 Setup...