


7
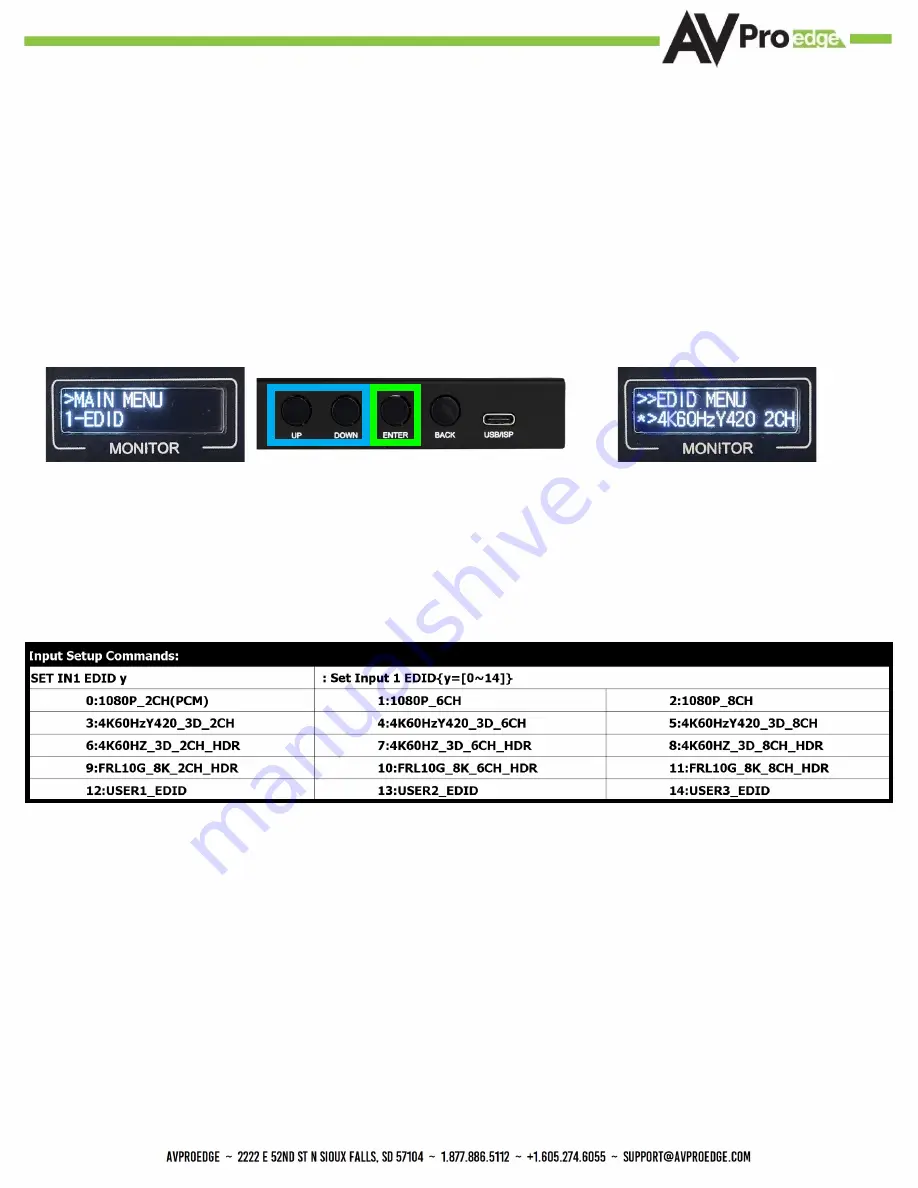
Front Panel Control - EDID Management
To Change the EDID of the INPUT
1. Press the ENTER button to enter the Main Menu. If the screen is off you the first button press will
wake up the screen, you will have to press the ENTER button again to enter the menu.
NOTE: EDID is the first menu and will default here every time you enter the Main Menu.
2. With “1-EDID” showing on the front screen, press the ENTER button.
NOTE: The current EDID will display initialy when you enter the EDID menu.
3. Use the UP/DOWN buttons to cycle through the available EDIDs (See list below).
4. With the desired EDID showing on the front screen, press the ENTER button to set.
NOTE: USER1 slot can be used to copy and store a connected sync devices EDID. Select COPY OUT1, COPY
OUT2, COPY OUT3, or COPY OUT4 (depending on the HDMI output you want to copy from) and press the
ENTER button to save the EDID of that OUTPUTs connected Sync device to the USER1 EDID slot.
EDID BLEND: You can copy the Audio part of and EDID from one HDMI Output and the Video of
another. See page[s] 10-11 command list for more details.
Summary of Contents for AC-DA-14X
Page 4: ...Specifications 4...
Page 11: ...11 System status response example STA cmd Command List Continued...
Page 14: ...HDMI 2 1 Bandwidth Innovation Chart 14...
Page 15: ...15...
Page 20: ...20...
Page 21: ...21...


