96
2.
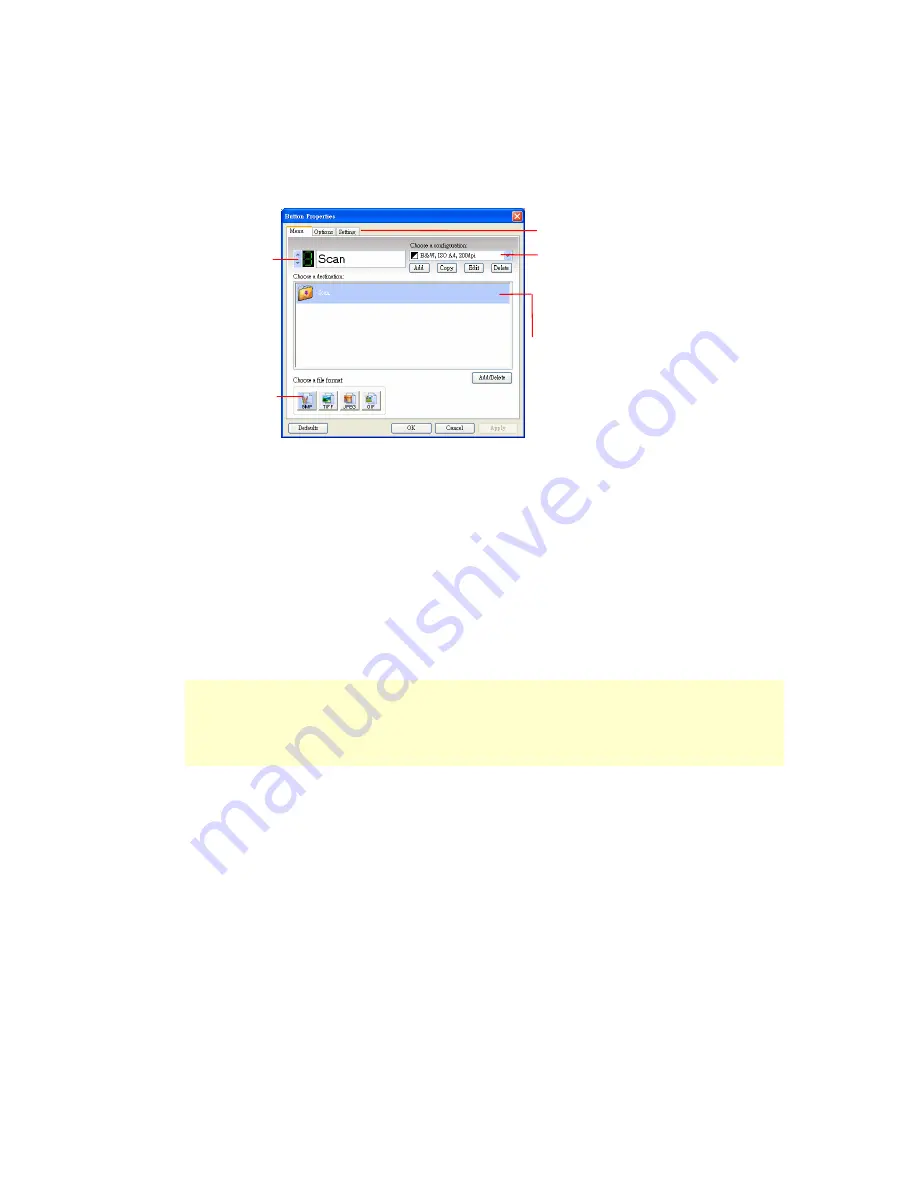
The Button Panel shows the first three scanning buttons. Right-click any
button (function) you wish to set up, the Button Properties window appears.
The default settings are indicated in highlighted color. If you wish to change the
setting, use this window to reset the setting for the file format, destination
application, or other scan settings. See “Configuring the Button” in the subsequent
section to reset the settings.
3.
Click the OK button to leave the window.
Note:
If the Button Panel has not been displayed in the Windows System Tray after
restarting your computer, please just turn off and on your product. The Button icon
will then be displayed on the right corner of the Windows System Tray.
Click to select
options or
setting.
The button
number and
name.
The file format
of the scanned
image.
The scan settings
for the selected
button. (in this
case button #1).
The destination
application. (This
is the application
that opens after
you have finished
scanning.)
Summary of Contents for MT-0904B
Page 1: ...An A3 Network MFP Copy Scan Print User s Manual Regulatory model MT 0904B Avision Inc ...
Page 10: ...4 The Rear View USB Port LAN Port Power Receptacle Tray 1 Tray 2 Optional ...
Page 16: ...10 Part D Numeric pad Enters a number or alphabetical characters ...
Page 26: ...20 8 Move the lock switch back to the Lock position ...
Page 63: ...57 dialog box ...


