22
4.2.3 Parameter Setup
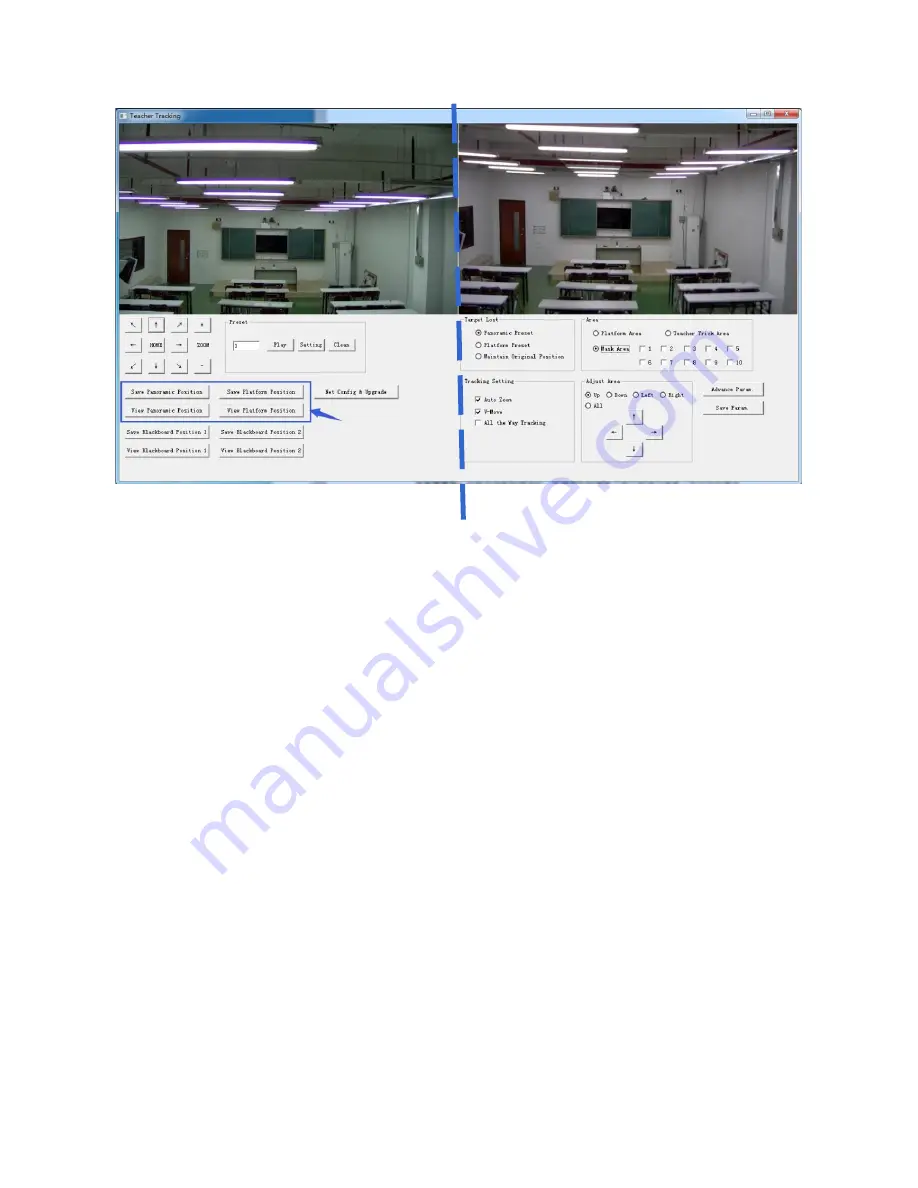
1) Close-up/ Tracking view configuration (the left half of the interface)
In the box indicated by the arrow (see the interface below), there are 4 buttons which are used to set preset
positions for both close-up and panoramic view.
Click
【
View Platform/Panoramic Position
】
, then adjust
【↑↓←
→】
position and zoom so that the target can
be best capture. Click
【
Save Platform/Panoramic Position
】
to save settings.
Note: Platform refers to the close-up view.
Platform preset:
Adjust
【↑↓←
→】
and zoom
【
+ -
】
of the tracking camera to get the desired visual result of
camera image (we suggest that the teacher stand in the middle of podium, if any). Click
【
Save Platform Position
】
.
Once the auto-tracking mode starts, the size of teacher in Platform preset is used as a reference. When tracking
target lost in sight, the close-up image will go back to Platform preset position.
Panoramic preset:
Adjust
【↑↓←
→】
and zoom
【
+ -
】
again to capture as much as a panoramic view of the
classroom (or any position). When tracking target lost in sight, the close-up image will go back to Panoramic preset
position.
Preset for blackboard-writing:
for future use.
2) Set Panoramic Area
Platform area
: It is the area tracked once close-up lens start up tracking. It is blackboard area on
platform generally so as to ensure that when teacher is on platform his upper body is displayed
within setting area, and it will not exceed lower margin of platform area when students in the first
row sit down. See Figure 5.2-3.


