ZM201 Indicator User Instructions
23
3.4 Checkweighing application
3.4.4 Weighing a target object
With the indicator in checkweighing mode, follow these steps to set a target by
weighing an object.
1.
Press
ZERO
to zero the scale, if necessary.
2.
Enter a tare if necessary. Refer to
Net weighing on page 17
for instructions.
3.
Place an object of the desired weight on the scale and press
F1
…
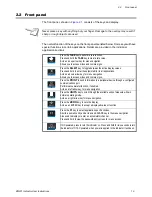
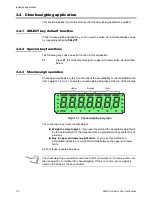
The weight is displayed and the middle bargraph segment lights as well
as the
SP2
annunciator.
4.
Remove the object and replace with the next object to be checked.
The bargraph will show if the weight is under, over or within the target
weight range. If the weight is under,
SP1
annunciator and the
UNDER
bar segments will light. If the weight is over,
SP3
annunciator and the
OVER
bar segments will light.
5.
Repeat step
4
until you are finished weighing items.
The current target weight will be active until you repeat steps
1
through
3
with a new
item of a different weight.
3.4.5 Setting upper and lower limits
With the indicator in checkweighing mode, follow these steps to set a target by setting
upper and lower limits.
1.
Press
ZERO
to zero the scale, if necessary.
2.
Enter a tare if necessary. Refer to
Net weighing on page 17
for instructions.
3.
With weight inside the gross zero band, press
F1
…
Lo
will be displayed briefly and then the current value for the lower
accept weight.
4.
Press
ZERO
to accept this or key in a new lower accept weight and press
ZERO
…
Hi
is briefly displayed and then the current value for the upper accept
weight.
5.
Press
ZERO
to accept this or key in a new upper accept weight and press
ZERO
…
The display returns to normal weighing mode.
The acceptable target window is a range from
Target Object weight ± a predefined
range
entered in a password protected menu.
The farther the weight is from the target weight, more over or under bargraph
segments will light. The UNDER and OVER bargraph segments are fixed at 1 division
each.

