27
Click the Freeze button
to freeze the live image
or double click a image in the list bar. The image
will be frozen. You can only calibrate or measure the
frozen image. Click the Measurement button
to open the measurement dialogue window
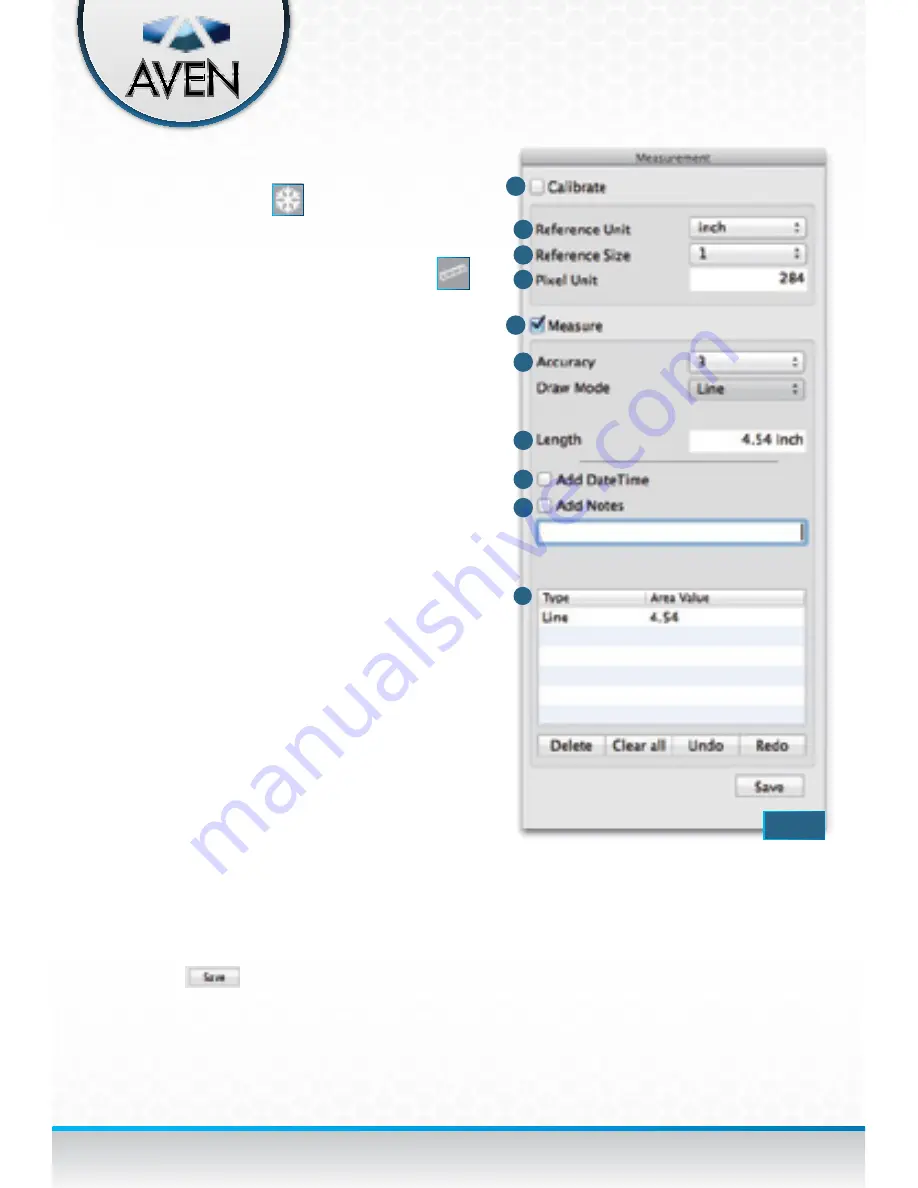
(Fig. 58)
.
1. Calibrate:
Check “Calibrate” first before
measurement to set up proper reference points
to measure.
2. Reference Unit:
Select the measurement unit
for calibration. There are three different units:
mm/inch/mil
3. Reference Size:
Select the unit of measurement
or calibration.
*Using a scale at the chosen magnification
allows for the most accurate measuring.
4. Measure:
Check “Measure” to enter
measurement mode.
5. Accuracy:
The number of decimal points the
measurement is accurate to. Supports up to nine
decimal points.
6. Draw Mode:
Choose the type of measuring:
Angle | Circle | Ellipse | Line | Rectangle |
Triangle.
7. Length/Angle/Area:
Shows the latest
measurement data.
8. Add Date Time:
Add the date and time
information to the saved image.
9. Add Notes:
Add notes to the saved image.
10. Data of the measurement:
Records the
measurement actions for the image. It allows
users to delete a record or clear all records.
*After finishing the measurement, click the Save
button
to save the measured picture.
Measuring -overview
(Mac)
1
2
3
4
5
6
7
8
9
FIG. 58
10


