


Installing the VSU-10000
2-1
Chapter 2
Installing the VSU-10000
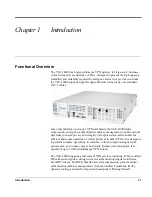
This chapter provides instructions for the physical installation of the
VSU-10000, including rack mounting, placement, and connection to the
network.
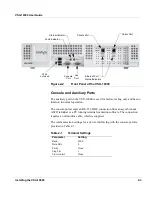
Installing the Power Supply Modules
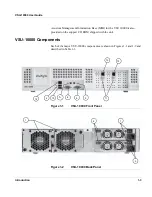
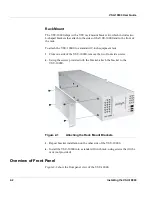
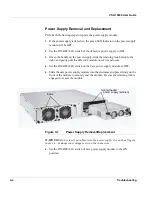
The VSU-10000 power supply modules are shipped outside the unit. To install
the power supply modules, refer to Figure 2-1 and perform the following steps:
1.
Remove the two power supply modules from their shipping containers.
NOTE: The power supply modules feature autoranging of the source AC line
voltage, thus eliminating the need for a voltage selector switch.
2.
Slide each power supply module into the enclosure and press firmly on the
front of the unit to securely seat the unit. The black spring-loaded retaining
clip should snap when the power supply is locked into place.
3.
Set the ON/OFF (I/O) switch of each power supply module to the ON
position.
Physical Installation
The VSU-10000 can be placed on a desktop or mounted in a rack.
Desktop
To install on a desktop, allow sufficient depth in the rear for cabling and on the
sides for ventilation flow.
Summary of Contents for VSU 10000
Page 1: ...VSU10000 System Administrator s Guide Comcode 700213853 09 0060 00 Issue 1 0 December 2001 ...
Page 2: ......
Page 6: ...VSU 10000 User Guide ...
Page 36: ...4 4 Troubleshooting VSU 10000 User Guide ...
Page 42: ...10 100 1000BASE T UTP Crossover Cable Pinouts B 2 VSU 10000 User Guide ...