background image

33

UK

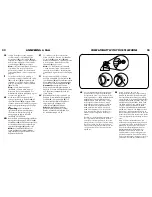
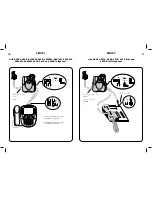
   It is very important that the Configuration dial 

be positioned correctly. Audio problems may 

be experienced if this is incorrectly set. For the 

following telephones — 2420, 4610SW, 4620, 

4620SW, 4621SW, 4622SW, 4625SW, 

4630SW, 5420, 5610 and 5620 — adjust 

the Configuration dial to Position 3. Adjust 

the Configuration dial to Position 1 for 2410, 

4630, 5410, 6416D+M and 6424D+M, 

8403, 8405, 8410D, 8411D, 8434, and 

9600 Series telephones. For other telephones, 

if you cannot hear a dial tone through your 

headset, turn the configuration dial until you 

obtain it. 


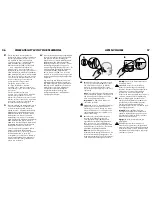
 Then dial a co-worker and while speaking, turn 

the configuration dial through the 4 positions. 

Select the position that provides the best sound 

quality for both you and your co-worker. During 

this call you should also adjust the Listen and 

Speak Volume as described next. Once set, the 

configuration dial will not require any further 

adjustment. 

DE

   Achten Sie darauf, dass sich der 

Konfigurationsknopf in der richtigen Stellung 

befindet, da andernfalls Probleme bezüglich 

der Tonqualität auftreten können. Der Konfig-

urationsknopf muss für die Mobiltelefonmodelle 

2420, 4610SW, 4620, 4620SW, 4621SW, 

4622SW, 4625SW, 4630SW, 5420, 5610 

und 5620 in die Stellung 3 gedreht werden. 

Für die Mobiltelefonmodelle 2410, 4630, 

5410, 6416D+M 6424D+M,  8403, 8405, 

8410D, 8411D, 8434, und 9600 Serie muss 

die Stellung 1 gewählt werden. Wenn Sie im 

Besitz eines anderen Modells sind und über das 

Headset kein Freizeichen hören können, drehen 

Sie den Konfigurationsknopf solange bis dieses 

ertönt.


 Rufen Sie dann einen Mitarbeiter an, und 

stellen Sie den Konfigurationsregler, während 

Sie sprechen, auf alle 4 möglichen Positionen. 

Wählen Sie die Position, die sowohl für Sie 

als auch Ihren Gesprächspartner die beste 

Klangqualität aufweist. Während dieses 

Gesprächs sollten Sie auch die Hör- und 

Sprechlautstärke sowie den Klang wie unten 

beschrieben einstellen. Wenn die Einstellung 

des Konfigurationsreglers festgelegt ist, muss sie 

normalerweise nicht mehr verändert werden.

32

COMPATIbILITY WITH YOUR TELEPHONE

ANSWERING A CALL

FR


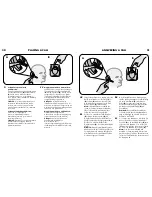
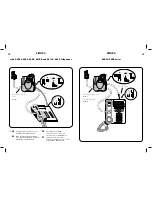
Lorsque le téléphone sonne, appuyez 

sur le bouton de contrôle d’appel du 

micro-casque (

A

) ou de la base (

b

) pour 

répondre à cet appel. Lorsque le téléphone 

mobile sonne, appuyez sur le bouton de 

contrôle d’appel (

A

) du micro-casque. 

Note:

 si la fonction IntelliStand est activée, 

le système active toujours le levier de 

décroché de combiné. Pour désactiver la 

fonction IntelliStand, suivez les instructions 

page 45.

IT


Se squilla il telefono a fili, premere il 

pulsante di controllo chiamate sulla cuffia 

(

A

) o sulla base (

b

) per rispondere alla 

chiamata. Se squilla il telefono cellulare, 

premere il pulsante di controllo chiamate 

(

A

) sulla cuffia. 

Nota:

 se è abilitata la funzione 

IntelliStand, il sistema attiva sempre il 

dispositivo di risposta automatico. Per 

disabilitare la funzione IntelliStand, seguire 

le istruzioni a pagina 45.

NL


Als de vaste telefoon overgaat, drukt u  

op de gespreksknop op de headset (

A

) of  

op het basisstation (

b

) om het gesprek aan 

te nemen. Als de mobiele telefoon overgaat, 

drukt u op de gespreksknop op de headset 

(

A

). 

Opmerking:

 als de IntelliStand is 

ingeschakeld, zal het systeem altijd de 

telefoonhoorn-lifter activeren. Volg de 

aanwijzingen op pagina 45 om de 

IntelliStand uit te schakelen.

NO


Hvis telefonen med ledning ringer, trykker du 

på ringekontrollknappen på hodesettet (

A

eller på basen (

b

) for å besvare anropet. Hvis 

det mobile håndsettet ringer, trykker du på 

ringekontrollknappen (

A

) på hodesettet. 

Merk:

 Hvis IntelliStand er aktivert, vil 

systemet alltid aktivere håndsettløfteren. 

Følg instruksjonene på side 44 hvis du vil 

deaktivere IntelliStand.

PT


Se o telefone com fios estiver a tocar, 

prima o botão de Controlo de chamadas 

no auricular (

A

) ou na base (

b

) para 

atender a chamada. Se o telemóvel estiver 

a tocar, prima o botão de Controlo de 

chamadas (

A

) no auricular. 

Nota:

 se o IntelliStand estiver activado, 

o sistema activa sempre o dispositivo de 

elevação do auscultador. Para desactivar 

o IntelliStand, siga as instruções da Página 

45.

FI


Kun perinteinen puhelin soi, vastaa 

puheluun painamalla joko kuulokkeen (

A

tai tukiaseman (

b

) puhelunhallintapainiketta. 

Kun matkapuhelin soi, vastaa painamalla 

kuulokkeen puhelunhallintapainiketta (

A

). 

Huomautus:

 Luurinpidike on aina 

aktivoituna, kun IntelliStand-tukiasema on 

käytössä. Voit ottaa IntelliStand-tukiaseman 

pois käytöstä noudattamalla sivulla 45 

olevia ohjeita.

SV


Om sladdtelefonen ringer trycker du på 

knappen för samtalskontroll, antingen på 

headsetet (

A

) eller basenheten (

b

) och 

besvarar samtalet. Om mobiltelefonen 

ringer trycker du på knappen för 

samtalskontroll (

A

) på headsetet.  

Obs!

 Om IntelliStand är aktiverat  

aktiveras alltid lurlyftaren av systemet.  

Om du vill avaktivera IntelliStand följer  

du instruktionerna på sid. 45.

Summary of Contents for ABT-35+

Page 1: ...poration in the United States and or other countries All other trademarks are the property of their respective owners Patents U S 5 210 791 6 735 453 6 923 688 7 075 270 D469 756 D512 984 D517 519 D519 498 D521 492 D523 412 Australia 147229 303053 303054 China ZL200530008543 X ZL200530008542 5 EM 293964 0003 293964 0004 0006 France 651 857 651 865 Germany 40108524 4 GB Regd Des No 2104923 Taiwan D...

Page 2: ...BT 35 Bluetooth Per istruzioni sull uso delle cuffie senza fili ABT 35H Bluetooth consultare la Guida rapida È possibile trovare informazioni tecniche dettagliate e una copia della dichiarazione di conformità all indirizzo www plantronics com documentation Per informazioni sulla sicurezza del prodotto fare riferimento al documento Importanti istruzioni sulla sicurezza fornito separatamente prima d...

Page 3: ...e d écoute IT Base e unità per la ricarica 1 Supporto di ricarica 2 Indicatore di conversazione verde 3 Indicatore di alimentazione rosso 4 Selettore di configurazione del telefono 5 Indicatore di carica ambra 6 Commutatore IntelliStand 7 Volume di conversazione 8 Regolazione perfetta 9 Controllo principale del volume di ascolto NL Basis en oplaadstation 1 Oplader houder 2 Spraakindicatielampje gr...

Page 4: ...essoire 14 Fiche de la base du téléphone 15 Cordon court IT Base e unità per la ricarica 10 Controllo principale del volume di conversazione 11 Presa jack della cornetta 12 Presa jack adattatore CA 13 Presa jack per accessori 14 Presa jack della base del telefono 15 Cavo corto NL Basis en oplaadstation 10 Regelaar voor spreekvolume 11 Aansluiting voor handset 12 Aansluiting voor wisselstroomadapte...

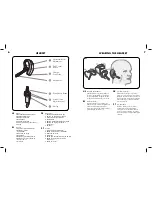
Page 5: ...lare NL Headset 1 Horizontale aanpassing spreekbuis 2 Gespreksknop 3 Oplaadaansluiting 4 Microfoon 5 Aan Uit Muteknop 6 Knoppen voor aanpassen luistervolume 7 Oordopje NO Hodesett 1 Horisontal bøylejustering 2 Tale knapp 3 Ladeforbindelse 4 Mikrofon 5 Strøm Demp knapp 6 Justeringsknapp for lyttevolum 7 Ørepropp PT Auricular 1 Ajuste da Haste Horizontal 2 Botão de Conversação 3 Ligação para carga 4...

Page 6: ...orte qu il soit dirigé vers votre bouche IT Indossare l auricolare Posizionare la cuffia dietro l orecchio Premerlo delicatamente verso l orecchio per sistemarlo correttamente Regolare il microfono posizionandolo davanti alla bocca NL De headset dragen Schuif de headset over en achter uw oor Druk de headset er voorzichtig tegenaan totdat de headset comfortabel zit Pas de microfoonpositie zo aan da...

Page 7: ... nieuw oordopje plaatsen NO Sette inn en ny ørepropp PT Introduzir uma almofada nova para a orelha FI Uuden korvatyynyn asettaminen SV Sätta i en ny öronsnäcka UK Replacing the ear tip DE Einsetzen eines neuen Ohrhörers DK Udskiftning af øreproppen ES Sustitución del extremo de plástico del auricular FR Remplacement de l embout d oreille IT Sostituzione del cuscinetto auricolare NL Het oordopje ve...

Page 8: ... 4 Cavo del comando di attivazione disattivazione chiamata 8400 Opzionale Il cavo 8400 non viene fornito con il prodotto Per reperirlo contattare un rappresentante della linea di prodotti Avaya 5 Cavo del comando di attivazione disattivazione chiamata 24 26 6 Cavo del comando di attivazione disattivazione chiamata 9600 NL Toebehoren 1 Wisselstroomadapter 2 D M filter 3 Oproepdetector 4 8400 Snoer ...

Page 9: ...W 5420 5610 and 5620 Telephones with AVAYA 2410 4630 5410 6416 D M and 6424 D M Telephones 24XX and 54XX phones require 4 0 firmware or greater 46XX and 56XX phones require 1 8 firmware or greater Configuration Dial Set to 3 Configuration Dial set to 1 Speak Master set to B D M Filter ...

Page 10: ...ar el cable 8400 Consulte la página de accesorios FR Contactez le service clientèle Avaya pour recevoir le câble 8400 Voir la page des accessoires IT Per richiedere il cavo 8400 contattare un rappresentante della linea di prodotti Avaya Vedere la pagina Accessori NL Bel de Avaya Headset Line om uw 8400 kabel te bestellen Zie de accessoirepagina NO Ring Avayas kundenummer for hodetelefoner for å be...

Page 11: ... ES Configuración 5 Precaución para garantizar un funcionamiento correcto y sin riesgos es importante que el cable de la base se conecte al conector correcto del teléfono Siga estas instrucciones con cuidado sobre todo si el teléfono cuenta con dos conectores para el microteléfono Asegúrese de marcar el conector en el que estaba conectado el microteléfono A Inserte esta clavija en el conector al q...

Page 12: ...n SV Den här produkten är tillverkad för anslutning endast till digitala Avaya telefoner Använd inte den här produkten med analoga eller ISDN baserade Avaya telefoner eller telefoner från andra tillverkare eftersom det kan orsaka risk för elektriska stötar NL Installatie 5 Waarschuwing het is belangrijk dat het snoer van het basisstation op de juiste ingang van de telefoon is aangesloten zodat het...

Page 13: ...t pt O indicador de Estado acende a vermelho durante o carregamento e passa para azul quando o auricular estiver completamente carregado O auricular tem de ser carregado durante pelo menos 1 hora antes de ser utilizado 3 horas até à carga completa Fi Tilan merkkivalo palaa punaisena kun laitetta ladataan ja muuttuu siniseksi kun kevytkuuloke on latautunut Kevytkuuloketta on ladattava ennen käyttöä...

Page 14: ...3 sekuntia kunnes punainen merkkivalo vilkkuu SV Du sätter på headsetet genom att trycka på och hålla ned knappen för ström sekretess i 3 sekunder tills statusindikatorn blinkar blått Stäng av genom att trycka på och hålla ned knappen igen i 3 sekunder tills statusindikatorn blinkar rött 26 PLACING A CALL A B UK Placing a call on your corded telephone Lift the handset and then press either the Cal...

Page 15: ...lefono cellulare Comporre i numeri utilizzando la tastiera o le funzionalità di composizione vocale se supportate dal telefono Importante é necessario innanzitutto registrare le cuffie sul ricevitore del cellulare Fare riferimento alle istruzioni sulla compatibilità Bluetooth nella Guida rapida delle cuffie ABT 35 NL Een gesprek via de vaste telefoon voeren Pak de handset op en druk op de gespreks...

Page 16: ...o para descolgar el teléfono Para desactivar la función IntelliStand siga las instrucciones de la página 44 A B 30 PLACING A CALL FI Soittaminen perinteisestä puhelimesta Nosta luuri ja paina puhelunhallintapainiketta joko kevytkuulokkeessa A tai tukiasemassa B Valitse numero tavalliseen tapaan valintaäänen kuuluessa Jos valintaääni ei kuulu tarkista että asetussäädin on määritetty oikein katso si...

Page 17: ...casque Note si la fonction IntelliStand est activée le système active toujours le levier de décroché de combiné Pour désactiver la fonction IntelliStand suivez les instructions page 45 IT Se squilla il telefono a fili premere il pulsante di controllo chiamate sulla cuffia A o sulla base B per rispondere alla chiamata Se squilla il telefono cellulare premere il pulsante di controllo chiamate A sull...

Page 18: ...r u en uw collega Pas tijdens dit gesprek ook het luister en spreekvolume en de luistertoon aan zoals hieronder wordt beschreven Als de configuratie eenmaal is ingesteld hoeft u deze niet meer aan te passen NO Det er meget viktig at konfig urasjonsskiven stilles korrekt Hvis den stilles feil kan man få lydproblemer For følgende telefoner 2420 4610SW 4620 4620SW 4621SW 4622SW 4625SW 4630SW 5420 561...

Page 19: ...rgir problemas de áudio caso este seja instalado de forma incorrecta Para os telefones seguintes 2420 4610SW 4620 4620SW 4621SW 4622SW 4625SW 4630SW 5420 5610 e 5620 ajuste o Marcador de Configuração para a Posição 3 Ajuste o Marcador de Configuração para a Posição 1 para telefones 2410 4630 5410 6416D M e 6424D M 8403 8405 8410D 8411D 8434 e 9600 Série Para outros telefones caso não consiga ouvir...

Page 20: ...itta en lagom hög lyssningsvolym kan du prova olika inställningar på Rx skjutomkopplaren 1 4 enligt bilden tills du är nöjd med ljudnivån Obs Med den här inställningen justerar du bara headsetets lyssningsvolym för samtal som rings med bordstelefonen Du kan inte justera headsetets lyssningsvolym när det används med en mobiltelefon Volymen från mobiltelefonen justeras i mobiltelefonen Viktigt En al...

Page 21: ...oerd U kunt het spreekvolume van de headset niet aanpassen als u een mobiele handset gebruikt Belangrijk Een te luid spraakvolume kan de kwaliteit van het geluid nadelig beïnvloeden NO A Juster talevolumet hvordan andre hører deg til nivået er behagelig for samtalepartneren B Hvis du ikke finner et behagelig talevolum må du prøve ulike innstillinger på Tx velgeren A D som vist helt til du oppnår e...

Page 22: ...mykistys painamalla painiketta uudelleen lyhyesti alle 1 sekunti SV Om du vill aktivera sekretessfunktionen trycker du snabbt kortare än 1 sekund en gång på knappen för ström sekretess Om du vill avaktivera sekretessfunktionen trycker du snabbt kortare än 1 sekund en gång på knappen igen 42 SPEAK VOLUME PT A Ajuste o Volume da voz o volume a que os outros o ouvem até que o nível seja confortável p...

Page 23: ...en kanssa voit käyttää IntelliStand toimintoa IntelliStand havaitsee kun kuuloke nostetaan ABT 35 tukiasemasta tai asetetaan siihen ja aktivoi luuripidikkeen vastaamaan tai päättämään puhelun automaattisesti IntelliStand toiminto on poissa käytöstä kun kytkin on kuvan osoittamassa I asennossa ja käytössä kun kytkin on II asennossa SV När ABT 35 används tillsammans med en Plantronics lurlyftare har...

Page 24: ...lo na embalagem e consulte a tabela seguinte para conhecer a utilização aprovada FI Pakkauksessa on tuotteen mallinumero Oheisessa taulukossa on tiedot tuotteen hyväksytystä käytöstä SV Produktens modellnummer hittar du i förpackningen och anvisningar om användning hittar du i tabellen nedan 47 REGULATORY NOTICE EXPOSURE TO RADIO FREQUENCY RADIATION This device and its antenna must not be co locat...

Page 25: ...istered trademark or a trademark of Microsoft Corporation in the United States and or other countries All other trademarks are the property of their respective owners Patents U S 5 210 791 6 735 453 6 923 688 7 075 270 D469 756 D512 984 D517 519 D519 498 D521 492 D523 412 Australia 147229 303053 303054 China ZL200530008543 X ZL200530008542 5 EM 293964 0003 293964 0004 0006 France 651 857 651 865 G...

Page 26: ... ou visitez le site www avayaheadsets com PT Este Guia de Iniciação Rápida disponibiliza instruções sobre a instalação e a utilização do Sistema de Auricular Sem Fios Bluetooth ABT 35 Consulte o Manual de Início Rápido do Auricular ABT 35H Bluetooth para obter instruções sobre a utilização do auricular Para obter informações relativas à segurança e às regulamentações consulte o folheto Importantes...

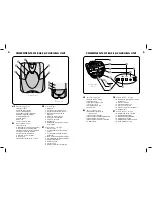
Page 27: ... Base de carga 2 Luz indicadora de conversação verde 3 Luz indicadora de alimentação vermelha 4 Disco de configuração do telefone 5 Luz indicadora de carga amarela 6 Controle IntelliStand 7 Volume de fala 8 Sintonia fina 9 Controle do volume de audição 4 components of base charging unit Underside View US Base and charging unit 10 Speak volume master 11 Handset jack 12 AC power adapter jack 13 Acce...

Page 28: ...geramente hacia la oreja para que ajuste bien Ajuste la posición del micrófono para que quede dirigido hacia la boca FR Port du micro casque Placez le micro casque en le faisant glisser sur votre oreille puis vers l arrière Appuyez doucement contre l oreille pour bien ajuster le micro casque Positionnez le microphone de sorte qu il soit dirigé vers votre bouche PT Uso do headset Deslize o headset ...

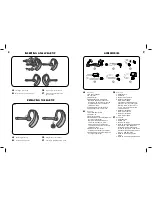
Page 29: ...M 3 Détecteur de sonnerie 4 Câble de contrôle de commutateur 8400 Facultatif Le câble 8400 n est pas fourni avec le produit pour l obtenir communiquez avec le service à la clientèle de Avaya 1 800 544 4779 5 Câble de contrôle de commutateur 24 26 6 Câble de contrôle de commutateur 9600 PT Acessórios 1 Adaptador CA 2 Filtro D M 3 Detector de toques 4 Cabo de controle de gancho 8400 Opcional O cabo ...

Page 30: ... 8 firmware or greater 10 SETUP 1 11 SETUP 2 with AVAYA 2420 4610SW 4620 4620SW 4621SW 4622SW 4625SW 4630SW 5420 5610 and 5620 Telephones with AVAYA 2410 4630 5410 6416 D M and 6424 D M Telephones Configuration Dial Set to 3 Configuration Dial set to 1 Speak Master set to B D M Filter ...

Page 31: ...ord US Call the Avaya Headset Line to request the 8400 cable 1 800 544 4779 ES llame al teléfono de servicio para auriculares de Avaya para solicitar el cable 8400 1 800 544 4779 FR Pour obtenir le câble 8400 communiquez avec le service à la clientèle de Avaya 1 800 544 4779 PT Ligue para o número de telefone disponível para headsets Avaya e solicite o cabo 8400 1 800 544 4779 ...

Page 32: ...gina 22 FR Configuration 5 Attention pour un fonctionnement correct et sûr il est important que le cordon de la base soit connecté sur la fiche adéquate de votre téléphone Suivez ces instructions avec attention surtout si votre téléphone est équipé de deux fiches sur lesquelles était connecté le combiné Assurez vous de noter ou de marquer la fiche qui a été effectivement utilisée pour brancher le ...

Page 33: ...e de vingt minutes avant utilisation Il faut compter trois heures pour un chargement complet PT O indicador de Estado acende a vermelho durante o carregamento e passa para azul quando o auricular estiver completamente carregado O auricular tem de ser carregado durante pelo menos 20 minutos antes de ser utilizado 3 horas até à carga completa US Positioning Recommended separation distance Important ...

Page 34: ...If you do not obtain a dial tone check that the Configuration Dial is set correctly as described on page 22 Important If your corded telephone has a receive volume control ensure it is set no higher than mid range Too high a setting could cause audio problems Placing a call on your mobile handset Dial using your telephone keypad or voice dialling if supported by your telephone Important You will f...

Page 35: ...demasiado alta pode provocar problemas sonoros Fazer uma chamada pelo telemóvel Marque utilizando o teclado do telefone ou a marcação por voz se suportado pelo seu telefone Importante primeiro precisa de emparelhar o auricular com o telemóvel Consulte as instruções de emparelhamento Bluetooth do Auricular para Telemóvel ABT 35H com o Guia de Iniciação Rápida US If either the mobile handset or cord...

Page 36: ... a ajustar el dial de configuración FR Il est très important que le bouton de configuration soit à la bonne position Si le bouton n est pas à la bonne position vous risquez d avoir des problèmes audio Pour les modèles de téléphone 2420 4610SW 4620 4620SW 4621SW 4622SW 4625SW 4630SW 5420 5610 et 5620 réglez le bouton de configuration à la position 3 Pour les modèles de téléphone 2410 4630 5410 6416...

Page 37: ... A B LIsten Volume FR A Réglez le volume d écoute la manière dont vous entendez vos interlocuteurs sur un niveau sonore agréable B Si vous ne trouvez pas de niveau d écoute agréable essayez les différents réglages de l interrupteur coulissant pour la réception 1 4 comme indiqué pour arriver à un niveau sonore satisfaisant Remarque cet interrupteur permet uniquement de régler le niveau d écoute des...

Page 38: ...n volumen de voz demasiado alto puede causar problemas de la calidad del sonido A B Speak Volume FR A Réglez le volume de l émission votre voix entendue par vos interlocuteurs jusqu à un niveau acceptable pour votre collègue B Si vous ne trouvez pas un niveau d émission agréable essayez les différents réglages de l interrupteur coulissant pour l émission A D comme indiqué pour arriver à un niveau ...

Page 39: ...dispositivo para descolgar el teléfono de Plantronics puede activar la función IntelliStand La función IntelliStand detecta si se ha quitado el auricular o si se ha vuelto a colocar en la unidad base ABT 35 y activa automáticamente el dispositivo para descolgar el teléfono para responder a una llamada o ponerle fin La función está desactivada si el interruptor se encuentra en la posición I como se...

Page 40: ...anual The internal wireless radio operates within guidelines found in radio frequency safety standards and recommendations which reflect the consensus of the scientific community Plantronics therefore believes the internal wireless radio is safe for use by consumers The level of energy emitted is far less than the electromagnetic energy emitted by wireless devices such as mobile phones However the...

Reviews: