Autonics RING 8012PMH Operation Manual Download Page 72

C) Receive error. 

C) Receive error. 

C) Receive error. 

C) Receive error.      

(1) Check timing : 

When receiving the data from host. (LAN connection) 

(2)  How to check : 

By detecting framing or parity error during internal processing of data.   

(3)  Cause of the error : 

LAN setting does not match to host computer.   

(4) How to recover :   
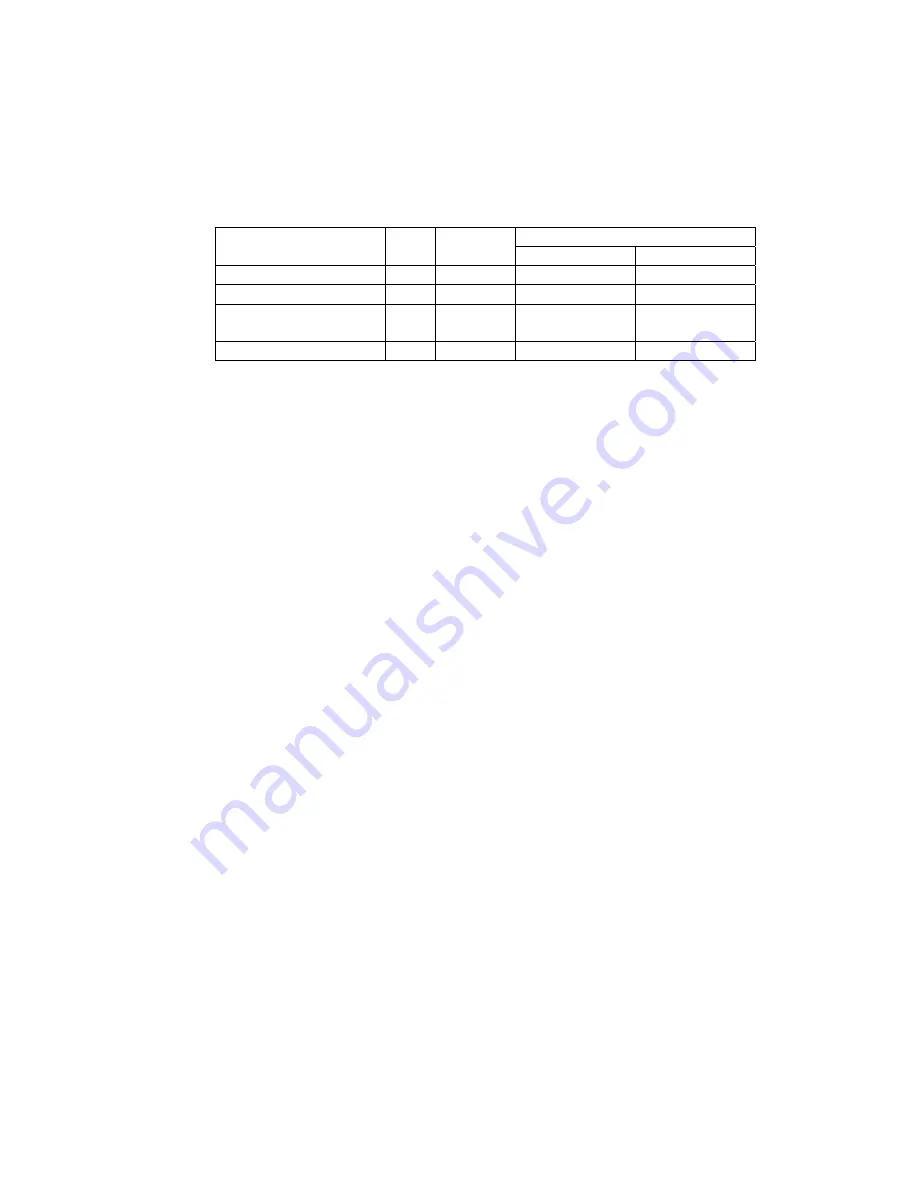
LCD 

How to recover

Beep 

sound 

ERROR 

LED status 

Upper Lower 

Error detection 

ON 

ON 

E60 LAN 

Receive error 

Press any button down 

OFF 

ON 

E60 LAN 

Receive error 

Press ‘PAUSE’ button   
down 

OFF OFF 

PAUSE 


Turn power switch again.  OFF 

OFF 

READY 


Summary of Contents for RING 8012PMH

Page 1: ...Thermal Printer Thermal Printer Thermal Printer Thermal Printer RING 8012PMH Operation Manual Operation Manual Operation Manual Operation Manual...

Page 2: ...ructions e instructions e instructions The denotations and meaning are as followings The denotations and meaning are as followings The denotations and meaning are as followings The denotations and mea...

Page 3: ...erate the printer with incursion of foreign material liquid such as water oil and piece of metal such as clip pins That might cause electrification or fire Turn off the power switch immediately and re...

Page 4: ...ove the plug by holding plug part Do not pull cable part to remove the plug That might cause the defection of the cable and cause fire b Please unplug the power cable in case of not using for long tim...

Page 5: ...pet or blanket Do not cover with cloth Note The outer case will get high temperature during the operation Keep the space of more than 5 cm between the printer and the surroundings Do not place the pri...

Page 6: ...th 16 3 5 Explanation of Operation panel 17 3 6 Procedure of operation 18 3 6 1 Operation with Die cut label 18 3 6 2 Operation with Continuous label 19 3 6 3 Switching Die cut to Continuous label 20...

Page 7: ...S232C interface 56 5 7 2 RS232C protocol 57 5 7 3 Parallel interface 59 5 8 Papers and ribbons 60 5 8 1 Paper types 60 5 8 2 Paper sizes 60 5 8 3 Thermal ribbons 62 5 8 4 Storage of paper and ribbon 6...

Page 8: ...roughly to make full use of the capabilities of the printer and to handle it properly before using your printer Keep the manual and the related documents included with the product on hand to solve you...

Page 9: ...t least if you use the cutter for label 4 mm requires at least To decrease unprintable area in the cutter peel off and tear off mode the printer has back feed feature Label printing having the same fo...

Page 10: ...About environment 1 Operating temperature is 5 to 40 centigrade Prevent condensation by keeping relative humidity under 85 RH 2 Install the printer on leveled place with no vibrations 3 Do not block...

Page 11: ...each part 1 Designation of each part 1 Designation of each part 1 Designation of each part Top Cover LCD Display Ribbon Stocker Ribbon Rewinder POWER Switch Left side cover Label Stocker Print Mechan...

Page 12: ...ermal Transfer Ribbon Feed out Tear off Mode Ribbon 1 Head Latch Mechanism Left Side View 1 Label Head Latch Lever 2 2 Home Position HP Sensor Label guide Top View Label Guide HP Sens or Peel off Mode...

Page 13: ...to the Label Stocker all the way to the end 2 To open the Print Mechanism push up latch lever 3 Thread the end of the paper roll through a space under the HP sensor and bring it over theplaten 4 In th...

Page 14: ...inder and wind it on the Rewinder by taking the procedures a to c described below a Pass the end of ribbon under the bar for the Ribbon Rewinder b Keeping the a status rotate the knob on the left end...

Page 15: ...ewinder by holding the left end of the spool and lift it while sliding it toward the right c Return the knob of the Rewinder to its original position as shown in fig 3 11 d Remove the used ribbon from...

Page 16: ...el width guide in accordance with the width of the printing paper or label backing leaving margins of 0 5 mm on either side of the medium a total of 1 mm or so b Set the printing width adjusting knob...

Page 17: ...or execute the selected functions 5 FEED Thebutton tofeed thepaperfrom Pause position 2 READY STORE The green light on in case of Ready and blinks when sending data to memory such as Firmware up date...

Page 18: ...cut label and thermal ribbon to the printer 4 Turn power switch on 5 Check if the LCD shows Ready 6 Execute HP level adjustment and calibration A Press PAUSE to show Pause on LCD B B Press CALIBRATE...

Page 19: ...s C Press ENTER to fix D The LCD shows Set Label Pitch 53 mm E Press PAUSE to show Pause on LCD 6 Execute HP level adjustment and calibration A Press CALIBRATE LEVEL and show Learn Gap Level Sensing 6...

Page 20: ...Die cut D Press ENTER to fix The LCD will displays Measure Label Manual E Press PAUSE to show Pause on LCD 4 Execute HP level adjustment and calibration A Press CALIBRATE LEVEL to show Learn Gap Level...

Page 21: ...e 1 In case of appearance of the ribbon wrinkle open the print mechanism and take up the slack of ribbon by rotating the Ribbon Rewinder by hand Then close the print mechanism The beep sound will ring...

Page 22: ...onfigurat 1 Configuration mode ion mode ion mode ion mode Initial setting of the printer is done in this mode A Turn power on while pressing ENTER to show Configuration on LCD B Use ENTER and to proce...

Page 23: ...ation Count Dictation Function Selects the way of display for counting None For not displaying counting Repeat For displaying the count by repeat Total For displaying the count by total A The settings...

Page 24: ...0 mm 15 mm A The max print speed differs by printer type Please refer 5 3 7 Print speed for the details B Please select suitable print speed for the ribbon and label you use to obtain best print quali...

Page 25: ...eration mode C The default is set as Die cut 6 Measure label Measure label Only displayed in case of selecting Die cut label Function Select the way of calibrating the paper Every time Start calibrati...

Page 26: ...acking paper Label Label Gap length The gap between labels A This mode is displayed only when PGM is selected at Measure label B The settings become valid after exiting from the mode C The default is...

Page 27: ...h the baud rate to host PC The setting becomes valid after exiting from the mode C The default is set as 9600 11 RS parity RS232C Parity Function Sets parity bit None For no parity Type Even For even...

Page 28: ...of the parity Host PC is ready SPACE ON about 7V on the line allows to return status DR DSR 4 pin Data Set Ready input The line shows data to be sent is ready in the parity Host PC ER DTR 6 pin Data t...

Page 29: ...00 C Press DENSITY POSITION again to proceed D Press to change the values and press ENTER to fix E Press PAUSE to exit from Print adjustment mode 1 Print density Print Density Function Change print de...

Page 30: ...e position goes back against feeding as value increases Feed Peel position Peel Position Displayed in Peel off mode Function Adjusts the stop position of label after printing in Peel off mode by 0 1 m...

Page 31: ...n Tear off Cut off mode Function Adjusts waiting position of label after printing in Tear off Cut off mode by 0 1 mm Range 0 to 99 9 mm A The position goes back against feeding as value increases B Pr...

Page 32: ...USE to show Pause on LCD B Press MENU several times to show Label Type C Select Die cut by using D Press ENTER to fix E Press PAUSE to show Pause on LCD 3 Executing HP adjustment A Press PAUSE and sho...

Page 33: ...E The LCD shows Set Label Pitch 53 mm F Press PAUSE to show Pause on LCD 4 Executing HP adjustment A Press CALIBRATE LEVEL to show Learn Gap Level B Press ENTER to execute HP level adjustment G The LC...

Page 34: ...execute the test print Press PAUSE to stop or restart the test print To exit press ENTER and DENSITY POSITION together to reset or turn off the power Test print pattern 1 Example Test print pattern 2...

Page 35: ...SITY POSITION and ENTER together 4 Resting Count Dictation It is the function to reset 00000 Count Dictation This function is valid only when Total in Count Dictation is selected Operation From Pause...

Page 36: ...7 Label positioning This is the function to adjust the label position to print starting position Operation A Turn on power switch while pressing C Ready will be shown on LCD as completing...

Page 37: ...icator Print Method Transfer Transfer Transfer Transfer Direct Thermal Label type Die cut Die cut Die cut Die cut Continuous Measure Label Every Manual Manual Manual Manual PGM Set Label Pitch 003 0 t...

Page 38: ...ing print density 1 Changing print density Turn power on and show Ready on LCD 1 2 3 Please use following button to change values The range is from 15 to 15 Press once to increase 1 Press once to decr...

Page 39: ...followng buttons for changing values The range is from 30 to 30 Range of 3 mm Press once to increase 1 Press once to decrease 1 5 Press once to fix value 6 7 This completes the process of changing Pr...

Page 40: ...The operation stays same however Turn on power to show Ready on LCD 1 2 3 4 5 Please use following buttons for changing values The range is from 30 to 30 Range of 3 mm Press once to increase 1 Press...

Page 41: ...D 1 2 3 Please use following buttons for changing value Range differes depends on printer type Press to select lower speed Press to select higher speed 4 Press once to fix the value 5 6 This completes...

Page 42: ...here are three DIP switch on main board They are named as DS1 DS2 and DS3 DS1 and DS2 are for internal setting of the printer therefore must not be changed 1 Explanation of function for DS3 Switch fun...

Page 43: ...nded paper form byAutonics 5 Thermal ribbon Recommended thermal ribbon byAutonics 6 Environment Operating An ambient temperature of 5 to 40 Maximum relative humidity of below 85 RH No condensation Sto...

Page 44: ...5 5 5 5 2 Outer dimensions 2 Outer dimensions 2 Outer dimensions 2 Outer dimensions...

Page 45: ...of thermal elements 2592 dots in one line Dot density 11 8 dots 1 mm in width and feeding direction 2 Arrangement of Heater elements 84 7 m 84 7 m 5 5 5 5 3 3 3 3 3 Printable c 3 Printable c 3 Printa...

Page 46: ...4 Font size 4 Font size a 16 x 16 dots Font number 1 Upper case letters Descendant letters shows the origin point 14 dot 16 dot 1 dot 9 dot 16 dot b 16 x 24 dots Font number 2 Upper case letters Desc...

Page 47: ...C 48 x 60 dot Font number 3 Upper case letters shows the origin point 51 dot 3 dot 34 dot Descendant letters shows the origin point 60 dot 48 dot...

Page 48: ...r case letters shows the original point 32 dot 4 dot 23 dot Descendant letter shows the original point 40 dot 32 dot e 24 x 36 dot Font number 5 Upper case letter Descendant shows the original point 2...

Page 49: ...12 dot h 8 x8 dot Font number 8 Upper case letter Descendant letter shows the origin point 7 dot 8 dot 7 dot 8 dot i Kanji JIS first standard characters and special characters JIS second standard cha...

Page 50: ...6 times 5 5 5 5 3 3 3 3 5 Available barcode 5 Available barcode 5 Available barcode 5 Available barcode a CODE 39 b NW7 CODABAR c JAN 13 8 d JAN 13 8 with human readable e EAN 13 8 g 2 of 5 Interleave...

Page 51: ...5 5 3 3 3 3 9 Data interface 9 Data interface 9 Data interface 9 Data interface 1 RE232C interface Compliance a Data transfer speed bps 4800 9600 19200 38400 57600 115200 b Data configuration Data 7 b...

Page 52: ...inting with back feeding the label to print from top position The difference from Strip mode is that printer does not accept next data until tearing print label off 4 Peel off mode The label is automa...

Page 53: ...k feeding 2 Back feeding In general about 10 to 25 mm unprintable area occurs between the print head element and the tear off position To eliminate the loss printer has back feed function The back fee...

Page 54: ...This is a sensor to detect ribbon break and empty 3 Head latch sensor This is a sensor to detect head closed 4 Label sensor This is a sensor to detect existence of paper label in Peel off or Tear off...

Page 55: ...by turning off the power switch as there is not back up by battery It is necessary to implement the data to internal ROM to save the data Please refer 4 1 6 Implementing external character for the de...

Page 56: ...G Signal ground 6 ER Data terminal ready Out 7 CS Send ready In 8 RS Send request Out 9 NC Connection to Host computer 25 to 9 pins connection cable Computer side 25 pins Printer side 9 pin GND Shield...

Page 57: ...r cannot receive data from computer during printing When RS line of the printer is off the printer cannot receive data 3 Sending the status to computer 1 When required by host computer Do not make a s...

Page 58: ...e OFF the status cannot be transferred correctly Check the following two lines from printer to host computer 1 RS line of the computer is at the ON state CS of the printer is ON 2 ER line of the compu...

Page 59: ...1 22 23 24 25 26 27 D0 D1 D2 D3 DATA 0V D4 D5 D6 D7 10 Output ACK Negative logic 28 ACK 0V 11 Output BUSY Positive logic 29 BUSY 0V 12 Output Paper empty Positive logic 30 Paper empty 0V 13 Output Sel...

Page 60: ...aper with high surface smoothness 3 Paper thickness 0 065 to 0 27 mm Includes backing paper In case of selecting thick paper select the one as soft as possible 5 5 5 5 8 8 8 8 2 Paper size 2 Paper siz...

Page 61: ...aper Maximum diameter 75mm 220 mm MAX 228 mm 4 Fan fold paper size Fan fold stocker is an option 5 Paper size and print area A Label pitch B Actual label length C Actual printable area Feed direction...

Page 62: ...er any ribbons except our genuine ribbons 1 Ribbon thickness 6 m 4 5 m 2 Base material Polyester film 3 Ink color Black 4 Ink Wax Resin and mixture of Wax and Resin 5 Length 300 m 330 m 450 m 6 Width...

Page 63: ...ty B Paper empty C Paper jam D Cutter error E Over heat F Level error G Communication errors 6 1 2 Framing error A Parity error B Over Run error C Buffer Full error D Analysis errors 6 1 3 Syntax erro...

Page 64: ...en Close print mechanism OFF ON E01 Head open Press PAUSE button down OFF OFF PAUSE Press PAUSE button down Positioning the paper and stat printing OFF OFF READY B Ribbon empty B Ribbon empty B Ribbon...

Page 65: ...paper and start printing OFF OFF READY 5 Please try HP adjustment in case of Paper empty error occurrence D Paper jam D Paper jam D Paper jam D Paper jam 1 Check timing At the time of feeding 2 How t...

Page 66: ...g When print starts 2 How to check a By detecting head temperature by thermistor 3 Cause of the error a Temperature of print head gets to high b Defection of thermistor 4 How to recover LCD How to rec...

Page 67: ...r 4 How to recover LCD How to recover Beep sound ERROR LED status Upper Lower Error detection ON ON E15 Level Error Press any button down OFF ON E15 Level Error Open print mechanism and check the pape...

Page 68: ...on condition again by front panel OFF OFF READY Power switch on again OFF OFF READY Note The date will be lost after turn off the power switch B Parity error B Parity error B Parity error B Parity err...

Page 69: ...The data will be lost after turn off the power switch D Buffer Full D Buffer Full D Buffer Full D Buffer Full 1 Check timing When receiving data from host computer at Ready position 2 How to check By...

Page 70: ...F OFF READY Note represents error command Reset by power switch The data will be lost after turn power switch off B Parameter error B Parameter error B Parameter error B Parameter error 1 Check timing...

Page 71: ...PAUSE will display the contents of error c Turn off the power and check utilities d The print mode will be changed to Standard after showing Print mode Cut off on LCD e The interface will be changed...

Page 72: ...or parity error during internal processing of data 3 Cause of the error LAN setting does not match to host computer 4 How to recover LCD How to recover Beep sound ERROR LED status Upper Lower Error d...

Page 73: ...each part such as element during the clean up Try test print after the clean up to see if it prints completely 7 7 7 7 1 1 1 1 2 Cleaning and routine check on platen roller 2 Cleaning and routine chec...

Page 74: ...print head 1 Do not force to rotate the platen roller without ribbon and paper installed on print mechanism closed 2 Clean the print head once a day at the time of label replacement or at the time of...

Page 75: ...properly previous to the shipment therefore it is not necessary to be re adjusted in usually Sensors in the Printing Head Mechanism Head Latch Sensor Label Sensor light receiving Ribbon Sensor HP Hom...

Page 76: ...TPG1 GND by volt meter Turn VR2 to counter clockwise from far right and stop at 0 9V 3 Turn VR4 to counter clockwise from far right and stop when LED4 turns on 4 Load ribbon to the printer and measure...

Reviews: