background image


15 


User Guide 

Sound mode

Includes Standard, Music, Movie, Sports and User. Only User mode supports to set treble 

and bass. 


Surround Sound

Includes Off, Surround and SRS Trusurround XT. 

EQ

To adjust the sound balance.


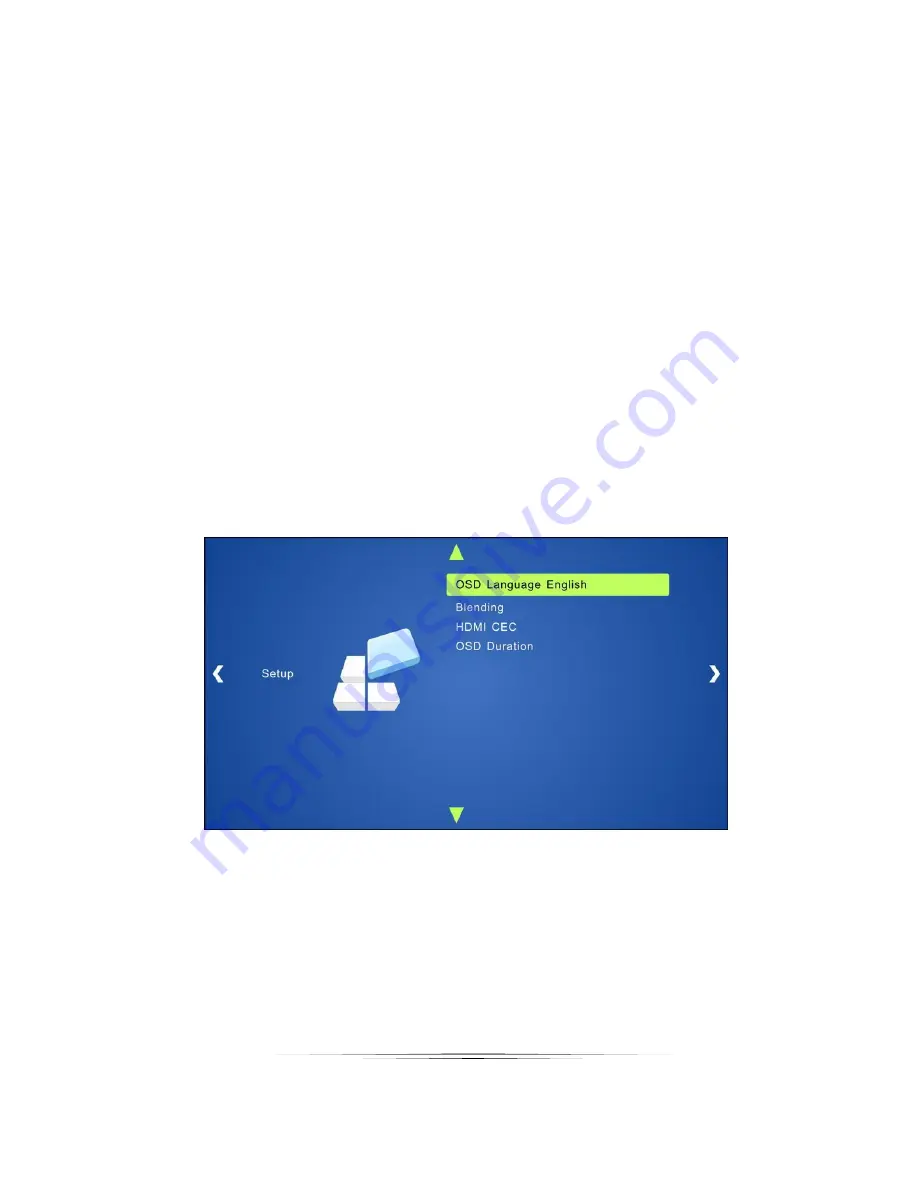
Setup: 

Including OSD Language, Blending, HDMI CEC and OSD Duration. 

Please check the picture below: 


OSD Language

Supports 14 languages, including English (default), Chinese etc. 


Blending

Includes Low, Middle, High and Off. Use ENTER button to select. 

Summary of Contents for DXP-62

Page 1: ...i USERS GUIDE Manual Number 160903 DXP 62 Digital Xtreme Scaler Switcher...

Page 2: ...for a long period disconnect it from the power source Also follow these precautions Ventilation Do not block the ventilation slots if applicable on the product or place any heavy object on top of it...

Page 3: ...kmark not defined System Diagram 5 Connection Procedure 5 Connection of Microphone 6 Application 8 OPERATION 9 Buttons 9 Resolution Switching 9 Software Updating 11 Volume 11 OSD Menu 11 OSD Menu Oper...

Page 4: ...tems are missing or damaged 1 x DXP 62 2 x Mounting Ears separate from the DXP 62 1 x Power Cable DC 12V 1 x RS232 Cable 2 x VGA converting cables male VGA to female YPbPr length 400 mm 7 x Captive sc...

Page 5: ...232 control to the far end display device If an amplifier screen control web control and ceiling tile speakers are required the DXE AT RX3C A with SKR 22T can be selected to create a complete end to e...

Page 6: ...1 and VGA2 The LCD screen will show the name of selected source 4 Enter Used to confirm selection when in menu 5 Menu Used as menu button press it to enter in OSD menu 6 Vol Used as volume down button...

Page 7: ...inside to update the system firmware 6 RS232 Serial control port 3p captive screw connector connects with a control device such as a computer to control the DXP 62 or other device connected with the...

Page 8: ...nect HDMI source devices e g Blue ray DVD to HDMI input ports of the DXP 62 with HDMI cable Connect VGA source device e g PC to VGA input ports of the DXP 62 with VGA cable 2 Connect the corresponding...

Page 9: ...ects with an IR receiver the IR transmitter must connect to IR OUT of the receiver The IR signal can be transmitted bi directionally between the DXP 62 and the receiver 8 Select MIC level and connect...

Page 10: ...and connect to ground and connects to signal 2 Balanced connection connects to positive connects to negative and connects to ground LINE input When switch to LINE It has a low frequency characteristi...

Page 11: ...while the HDBaseT CAT is connected to the RJ 45 jack on the back of the cart or podium A standard CAT 5e cable will connect the cart or podium to the wall plate which will pass the signal to the proje...

Page 12: ...tion If need to choose the resolution of local HDMI display device Cut off the power of DXP 62 and break the connection between DXP 62 and DXE CAT RX1 Turn on the power of DXP 62 Gets the resolution o...

Page 13: ...cted to be available to outputs Note Auto switching function works only when input with new signal remove a signal or power rebooting With any VGA port set to AV or YPbPr the system will be not able t...

Page 14: ...the USB memory stick to the DXP 62 USB port 3 Press the button MENU for 7 seconds or more to update the software automatically Or press this button for 6 seconds until it comes out an update OSD and...

Page 15: ...ct width and height Input5 Select Select video source format for VGA input includes AV 1 C video signal VGA 1 VGA signal and YPbPr 1 Component video signal Use ENTER button to select the desired sourc...

Page 16: ...HDMI3 Audio Select Switch between Embedded and Line to choose the desired audio output port for HDMI3 HDMI4 Audio Select Switch between Embedded and Line to choose the desired audio output port for H...

Page 17: ...Ratio Includes Native 4 3 16 9 Zoom1 Zoom2 Just Scan Panorama and Point To Point VGA format only supports 4 3 16 9 and Point to Point Noise Reduction not for VGA format Includes Off Low Middle High a...

Page 18: ...und Sound Includes Off Surround and SRS Trusurround XT EQ To adjust the sound balance Setup Including OSD Language Blending HDMI CEC and OSD Duration Please check the picture below OSD Language Suppor...

Page 19: ...DXP 62 and HDMI source device via the IR remote of the DXP 62 Serial commands for CEC function CEC1 cr enable CEC and CEC0 cr disable CEC The working status related to CEC and STANDBY is showed as bel...

Page 20: ...HDMI 1 IN02 cr Switch to HDMI 2 input IN02 cr Switch to HDMI 2 IN03 cr Switch to HDMI 3 input IN03 cr Switch to HDMI 3 IN04 cr Switch to HDMI 4 input IN04 cr Switch to HDMI 4 IN05 cr Switch to VGA 1...

Page 21: ...MP1 cr Enable Mic precedence EMP1 cr Mic precedence enable EMP0 cr Disable Mic precedence EMP0 cr Mic precedence disable EMPS CR Check Mic precedence status EMPS x CR x 1 2 1 enable 2 disable Mic prec...

Page 22: ...buttons LCK0 cr Front Panel Unlock BTxx cr Set the brightness to xx BTxx cr xx 00 99 Brightness xx xx 00 99 CNxx cr Set the contrast to xx CNxx cr xx 00 99 Contrast xx xx 00 99 STxx cr Set the saturat...

Page 23: ...0 cr Not display mute icon of LINE audio ILM0 cr LINE Mute Icon disable ILM1 cr Display mute icon of LINE audio ILM1 cr LINE Mute Icon enable IMM0 cr Not display mute icon of MIC audio IMM0 cr MIC Mut...

Page 24: ...EDID data from output to input EDBY cr EDID bypass EDCS cr Upload custom EDID data to the switcher EDCS cr EDID user EDID cr Inquire EDID status EDID x cr x 1 2 3 1 initial 2 bypass 3 user EDID initi...

Page 25: ...xx xx 1920 1200 1920 1080 1600 1200 1360 768 1280 800 1280 720 1024 768 IM cr Check the image mode IM x cr x 1 4 1 dynamic 2 standard 3 mild 4 user Picture Mode xx xx Dynamic Standard Mild User AM cr...

Page 26: ...ock 2 front panel unlock Front Panel Lock UnLock STAT cr Display statues including MIC LINE audio Resolution Output Audio on off Manual Auto switching modes STAT0 xx yy ii r a s cr xx Line volume 00 9...

Page 27: ...usly HMB1 cr HDMI HDBT output on CEC Commands CEC0 cr Disable CEC CEC0 cr HDMI CEC OFF CEC1 cr Enable CEC CEC1 cr HDMI CEC ON CECP cr Play pause CECP cr CEC cmd play pause CECS cr Stop CECS cr CEC cmd...

Page 28: ...sa 2 Screen output adjusting avails only when the screen output adjusting is on 3 CEC commands with grey background avails only when CEC is on 4 MIC precedence In Mute mode if the MIC noise detecting...

Page 29: ...t INPUT 5 or INPUT 6 with corresponding source device At last please switch to INPUT5 or INPUT 6 again Connect with Component Video YPbPr Source Operation Examples 1 Via front panel buttons OSD Press...

Page 30: ...ont panel to enter in OSD and then enter in OPTION setting menu set INPUT 5 Select to AV1 and INPUT 6 Select to AV2 After setting press SOURCE AUTO button on front panel to switch to AV1 or AV2 source...

Page 31: ...ables a Incorrect grounding please correct before the DXP 62 is damaged 6 Control through RS232 commands but no control from front panel buttons a Front panel buttons are locked Use RS232 command LCK0...

Page 32: ...put Ports 1 IR Frequency Range 20KHz 60KHz HDBaseT Connector RJ 45 WE SS 8P8C RS 232 Connector Euro Style 3 81mm IR Connector 3 5mm TRS HDMI Connector Type A 19 pin Power Connector IEC Male Mechanical...

Page 33: ...30 User Guide...

Page 34: ...r similar This can affect distance and overall performance Below is a list of cables that have been officially tested with our products by the manufacturer of the cable West Penn Wire CAT 6 Shielded H...

Page 35: ...en repaired and or altered by other than manufacturer or authorized service center or D The product s original serial number has been modified or removed or E External equipment other than supplied by...

Page 36: ...t warranty extends to the original purchaser only and will be null and void upon any assignment or Aurora Multimedia Corp 205 Commercial Court Morganville NJ 07751 Phone 732 591 5800 Fax 732 591 6801...

Reviews: