


52
Secondary Mode Information
Secondary Mode:
Once set up in the App, to access this mode, PRESS and HOLD the Dimmer knob for 1 second (the
red LED will light up momentarily). You can now adjust the feature by twisting the knob CLOCKWISE
or ANTI-CLOCKWISE.
To return to Dimmer mode, PRESS and HOLD again for 1 second. Alternatively, the Dimmer will
automatically return to Dimmer mode after 15 seconds of inactivity.
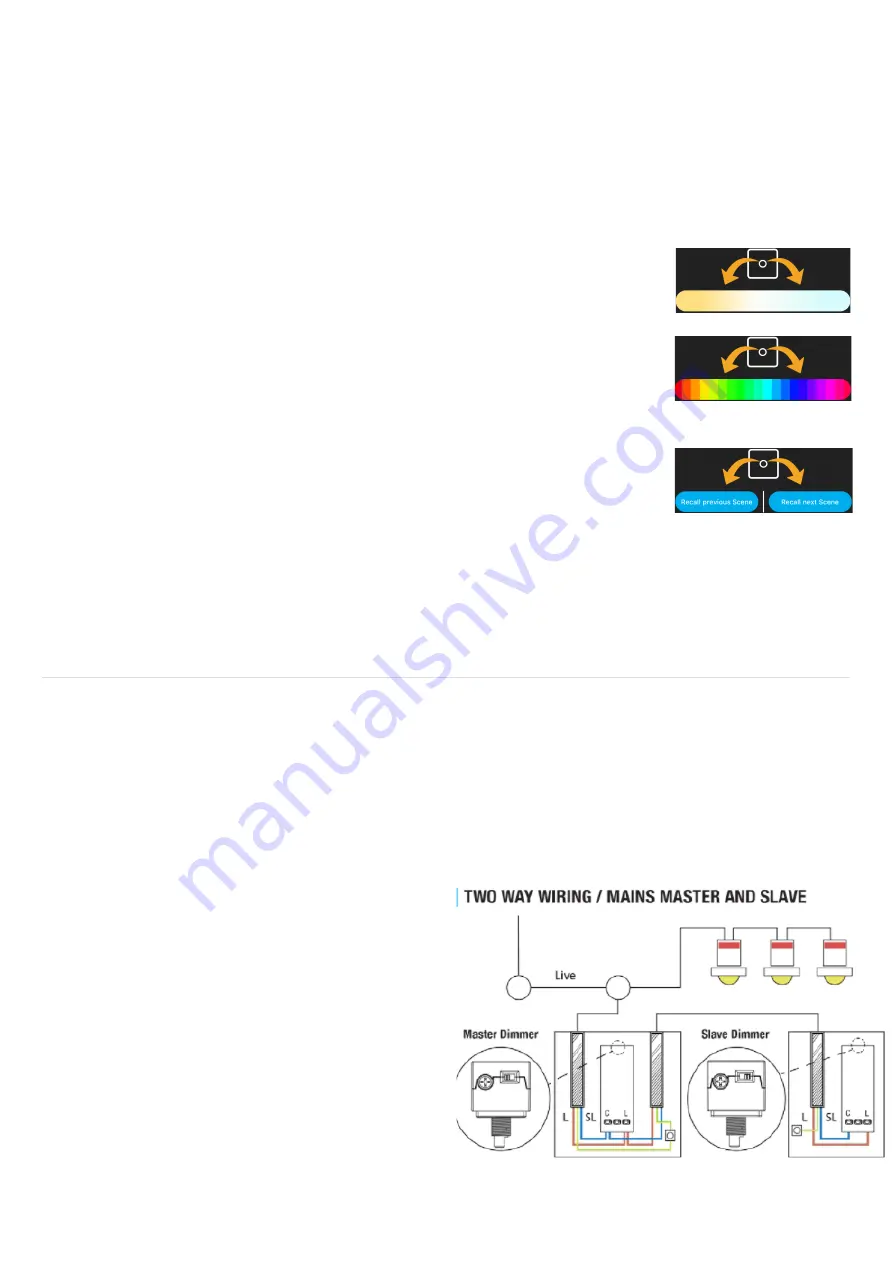
Colour Tuning Mode:
In Colour Tuning mode, rotating the Dimmer clockwise will cool the colour
temperature and anti-clockwise will warm the colour temperature.
Colour Mode:
Once in RGB mode you can select one of 20 preset colours by rotating the
dimmer clockwise and anti-clockwise.
Scene Cycling Mode:
In Scene cycling mode, turning the knob clockwise will recall the next Scene
available for the associated Space, and turning anti-clockwise will recall the
previous Scene.
Battery Life Notification
When the batteries in your dimmer are reaching the end of their life the LED will flash once every 10
minutes.
How to configure 2-Way Dimming (Slave Mode) for the Rotary Dimmer
1. Ensure the Master Dimmer is paired and working
2. Ensure the Slave Dimmer has been wired correctly as per the below instructions and set to
Slave mode using the Dipswitch on the module itself before it’s powered on
3. Go to Set up Devices
4. Tap the Aurora Wall Dimmer (control) you want to set up under the Switches category
5. Select the Master Dimmer(inline) you want to pair the Slave Dimmer to and then press Save
6. Press Save once you are happy with your Rotary Dimmer settings to go back to the All Devices
page
2-Way lighting circuits have two switches
controlling the same lights from two different
locations. This is commonly used at the top and
bottom of staircases or at the entry and exit doors
to a room.
For 2-way switching applications BOTH existing
switches/dimmers must be replaced with Aurora
Zigbee Smart Rotary Dimmers.
Remove one of the existing switches, taking note
of the wiring.
Ensure that the Live (Brown or Red) wire is inserted into the terminal marked L and the Switched Live
(Blue or Black, to your lights) is inserted into the C terminal.


