background image

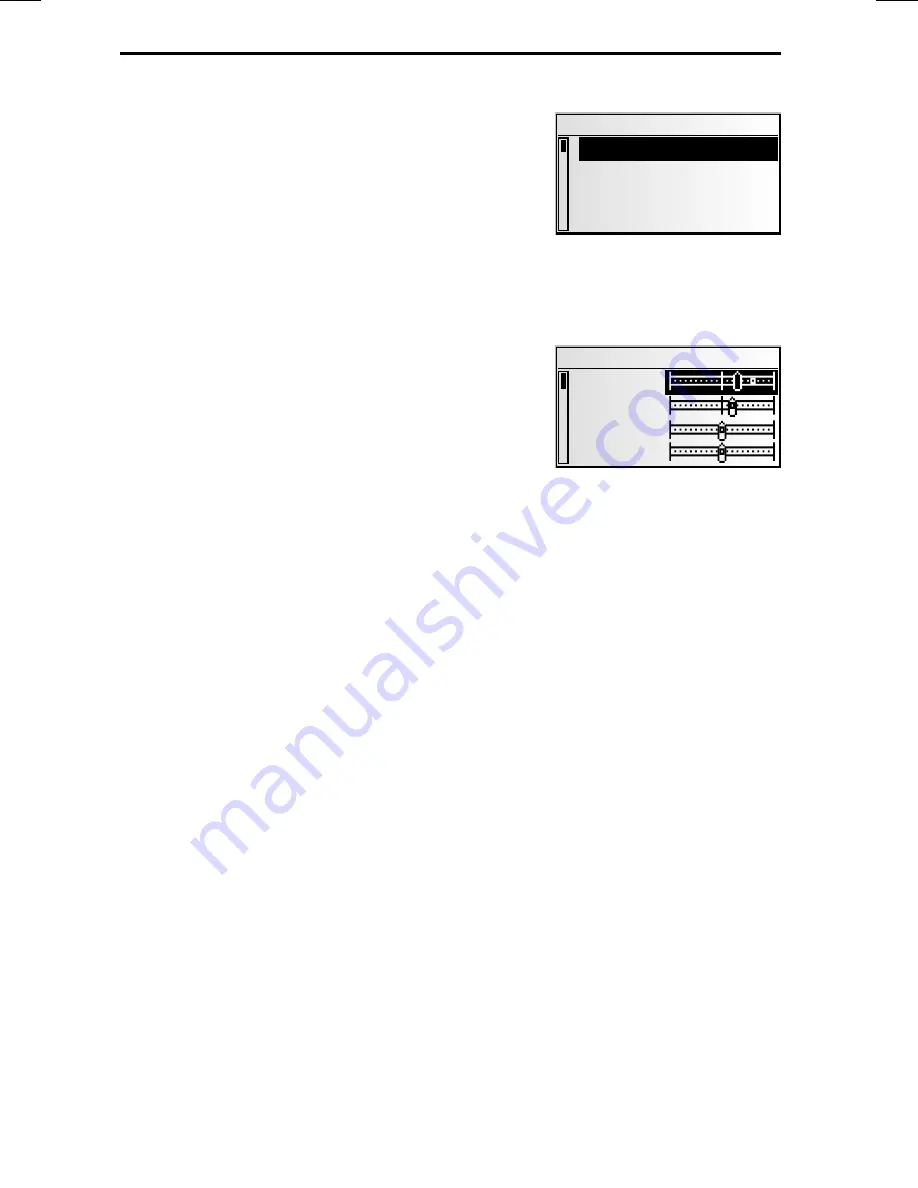
The “SOUND” menu

In the “

SOUND

” menu, you can set your navigation

radio’s sound and several other sound reproduction
parameters to your own preferences.
The sound settings for bass and treble/tone are valid
for the currently active sound source (radio, CD or
CDC).

Press

SOUND

.

:

The “

SOUND

” menu is displayed.

The following options are available:

Sound settings

Select the desired option by turning the right ro-
tary control.

Press the right rotary control in order to activate
the setting.

Move the slide control to the desired setting by
turning the right rotary control.

Press the right rotary control in order to store the
setting.

Bass

:

Setting the bass (low tones).

Treble

: Setting the treble (high tones).

Bal

:

Setting of volume balance left <–> right.

Fader

:

Setting the volume distribution rear  <–> front.
Slide control left: rear
Slide control right: front

Sound settings cannot be performed for navigation information, traffic announce-
ments and telephone operation.

Loudness

Activate this function to increase low and high tones at low volume settings.

Selecting one of the pre-set sound styles deactivates the loudness function.

Sound Style

Select one of the pre-set sound styles.

Select “

User

” to retain your own bass and treble settings.

For each sound source, the sound style is stored separately.

SDVC (speed-dependent volume control)

To compensate for environmental noise, the volume for audible information increases
as a function of the speed.

Choose a setting for the speed-dependent increase of the volume.

Select

OFF

to deactivate the function or select

1

to

5

to choose the desired volume

increase. 1 is the lowest, 5 the highest volume increase.

20

SOUND SETTINGS

SOUND

Sound Settings

Loudness

Sound Style

SDVC: 2

SOUND SETTINGS

Bass

Treble

Balance

Fader

Summary of Contents for MS4150RS

Page 1: ...AM FM CD CD ROM Navigation Radio Model MS4150RS Owner s and Installation Guide ...

Page 2: ......

Page 3: ...Notes on audio CDs 12 Notes on map CDs 12 Handling CDs 12 OPERATION 13 Control elements 13 Displays 14 Inserting a CD 15 Removing a CD 15 Switching on off 15 Volume 15 Menu operation 16 Entering letters 17 INFORMATION MENU 18 The INFORMATION menu 18 SOUND SETTINGS 20 The SOUND menu 20 RADIO 22 Radio 22 The RADIO menu 23 CD PLAYER 25 CD player 25 The CD menu 26 CD CHANGER 27 CD changer accessories ...

Page 4: ...menu 34 Destination input 35 Destination input menu 35 Points of interest POIs 38 Via point input 40 Guidance 42 Audible messages 43 Information during guidance 46 Alternative route 48 Address manager 49 Emergency menu 51 System settings 52 Loading software updates 55 TROUBLESHOOTING 56 SPECIFICATIONS 58 CONTENTS ...

Page 5: ... to follow these directions Always use good judgment and common sense A Obey all traffic signs and laws while driving A The applicable traffic laws and the prevailing traffic situation always take precedence over the instructions issued by the Navigation Radio if they should contradict one another A Only use the Navigation Radio when it is safe to do so It is more important to keep your eyes on th...

Page 6: ...ase CD contains all available emergency services in your neighborhood Use your own judgment and abilities to ask for directions in such a situation A The Navigation Radio does not take into account the relative safety of the suggested routes The suggested routes do not reflect road closures or construction weight or height restrictions traffic or weather conditions or any other factors which may a...

Page 7: ...dealer for special cables for a problem free installation Connection in vehicles without standard ISO connectors If no adapter cables are available for your vehicle connect the navigation radio as described in Electrical connections Taking safety precautions Fig 1 A Before starting work disconnect the earth cable from the negative terminal of the ve hicle battery in order to prevent short circuits...

Page 8: ...act your vehicle dealer or our hotline A Never collect the speedometer signal from the ABS control Reversing signal A2 Connect green lead A2 to a suitable point of the reversing signal lead positive lead of reversing lamp Telephone mute function A3 optional Connect purple lead A3 to the mute function output of the car phone or the hands free unit When the telephone is in use the radio is muted or ...

Page 9: ...llow connector C1 line out An amplifier with additional loudspeakers can be connected to the unit via this connector Connect the FRONT lead to the front left white and front right red channel of the amplifier Connect the REAR lead to the rear left white and rear right red channel of the amplifier Connect the blue yellow lead to the remote control REMOTE of the amplifier Green connector C2 Telephon...

Page 10: ...racket into the DIN slot and bend the appropriate metal tabs inwards using a screwdriver Take care not to damage any hidden parts in the dashboard Mounting the radio Fig 11 1 Connect the GPS antenna connector to the GPS antenna socket on the back of the unit 2 Insert antenna plug E into antenna socket If necessary use a suitable antenna adapter Use hook J on the back of the unit for secure attachm...

Page 11: ... to between 10 and 30 degrees The system does not differentiate between negative and positive angles Thus even for a mounting angle of e g 10 degrees set a value of 10 in the menu Loudspeaker test To check the correct connection of the loudspeakers the function Loudspeaker Test in the INITIALIZATION menu can be performed page 2 9 Setting the clock and the time zone To ensure that the correct time ...

Page 12: ...t enabling the contents of the C IQ However no directional information will be provided The current vehicle location can then be checked in the emergency menu see operating instructions page 51 Hotline Technical support is available to handle queries about ADIOVOX navigation systems Up to date telephone number can be found in the WARRANTY located in the back of this manual Subject to technical mod...

Page 13: ...e GPS Global Positioning System satellites The position can be calculated within a range of approx 10 m by comparing the sensor signals with the digital map on the navigation CD Important notes on the function of your navigation radio In principle the system is functional with poor GPS reception although the accuracy of the positioning may be impaired by poor or interrupted GPS reception or errors...

Page 14: ...s the distance to the center of the junction This is why the distances indicated on main road signs may not agree with those of the navigation system The road signs indicate the distance to the beginning of the exit Areas with limited road information In some areas not all of the information on a road is available on the map CD Thus for example turn off prohibitions information on the direction of...

Page 15: ...code can be activated deactivated and changed For further information see INITIALIZATION option Security Code page 30 Anti theft protection LED When the navigation radio is switched off and the and the ignition key removed the red anti theft protection LED above the POWER VOLUME knob flashes The anti theft LED is linked to the security code It will not flash if the security code has been deactivat...

Page 16: ...CDs with or without adapter and of CDs with irregular shapes is not recommended Notes on map CDs The navigation system is based on a C IQ database which is stored on a CD in encrypted format The CD contains map data for navigation as well as travel and traffic information TMC for dynamic route planning You can customize your navigation package by activating specific components of the database TMC ...

Page 17: ...n in the menus For radio CD and CD changer Search and scan functions 8 CLEAR Deletes the last entry Returns to the next higher menu level 9 ALT R Planning an alternative route in navigation mode page 48 0 NAV Opens the navigation menu page 34 q Play back current direction and if available the current TMC message pages 43 w Display e CD C Switch to CD player page 26 CD changer only with connected C...

Page 18: ...ashes route is being planned Do not remove map CD TA TMC Traffic Announcements TMC see INFORMATION menu Selected search mode JIMMY HENDRIX Rnd 3 29 pm T02 Selected search mode Rnd Rpt Random playback Repeat track Time Elapsed track time 03 52 Track number CD title if entered With CD Text available Artist 1 44 pm T10 04 17 4 ELVIS Track number Selected search mode or display for random playback mod...

Page 19: ...ble Turn the POWER VOLUME knob to set the volume Setting the volume of the navigation messages The volume of navigation messages can be modified while a message is playing by turning the POWER VOLUME knob Press the button to hear a navigation message and set the NAV volume Setting the volume of traffic announcements The volume of traffic announcements can be set in the INFORMATION menu page 18 MUT...

Page 20: ...nd the cursor Move the cursor to a menu entry at the top or bottom of the screen by turning the right rotary control Turn the right rotary control further in the same direction The screen automatically displays the next menu items In all menus except the main control the menu title changes to the Return option when you move the cursor to the top of the screen Confirm Return by pressing the right r...

Page 21: ...tems End of destination input and automatic start of guidance Accept the data entries and go to the next input step o Accept the data entries e g when entering a CD title Depending on information already entered one or more options may not be selectable gray Intelligent keyboard When you enter names of cities and roads or points of interest the system compares the character string already entered ...

Page 22: ...raffic announcements TA See also Behavior of TMC and TA on the following page If the radio has not been set to a station with TA you will hear a warning tone and the radio will automatically search for a station transmitting traffic announcements News NEWS Activate this function if you wish to listen to news e g even when a CD is playing or when the unit is set to mute Using the RDS EON function t...

Page 23: ...in the INFORMATION menu TA Scan ON TMC Scan ON Both ON Both OFF No TA No TMC u No display No TA TMC y t t t TA No TMC x u u x TA TMC x t t t In this case the unit will immediately start searching for the next strongest TA station signal Traffic announcements from other stations EON With the RDS function EON Enhanced Other Networks you will hear traffic announcements even if the set station does no...

Page 24: ...ution rear front Slide control left rear Slide control right front Sound settings cannot be performed for navigation information traffic announce ments and telephone operation Loudness Activate this function to increase low and high tones at low volume settings Selecting one of the pre set sound styles deactivates the loudness function Sound Style Select one of the pre set sound styles Select User...

Page 25: ...ction to equalize volume differences between the various sound sources Loud Low Set the enhancement of low tones at loudness Loud High Set the enhancement of high tones at loudness Bass Freq Select the transitional frequency for the low tones Treb Freq Select the transitional frequency for the high tones Initialisation See INITIALIZATION page 29 21 SOUND SETTINGS ...

Page 26: ...e received If TMC Scan is activated the radio will search only for stations from which traffic information can be received Scanning receivable stations SCAN Press the right rotary control in order to briefly play all the receivable stations in the currently selected waveband Press the control again in order to stop the scanning process The playing time for the scanning process can be adjusted See ...

Page 27: ...able RDS Memo only on FM Searches for all currently available RDS stations and stores them in alphabetic order in the station list Activate this function to refresh the RDS Memo Refreshing the RDS Memo may require up to 30 seconds Autostore Activate this function to automatically store up to 6 FM AM stations with strong sig nals on the FM AST or AM AST waveband Station list only on FM Select a sta...

Page 28: ...ll countries Radio Setup Set one of the following functions Search Level Setting the search level Select LO if you want automatic waveband tuning to only search for local stations strong signals Select DX to also search for distant stations Tuner Grid Select EUR or USA depending on which continent you are currently in A If you change the tuner grid all station memories and the stations in RDS Memo...

Page 29: ...fter the first 10 seconds of a track the CD player jumps to the beginning of the current track Scanning tracks SCAN Press the right rotary control to briefly play all tracks on the inserted CD Press the control again in order to stop the scanning process again The playing time for the scanning process can be adjusted See INITIALIZATION page 30 Manual search forwards backwards Activate the manual s...

Page 30: ... is used CD Title Assign a name with up to 13 characters to the CD currently playing The CD will be recognized automatically upon insertion and the CD player will display the CD title If your CDs have CD text you can also overwrite the CD title displayed Up to 50 CD titles can be stored automatically in the title memory Once the memory is full you will have to first select a title to be deleted be...

Page 31: ... the right or left in order to select the next or the previous track If the right rotary control is turned one detent position counter clockwise after the first 10 seconds of a track the CD player jumps to the beginning of the current track Scanning for a track SCAN Press the right rotary control to briefly play all tracks on the current CD Press the control again in order to stop the scanning pro...

Page 32: ...e Assign a name with up to 13 characters to the CD currently playing The CD will be recognized automatically by the CD changer and the CD changer will display the CD title If your CDs have CD text you can also overwrite the CD title displayed Up to 50 CD titles can be stored automatically in the title memory Once the memory is full you will have to first select a title to be deleted before you can...

Page 33: ... unit s telephone input to the muting signal of your car phone LOW Muting signal active low Radio switches to mute at 0 V HIGH Muting signal active high Radio switches to mute at 12 V Tel Level Adapt the car phone s volume to the navigation radio s telephone input The volume adjustment can be set to between 30 and 30 Beep Type Select a confirmation alert sound You have the choice between 4 differe...

Page 34: ...to enter the security code Enter the first digit by turning the right rotary control Press the control to confirm Enter the next three digits as described above If you confirm an incorrect digit you can delete it by pressing CLEAR The unit will be disabled once ten incorrect codes have been entered The unit can only be reactivated by taking it to a Service department along with proof of ownership ...

Page 35: ...rvice will be happy to provide more information about the possible access options You should also read the C IQ brochure supplied with your map CD TMC and dynamic route planning are not available in the U S Registering the navigation system In order to activate C IQ products you must register your navigation system with C IQ Service Registering the system also provides you with additional anti the...

Page 36: ... and or if your sys tem software is not capable of processing the encrypted information In these cases select either OK or C IQ Service if you wish to establish contact and confirm by pressing the right rotary control It is possible to operate the system without activation Destinations can be entered Navigation information however will only be provided for activated areas and for activated service...

Page 37: ...to be informed in advance of the expiry or start of the products you have activated You can use Expiring soon and Starting soon to select whether you wish to be informed in advance and if so which products you wish to be informed about Select Return to go back to the previous menu If you wish to be informed about the expiry or start of C IQ products when the sys tem starts up you can view a list o...

Page 38: ...e 42 Traffic info This feature is not available in the U S Address manager Opens the Address manager menu The address manager enables management of frequently used addresses for destinations and via points See page 49 C IQ Use this option to manage your C IQ data See page 31 Emergency Opens the Emergency menu Here information on the current position of the car and geographic position GPS position ...

Page 39: ...nu the following choices are available New address Input country city road house number or intersection or even a point of interest Load address Loading an address stored in the address book Last destin Load one of the last 20 addresses used for guidance Info on car pos Loading a special facility in the vicinity of the current car position depending on the loaded map CD hotels restaurants petrol s...

Page 40: ... entered If you wish to change the destination country move the cursor to the country code and confirm your entry The list of countries stored on the current map CD appears Countries not currently activated appear in Select the required country from the list You can also enter destinations in countries which have not been activated You will then only receive directions until you reach the border o...

Page 41: ...mple you have entered house number 83 but only numbers up to 51 are stored on the map CD the system will automatically correct this to 51 4 th step Route selection The required criterion for route planning can be modified even after all data for the destination has been entered A detailed description of the route criteria can be found under Route selection on page 45 Once the route criteria are se...

Page 42: ... stored facilities the list will appear immediately Enter the name of the required facility or select the symbol for the list display Confirm the input using or select an entry from the list Special facilities in connection with the destination Select New address and use the input wizard to enter the required country and the name of the required destination Then select the symbol in the lower line...

Page 43: ...on input via GPS coordinates If you know the GPS coordinates of a destination you may enter them directly In the main menu select Destination input Select Long Latitude in the Destination input menu The GPS coordinates input menu appears Mark the desired coordinate using the cursor Con firm by pressing the right rotary control Next set the required values for degrees minutes seconds and north sout...

Page 44: ...he Via point input menu New address Input country city road number or intersection or special facility as via point Load address Loading an address stored in the address book as a via point Last destin Recall one of the 20 addresses last used for guidance to load as a via point Info on car pos Loading a special facility in the vicinity of the current position of the car Long Latitude Entering a de...

Page 45: ...points are targeted in the order in which they are entered For guidance to the via points the system automatically uses the route planning criterion for the final destination It is possible to enter new via points en route to the final destination at any time Once a via point has been reached destination reached it is deleted from the list of via points If you enter a new destination you will be a...

Page 46: ...load the map data 5 Road into which to turn at the next announcement 6 You are in an area with incomplete map information 7 Distance to the next change in direction 8 Option field Move the cursor to the required symbol and confirm Z Return to the main control ª To Alternative route menu page 48 U Display and select route criterion page 45 I To information screens page 46 9 Status field Display of ...

Page 47: ...ystem settings Language menu Improved acoustic guidance information In many countries speaking road signs are available for main road slip roads e g Take exit number 7 and follow the B 429 Repeating voice message Did you miss the last guidance message or didn t you fully understand it Press the button You will hear the current guidance message Did you ignore the last message If you did not follow ...

Page 48: ...each a digitized road As soon as you return to a digitized road you will receive destination guidance again Areas with limited road information In some areas not all of the information on a road is available on the map CD Thus for example turn off prohibitions information on the direction of travel in a one way street or prohibited entry into a pedestrian zone may be missing The navigation radio w...

Page 49: ...t available in the U S Fast If you prefer a fast route Short If you prefer a short route Main roads If you prefer expressways No main roads Avoids expressways In addition you can bypass toll roads when planning your route Activate the Minimize tolls option if you wish to avoid toll roads as much as possible A check mark appears in front of the option If no toll free roads are available toll roads ...

Page 50: ...on transmitting traffic information and if one or more traffic obstructions are reported on your route A list of segments for which traffic obstructions have been reported appears The list is sorted on the basis of the location of each obstruction on the route Select a report in order to access detailed information about the traffic obstruction Car position Display of current vehicle location with...

Page 51: ...an unobstructed view of the sky up to 8 satellites may be displayed 2 Current driving direction compass The arrow always points north 3 Date and time Trip computer The following information appears in the Trip computer information menu Current speed Average speed Maximum speed so far Distance traveled Time traveled Resetting values Confirm with O Confirm the deletion with Yes All trip computer val...

Page 52: ...lay saving Confirm the planned alternative route with Yes or reject it with No If you reject the alternative route the navigation system will plan a new route to the destination from the current position of the car The display shows the guidance screen again Cancel procedure Move the cursor to Quit and press the right rotary control to confirm Change distance If you wish to change the distance dis...

Page 53: ...acters as the name for the address Complete the input with o If you do not wish to enter a name select o directly The address is now stored in the selected address book Delete address Addresses that are no longer needed should be deleted from the address book to ensure sufficient space for new addresses Select Delete address in the address manager Select which address book the address should be de...

Page 54: ...sh to change the name of a destination address select the Rename address option in the address manager Select which address book the address should be edited in private business home or work Select the address to be edited from the list and enter a new name for it Confirm your entry with o The address will be stored under the new name in the address book Comments 30 entries is the guaranteed minim...

Page 55: ...geographic vehicle location as calculated by the Global Positioning System Longitude altitude and elevation above sea level provided adequate GPS reception is available will be displayed Car position Display of current vehicle location with country code city and street This option is only available if you are on a digitized road NAVIGATION 51 Emergency GPS position Car position ...

Page 56: ... rotary control Set the required speed correction To save the setting press the right rotary control again Speed limit Use this value to specify the vehicle speed at which a speed warning should be output Move the cursor to the value after Limit mph Press the right rotary control Set the required speed To save the setting press the right rotary control again Activating deactivating speed warning I...

Page 57: ...ute planning This feature is not available in the U S Language Choose one of the two languages loaded in the system or Select Other language to replace one of the two loaded languages with another language from the system software CD included Select the language to be replaced You will be prompted to insert the software CD Insert the language CD in the CD player of the radio Follow the system inst...

Page 58: ...ensor compensation This adjustment need only be made once after the installation of the radio See Setting the mounting angle page 7 Service For diagnosing hardware and software problems code protected The option Service is exclusively reserved for service work on the navigation radio performed by an authorized service company System information The System Info menu displays information about the s...

Page 59: ...tware is then loaded automatically The loading progress is indicated by a bar A On no account must the ignition or radio be switched off during the loading procedure even if no displays appear on the monitor for a while Once loading is complete you will be prompted to remove the software update CD Please confirm the completion of the loading procedure with OK The radio will then switch itself off ...

Page 60: ...ion The unit is faulty Take it to the Service department Radio Poor radio reception Check if the antenna is completely extended and correctly connected Verify that the supply power negative pole brown lead is correctly connected to earth vehicle chassis If the unit is being installed in VW and Audi vehicles you will need a power supply adapter for the antenna Use a suitable adapter e g Votex The d...

Page 61: ...exits Displayed position does not correspond to actual vehicle position Bad GPS reception for an extended period e g as a result of poor reception conditions The position is corrected automatically when adequate GPS reception returns If necessary wait a few minutes Directions do not correspond to the actual traffic conditions It is possible that the car position calculated by the navigation system...

Page 62: ... 5MHz 107 9MHz Mono Sensitivity 30dB 12dBf Quieting Sensitivity 50dB 18dBf Signal to Noise 1kHz 70dB Stereo Separation 1kHz 25dB Frequency Response 40Hz to 15kHz 3dB AM Tuner Tuning Range 530kHz 1710kHz Sensitivity 20dB 30uV Signal to Noise 1kHz 65dB Frequency Response 40Hz 2kHz 3dB EIAJ Amplifier Output PEAK Total System Power 160 watts PEAK Power Output 40 watts X 4 PEAK Speaker Impedance 4 ohms...

Page 63: ...EXTENT OF THE COMPANY S LIABILITY UNDER THIS WARRANTY IS LIMITED TO THE REPAIR OR REPLACEMENT PROVIDED ABOVE AND IN NO EVENT SHALL THE COMPANY S LIABILITY EXCEED THE PURCHASE PRICE PAID BY PURCHASER FOR THE PRODUCT This Warranty is in lieu of all other express warranties or liabilities ANY IMPLIED WARRANTIES INCLUDING ANY IMPLIED WARRANTY OF MERCHANTABILITY SHALL BE LIMITED TO THE DURATION OF THIS...

Page 64: ... 2004 Audiovox Electronics Corp 150 Marcus Blvd Hauppauge N Y 11788 128 7211 ...

Reviews: