


17
INPUT TWO
IN
2 -32 dB
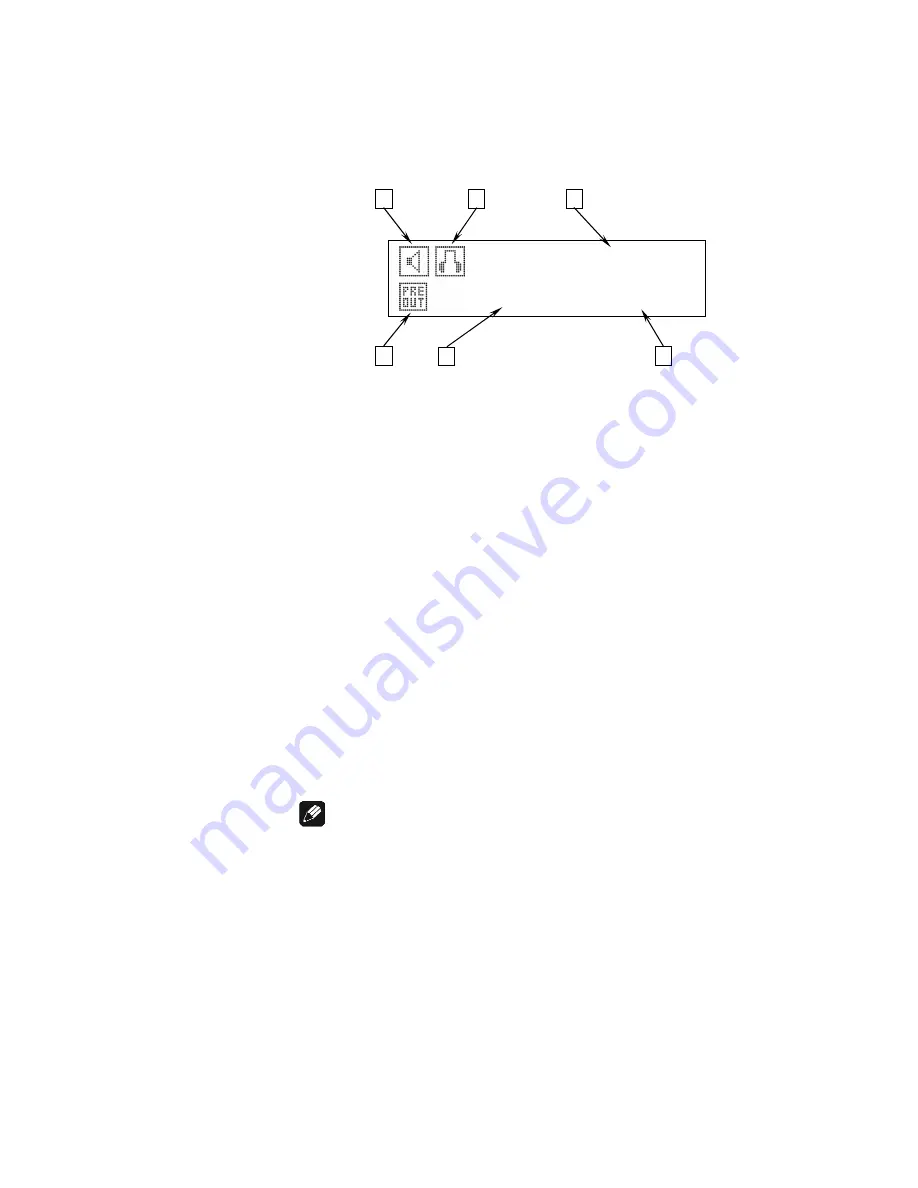
6.7 Display
The display provides in the normal operating mode the following infor-
mation:
1
Status of the loudspeaker output mode (see section '
Set Output Mode
'
on page 20).
2
Status of the headphones output mode (see section '
Set Output Mode
'
on page 20).
3
Name of the currently selected input channel, fully user-definable
(see section '
Edit Channel Name
' on page 22).
4
Status of the preamplifier output mode (see section '
Set Pre Output
Mode
' on page 21).
5
Number of currently selected input channel, corresponds to the
number printed above the input jack on the back panel (see section
'
Overview back panel
' on page 8).
6
Current volume level in dB relative to the input level (see section
'
Volume control
' on page 16).
As soon as you enter the setup menu by pushing the
set
key, the display
changes to show information related to the selected menu item. For fur-
ther display details refer to the description of each menu item in section
'
Setup menu
' starting from page 19.
Note
·
After 10 minutes without any user interaction the 'display saver' is
invoked automatically. The display then shows only the number of
the currently selected input channel and the current volume level.
6.8 Input selection
Push the
set
key on the front panel once for less than two seconds, then
select the desired input channel with the keys
up
and
down
. The 2
nd
line
of the display provides the number and the (user-definable) name of the
currently selected input channel.
1
6
4
2
3
5


