background image

®

28

n

avIgatIng


tHe

 S

etup

 m

enuS

MAESTRO M9

Speaker Types

This series of menus allows you to select the types of speakers that you will 
be using in your system. Please note that if you set all speakers to small 
then you must indicate in the menus below that a subwoofer is present in 
the system. 

“Large” 

speaker is one that is capable of reproducing a full range (20-

20 kHz) audio signal. Use this setting when 

not

 using a subwoofer.

“Small”

 speaker is one that is not designed to reproduce deep bass 

frequencies and is generally used 

with

 a subwoofer (i.e. Satellite 

speakers typically can’t play below 80 Hz). 

“Height 1, 2”

 selects the speaker types used for Dolby Atmos.

“None”

 If you do not have a speaker connected to an output (i.e. No 

Subwoofer or Back Speakers) then set that speaker size to “None”.

“Subwoofer”

 Selects whether a subwoofer is present in your system.

Crossover Frequency - 

This controls the frequency at which bass is re-

directed from speaker channels set to “Small” and sent to the Subwoofer 
outputs. This frequency is adjustable from 40 Hz to 150 Hz. 

Dolby Speaker Crossover - 

If the Height speakers are set to small, this is 

the frequency below which the bass information is redirected to the sub-
woofer.

Using Channels 6 + 7 for -

 If your main speaker system has no Surround 

Back speakers, you can use these unused balanced outputs to feed power 
amplifiers for Height 1 speakers, Zone 2 speakers, or to biamp the front left 
and right speakers.

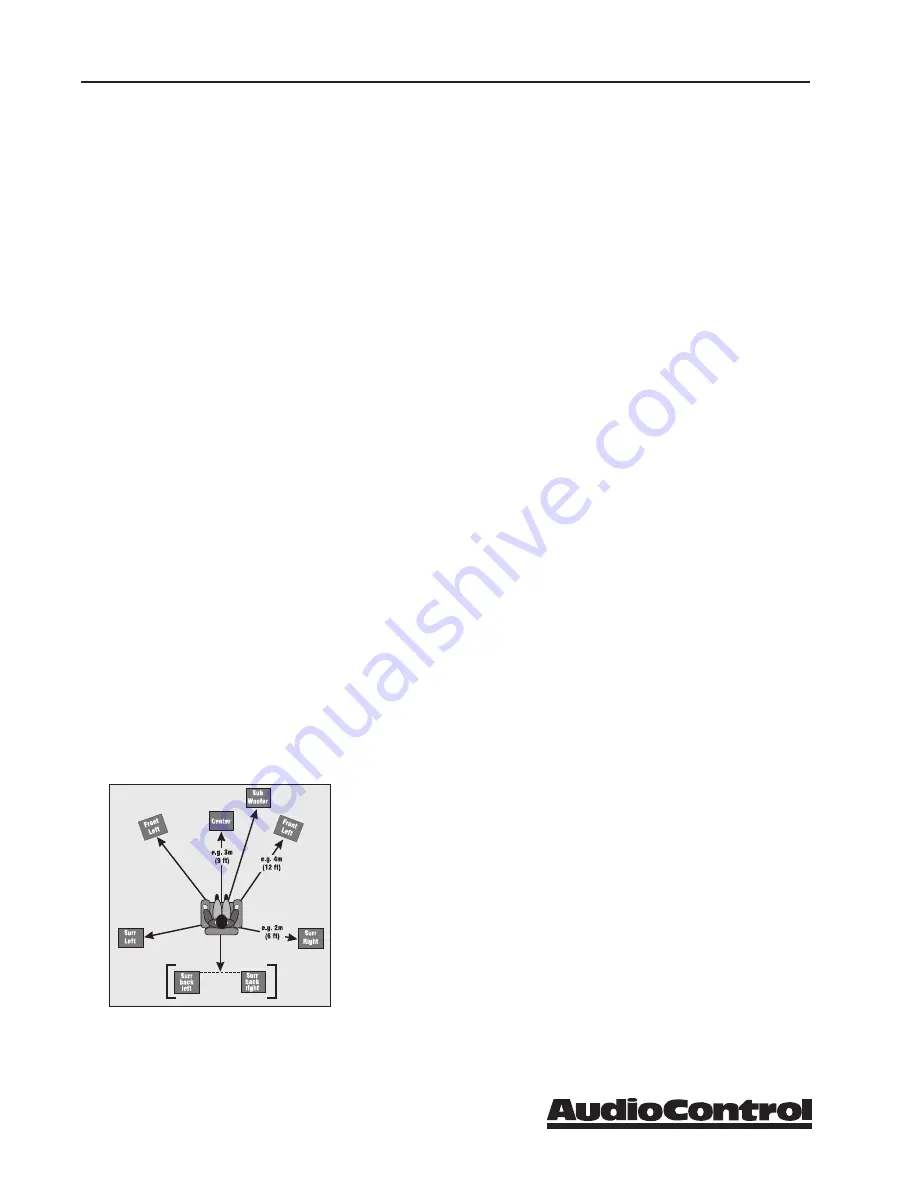
Speaker Distances

The Speaker Distance settings help the sound from each speaker 
arrive at the listening seat at the same time. This provides a 
much more believable and immersive sound environment. Ac-
curately measure the distance from the center of each speaker to 
the seated ear position of the main listening seat. Write each of 
these distances down (select Imperial or Metric) and enter them 
into the Maestro M9 using this menu. Speakers not present (as 
you entered in the Speaker Types menu) will be greyed out. If 
the Dirac application has been used, the speaker distances can 
still be entered and edited in this menu.

Summary of Contents for maestro m9

Page 1: ...nd Sound Preamplifier User Experience Manual 22410 70th Avenue West Seattle WA 98043 USA Phone 425 775 8461 Fax 425 778 3166 www audiocontrol com 2015 All Rights Reserved s y s t e m Home Theater AudioControl Making Good Sound Great ...

Page 2: ...be of sufficient magnitude to constitute a risk of electric shock to persons The exclamation point within an equilateral triangle is intended to alert the user of the presence of important operating and maintenance servicing instructions in the literature accompanying the appliance Caution to reduce the risk of electric shock do not remove the top cover There are no user serviceable parts inside R...

Page 3: ...ed without a license from NEMS and BridgeCo or an authorized subsidiary MP3 MPEG Layer 3 audio decoding technology licensed from Fraunhofer IIS and Thomson multimedia FLAC FLAC Decoder Copyright 2000 2001 2002 2003 2004 2005 2006 2007 2008 Josh Coalson Redistribution and use in source and binary forms with or without modification are permitted pro vided that the following conditions are met Redist...

Page 4: ...and Placement 18 Dolby Atmos 19 Power Wiring 20 Audio Connections 20 Video Connections 20 Navigating The Set Up Menus Initial Display Configurations 22 Input Configuration 24 General Setup 26 Speaker Types 28 Speaker Distance 28 Speaker Levels 29 Video Inputs 29 HDMI 29 Surround Modes 30 Zone Settings 30 Network Settings 31 Playing Audio Files Via Network Audio and USB Sources 32 Automation Integr...

Page 5: ... all contribute to a truly awesome home theater experience AudioControl s passion for high quality meticulous attention to detail and professional sound heritage shows itself in the dozens of awards we have won for our designs products and service This manual is designed to help you get the most from your Maestro M9 Home Theater Surround Sound Preamplifier Even though you re dying to plug it in an...

Page 6: ...DMI connectors HDMI is an uncom pressed all digital interface standard used on many home theater products This format can be used for sending audio video and control signals over short distances The dual HDMI outputs are assignable to allow for priority switching via the display device Zone 2 has its own HDMI output that can be configured independently of the main room Dolby Atmos The Maestro M9 i...

Page 7: ...MI 1 output to an HDMI 1 4 display device s ARC Au dio Return Channel enabled input to receive the audio signals from the sources connected directly to the display In the list of available inputs choose the one called Display to select the ARC source Multi Zone Operations Since we know your audio and experiences may extend beyond one room the Maestro M9 is equipped with preamplifier outputs for a ...

Page 8: ... company that has been designing and manufacturing perfor mance audio components in the USA since 1977 We Want to Hear From You Before you get too entrenched in the features of your Maestro M9 we encourage you to take a moment and visit the AudioControl web site at www audiocontrolregistration com and register your new Maestro M9 It allows us to keep a record of your purchase of the Maestro M9 Nee...

Page 9: ...stro M9 It is important that you have an external display device connected to one of the rear video connectors for complete viewing of all OSD menus during set up 8 MUTE Need to listen to the Mrs but still keep an eye on the big game on TV Just press the Mute button to turn off the sound Press it again and the audio will return to an in depth analysis of the last play 9 MODE Select between stereo ...

Page 10: ...t block any of the ventilation slots There should always be plenty of good ventilation to cool the unit Rear Panel Features Guided Tour of the Maestro M9 4 ANALOG AUDIO INPUTS There are 4 analog stereo input RCA pairs each labeled with the name of a typical source unit Con nect these to the line level analog outputs of your source units 5 ANALOG AUDIO BD and CD INPUTS The BD and CD inputs each hav...

Page 11: ...utputs connect to the HDMI inputs of your TV dis plays for zone2 your main home theater and an alternate display Zone 2 output enables viewing and listening to a source indepen dently of the main home theater system 15 UNBALANCED AUDIO OUTPUTS These line level unbalanced RCA outputs for left center right surrounds and surround backs can feed external power amplifier to power the speakers in your s...

Page 12: ...nections In this example balanced XLR connections are made to the balanced inputs of an AudioControl SAVOY G3 7 channel Power Amplifier and a powered subwoofer to unleash vast quantities of audio pleasantness in your system If your main power amplifier does not have balanced inputs you can use the Maestro M9 s unbalanced RCA outputs for front center surround surround back and subs ...

Page 13: ...ced connections In this example a second SAVOY G3 is used to power two pairs of Height speakers and a pair of Zone 2 speakers The unbalanced outputs of the Maestro M9 connect to the unblanced inputs of the SAVOY G3 and a second powered subwoofer Alternatively if you do not need so many channels you could use the AudioControl Pantages G3 5 channel Power Amplifier ...

Page 14: ...w the app works And another important note the app is designed for the iPad only Remote Control The remote control is an eight device universal IR remote controller with back lit buttons You can set up the remote for full control of your AudioControl Maestro M9 plus various AV sources and displays via the extensive library of device codes found on our web site The remote is also a learning remote ...

Page 15: ...ing state of the remote 30 seconds after the last button is pressed the remote returns to normal op eration Stuck Key Timeout If the remote has slipped into the cushions of your couch and a button is pushed in for more than 30 seconds the remote will stop sending IR information to conserve the battery It will resume normal operation after the button has been released General Functions The Device o...

Page 16: ...analog input source so that there is a direct path from the input to the amp Single press toggles your Mae stro M9 on or back to standby Press and hold Forces both Zones to Standby These number keys are used to enter numeric values Cycle through the info displayed on the front panel display when on Tuner NET or USB inputs Adjust the synchronization of the video and audio Use the left and right arr...

Page 17: ...ork control Select USB input source and changes remote to USB control Select the AV Input and changes remote to AV control Select Satellite input and changes remote to satellite receiver control Select PVR personal video hard disk recorder and chang es remote to PVR control Select Game input changes remote to game control Select BluRay input and changes remote to BluRay DVD control Select CD input...

Page 18: ...d also be placed at the same horizontal level for best imaging Side Surround Speakers The surround speakers provide the reverberant or ambient sound effects in a multi channel theater audio system These speakers should be placed on the sidewalls approximately 36 above the seated ear height of the lis teners If you are using surround speakers which have a dipole sound pat tern they should be mounte...

Page 19: ...pair would be just in front of your listening position This is just an overview so do your research carefully and talk with your dealer Connection Tips Even if you re an electronics veteran this part may seem repetitive but some things can never be repeated too many times Turn off all components before making or undoing any connections When making connections make sure that left goes to left and r...

Page 20: ... video from your sources But some sources may not offer quality or any digital audio through the HDMI connection In these cases you can also connect the digital audio in addition to HDMI This will provide the digital audio signal necessary for high quality digital surround sound Don t worry if your satellite receiver has a coaxial digital output and the Maestro M9 SAT input is optical Refer to the...

Page 21: ... connec tions are designed for modulated signals and wired for stereo or mono 3 5 mm jacks with Tip being the modulated signal and Sleeve being ground Zone 1 IR This is ideal to use when the front panel of the Maestro M9 is hidden away in some dark closet or equipment rack To prevent the possi bility of receiving multiple commands when you connect an IR receiver to this Z1 IR input it will disable...

Page 22: ...amplifier As you have probably deter mined by now if you have the read the rest of this manual the Maestro M9 is an incredibly flexible and sophisticated processor that you can literally personalize for use with your performance theater system While the set up menus incorporate a number of default settings that we determined will work well with many theater systems you will want to take the time t...

Page 23: ...nter the Setup Menus The word Menu will appear on the display of your Maestro M9 and the actual menu will appear on your display device 2 Use the Input selection button Input and Input to navigate among the menus and use the Info and Mode buttons to select the appropriate menu screen 3 Press the SELECT button or OK to select the menu options 4 Press the Menu button anytime to exit the Menu screens...

Page 24: ...ass and treble response for all speak ers when using this input Very useful when you have a source unit that has reduced frequency response due to the format i e older VCR s ROOM EQ The Dirac system in the Maestro M9 measures the major frequency resonances that occur due to room acoustics and speaker loca tions and creates specific equalization filters to offset this The Room EQ menu allows you to...

Page 25: ...hen using an analog source and you have selected the Stereo Direct mode As Speaker Types Your normal speaker configuration as selected in the Spkr Types menu determines your subwoofer output Left Right Full frequency audio will be sent to your front left and right speakers with no information going to the subwoofer Left Right Sub Full frequency audio will be sent to your front left and right speak...

Page 26: ...uiet sections and reduces the vol ume of the louder sounds These 3 options for this setting only apply to some Dolby Digital or DTS soundtracks As part of the general set up this setting applies to all inputs with digital audio streams that support this function and is recalled each time the unit is powered up Off Audio compression is not applied default Medium For loud segments of the audio strea...

Page 27: ...MI Audio to TV Enables the HDMI audio from the unit to be sent to the TV for listening through the TV speakers Control The front panel and IR control are always active This control setting defines the 3rd option for controlling your unit You may select between RS 232 or IP control if you have an automated control system Default setting is IP Power On This setting defines the state of your Maestro ...

Page 28: ...ted from speaker channels set to Small and sent to the Subwoofer outputs This frequency is adjustable from 40 Hz to 150 Hz Dolby Speaker Crossover If the Height speakers are set to small this is the frequency below which the bass information is redirected to the sub woofer Using Channels 6 7 for If your main speaker system has no Surround Back speakers you can use these unused balanced outputs to ...

Page 29: ...ettings is None This is a great way to listen to the ball game over the Internet Radio and watch it over your normal video display device though timing might be a little off HDMI Settings The Maestro M9 is not only a great sounding home theater processor but it is also a very powerful video processor To that extent it has a number of video settings that need to be selected carefully to optimize yo...

Page 30: ...ema DTS Neo 6 Music 5 7ch Stereo Multi channel sources The following formats are available for any multi channel digital sources such as any Dolby or DTS multi channel digital stream Stereo Downmix Dolby Digital EX Dolby Surround Zone Settings This menu allows you select the audio and video control and volume set tings for Zone 2 Zone 2 Input Selects the analog audio and video to be used for Zone ...

Page 31: ... a static IP address USE DHCP Use this setting if your network uses DHCP for assign ing an IP address IP Address When not using DHCP use this setting to assign a unique IP address to your Maestro M9 Subnet Mask When not using DHCP use this setting to assign the subnet mask to your Maestro M9 Gateway When not using DHCP use this setting to enter the IP ad dress of the router connected to your Maest...

Page 32: ...vice may operate differently here are some basic commands to follow 1 With the Maestro M9 in Standby make all of the Ethernet network and or USB connections and then take the unit out of Standby 2 Using the front panel source selection controls select Network Audio NET as a source A Home Page page will appear on your display device and show all available storage devices 3 Navigate through these us...

Page 33: ...et radio stations You will want to go to www audiocontrolradio com to set up this service for use in your system Review the Network set up menu of your Maestro M9 and locate the unique MAC Media Access Controller address of your unit as it will be required to setup up your service Once activated you can visit various sta tions and podcasts and then set up groups of favorite stations These will sho...

Page 34: ...me com mand structure format as defined in the automation documentation found on our website The Maestro M9 command set also takes advantage of the extensive discrete IR command library with the IR simulation command This adds a great deal of flexibility to system design general functionality and personal customization It is possible to use both hand held remotes and control panels in the same ins...

Page 35: ...Maestro M9 to your control system will depend on the RS 232 output connection on the controller Make certain that you wire the Transmit Data output on the serial controller to the Receive Data on the Maestro M9 and vice versa on the Receive Data line on the controller system Connect the signal grounds on the control system and the Maestro M9 together The RS 232 connection on the Maestro M9 is a DB...

Page 36: ... in the following format ST ZN CC DL Data ETR Parameter Command Description Start 0x21 Begins transmission to Maestro M9 Zone Number 0x01 Zone 1 0x02 Zone 2 Command Code See code list The code of the command Data Length 0x01 0x02 etc Number of data parameters to follow Data See code index The parameters for the command ETR 0x0D End transmission As an example To change the Maestro M9 video source o...

Page 37: ...and back in the following format ST ZN CC AC DL Data ETR Parameter Command Description Start 0x21 Begins transmission to Maestro M9 Zone Number 0x01 Zone 1 0x02 Zone 2 Command Code See code list The code of the command Answer Code 0x00 No problems status updated 0x82 Incorrect Zone 0x83 Incorrect Command 0x84 Incorrect Parameter 0x85 Invalid Command in current state 0x86 Data length is incorrect D...

Page 38: ...hile the Maestro M9 is controlled by a serial command its state may be changed by other inputs such as the front panel or through IR Such changes in state will yield a response with an answer code from the Maestro M9 In order to determine the command code you may use the response to get the code for the desired function if you can t find the listing for it in the table below Serial and IR Code Tab...

Page 39: ...l usual position of your head when you are sitting in your home theater You can use a camera tripod to position it there is a threaded screw hole underneath for this purpose The microphone can be pointing straight upwards and in a position where it has a direct line of sight view of all speakers 7 Start by setting your subwoofer s output level controls to approximately match the front speakers 8 R...

Page 40: ...Zone 1 Control option in the Zone 2 Configuration Menu to Off Video No video picture ü Verify your video display or projector is turned on and set to the correct input for the Maestro M9 Press the Menu button on the Maestro M9 and look for the Main Menu to show on the video display ü Verify the correct input on the video display is selected for the output of the source ü Verify the Video Input ass...

Page 41: ... the audio RCA cables to the power amplifiers are working and seated properly ü If the trouble is in all channels Verify the Input Trim setting in the Advanced Configurations is not set too low Cannot select Dolby Digital or DTS decoding mode ü The Maestro M9 can only decode formats encoded onto the source Normally these are marked on the packaging or liner notes of the material ü Verify that the ...

Page 42: ...nnection ü It does not know the words No audio on Zone 2 ü Zone 2 is muted when unit is first turned on ü make sure you are using a source with analog outputs No Zone 2 audio when playing a DTS encoded video ü Most DVD players cannot output a stereo analog version of the soundtrack while playing a DTS encoded disk If you want to watch the movie in the second zone select the Dolby Digital soundtrac...

Page 43: ...AudioControl product registration page at www audiocontrol com product regis tration 2 You must keep your sales receipt for proof of purchase showing when and from whom the unit was bought We re not the only ones who require this so it s a good habit to get into with any major purchase 3 The Maestro M9 must have originally been purchased from an authorized AudioControl dealer You do not have to be...

Page 44: ...ER NEED SERVICE Please contact AudioControl either by e mail or phone We will verify if there is anything wrong in the system that you can correct yourself or if it needs to be sent back to our factory for repair Please include the following items when returning the unit 1 A copy of your proof of purchase No originals please We cannot guaran tee returning them to you 2 Supply a really detailed des...

Page 45: ...ency Response 20 Hz 20 kHz Preamp Audio Outputs Balanced 7 Main Channels 1 Subwoofer Preamp Audio Outputs Unbalanced 7 Main Channels 2 Subwoofer 4 Height 2 Zone 2 Main Video Outputs Dual 2 HDMI Zone 2 Second Zone Output 1 HDMI Stereo analog audio Control 12 Volt Trigger Outputs Main Zone Zone 2 RS 232 Serial control 1 DB 9 IR Receiver Inputs Main Zone Zone 2 IP Control iOS App General Power Consum...

Page 46: ... 46 MAESTRO M9 ...

Page 47: ... 47 MAESTRO M9 ...

Page 48: ...P N 913 141 0 22410 70th Avenue West Seattle WA 98043 USA Phone 425 775 8461 Fax 425 778 3166 www audiocontrol com AudioControl Making Good Sound Great ...

Reviews: