background image


Audax Body Worn Video System 
 
Chest Camera - User Guide 


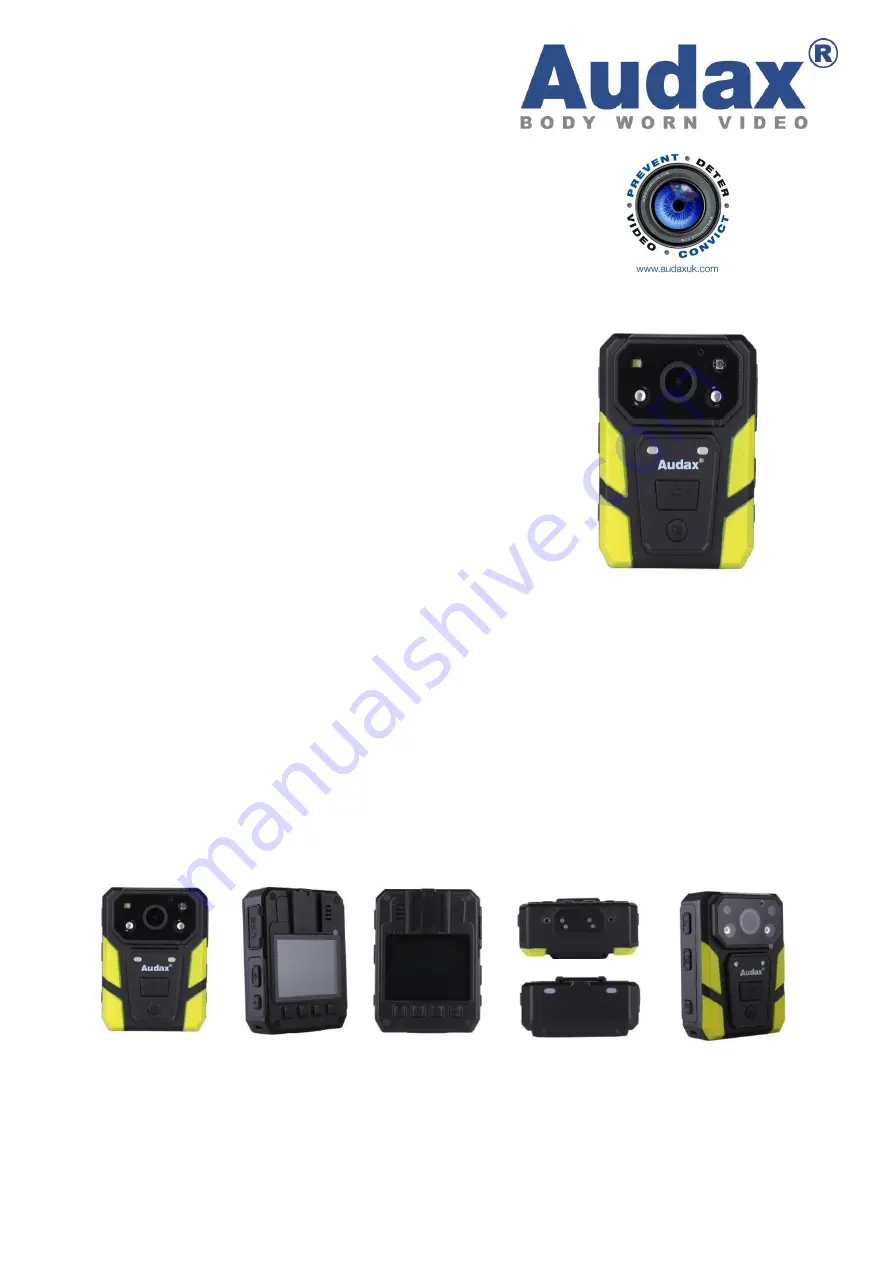
1. System Components 

The system is supplied complete with the following: 
 

A. Chest Camera (including Screen) 

B. Internal (non-removable) 32Gb Solid State memory 

C. Universal metal clip with 360° rotation 

D. USB 2.0 cable 

E. Wall Socket USB Charger 


2. System Features 
 

  Full HD video recording


  Solid State memory 

  Still image capture 

  Audio 

  IR (Auto or Manual) 

  GPS 

  140° Wide Angle Lens 

  Secure, password protected files 

  IP67 


V.20200313


Summary of Contents for 19-1

Page 1: ... Camera including Screen B Internal non removable 32Gb Solid State memory C Universal metal clip with 360 rotation D USB 2 0 cable E Wall Socket USB Charger 2 System Features Full HD video recording Solid State memory Still image capture Audio IR Auto or Manual GPS 140 Wide Angle Lens Secure password protected files IP67 V 20200313 ...

Page 2: ...two different Passwords set a The Settings Menu has the initial password set as 000000 Please see Section 6 para i for details of how to set Passwords The software will not allow access to settings and downloading without using this password Audax recommend that this Password is re set and safely recorded at the earliest opportunity b The Replay Menu has the password set as 000001 and this can als...

Page 3: ... right IR Sensor Centre Camera lens Bottom Left Right IR Illuminators b Record Video button c Still image button Left d USB connection e Audio only button f Manual IR button Right a Video Record button b Camera still image button c Power on off button Rear a 360 detachable clip b Display Screen c 1 Menu OK button d 2 Up button e 3 Down button f 4 Back Replay button 1 2 3 4 ...

Page 4: ... will be saved 3 If recording is required in low light conditions press the IR button unless IR Auto has been previously selected The IR illuminators will be turned on and the device will enter the night shooting mode IMPORTANT NOTE Video recorded when IR has been selected will be in black and white only c Still Images 1 Once turned on the device will automatically enter the camera preview mode Pr...

Page 5: ... to play 2 Press the OK button to play the video file Pressing the OK button while the file is playing will pause playback Press OK again to continue f Still Image playback 1 When in the playback state select the Photo playback option and press the UP or DOWN button to select the image you want to view 2 Press the OK button to view the picture Pressing the UP DOWN buttons will cycle photos 3 When ...

Page 6: ...LITY will be highlighted in RED and select OK This gives you the option to change the video quality bitrate in the following settings There are three options to select from High Medium and Low This gives different settings dependent on the Resolution set 2560 x 1080 30 18 0Mbps High 15 0Mbps Medium 12 0Mbps Low 2304 x 1296 30 18 0Mbps High 15 0Mbps Medium 12 0Mbps Low 1920 x 1080 30 12 0Mbps High ...

Page 7: ...to select the required resolution and press OK to confirm Press Back to return to standby e Capture Select CAPTURE will be highlighted in RED and select OK This gives you the option to change the continuous photo shooting in a sequence There are six options to select from Off no continuous photo shooting a single photo will be captured 5 Five photos taken with one press of the Capture button 10 Te...

Page 8: ...r of the device and or user The Up or Down buttons can now be used to select 0 to 9 or A to Z Press OK to select and confirm each setting Once the final Letter Number has been selected you will automatically be returned to the settings menu The first 00000 are for the User ID if used the X7 cannot be changed The second 000000 are for the Unit ID if used Press Back to return to standby h Date Time ...

Page 9: ... setting 0 to 9 or A to Z and press OK to confirm each setting Press Back to return to standby j PB Password Select PB PASSWORD will be highlighted in RED and select OK This gives you the option to change the Replay password The DEFAULT Password is set as 000001 IMPORTANT NOTE When changing Passwords the current Password MUST be entered first You will be returned to the Password menu select OK to ...

Page 10: ... Up or Down to select the required option and press OK to confirm Press Back to return to standby l Post Event Recording Select POST_RECORDING will be highlighted in RED and select OK This gives you the option to select Post Event Recording There are six options to select from Off No post event recording 10 20 30 60 or 300 seconds The camera will record for the selected duration AFTER stopping rec...

Page 11: ...one NOTE We would always recommend that the Microphone is set to Unmute There are two options to select from Mute or Unmute Press Up or Down to select the required option and press OK to confirm Press Back to return to standby o Light Sensitivity Select LIGHT SENSITIVE will be highlighted in RED and select OK This option gives a clearer picture in dark conditions when IR is used There are three op...

Page 12: ...red option and press OK to confirm Press Back to return to standby r LCD Auto Off Select LCD AUTO OFF will be highlighted in RED and select OK This gives you the option to power off the LCD Screen after a certain period of time unless any other operation is selected NOTE Having the LCD Screen on continuously will use more battery power There are four options to select from Off the camera will NOT ...

Page 13: ...camera will be turned off after 5 minutes 10 the camera will be turned off after 10 minutes Press Up or Down to select the required option and press OK to confirm Press Back to return to standby t Loop Recording Select LOOP RECORDING will be highlighted in RED and select OK This gives you the option to either overwrite old video files stored on the camera or to have the camera stop recording when ...

Page 14: ...options to select from Off disables GPS function On enables GPS function Press Up or Down to select the required option and press OK to confirm Press Back to return to standby w Default setting Select DEFAULT SETTING will be highlighted in RED and select OK This will give you the option to return the Camera back to its original default factory settings IMPORTANT NOTE Resetting the camera DOES NOT ...

Page 15: ...ions for installation NOTE There is no option to alter this setting Press Back to return to standby z Vehicle This turns on the Vehicle mode for automatic start stop recording from vehicle ignition There are two options to select from On and Off Press Up or Down to select the required option and press OK to confirm Press Back to return to standby NOTE The use of the Vehicle mode will generally dep...

Page 16: ... and the device will appear as an external Removable Disk as per the diagram below 5 All video still images and audio files will appear in the DCIM folder The LOG folder contains a basic admin trail of the device use The MISC folder is not used and may not show 6 Click to open one of the recordings and this will immediately start playing the recording in a movie application e g VLC Media Player Wi...

Page 17: ... found to have an altered or tampered with serial number or if access or attempted access to the internal memory is suspected Full details of our Terms and Conditions can be found on our website www audaxuk com This Product is exclusively distributed Worldwide by Audax Global Solutions Ltd and all claims questions and contact should be with Audax in the first instance Audax Global Solutions Ltd 20...

Reviews: