7
U.V. LAMPS:
INSTALLATION OF THE ULTRAVIOLET LAMPS:
**DO NOT PUT POWER ON AT THIS TIME!**
CAUTION:
Never look directly at a operating U.V. lamp operate a U.V. lamp outside the
disinfection
chamber.
Make sure unit is unplugged when installing or servicing ultraviolet lamp. Remove any paper tabs on
the U.V. lamp and avoid allowing fingerprints and other debris to deposit. Carefully place the bulb
inside the quartz sleeve leaving enough space to connect the socket connector to the lamp pins. Insert
the protective polyurethane endcaps into the quartz open ends to secure the lamp(s) in place or reinstall
brass dust covers.
ULTRAVIOLET LAMP MAINTENANCE REQUIREMENTS:
The U.V. lamp is rated for 9,000 hours of continuous use. After this period of time, the U.V. lamp has
undergone a photochemical change. While the lamp will not normally be burned out, the lamp quartz
may no longer emit the 254-nm shortwave U.V. to effectively kill bacteria.
Failure to replace the U.V.
lamps every 9,000 hours may cause bacteriological breakthrough.
Should the use of the
disinfection unit be intermittent, in no case should the U.V. lamp be used for more than 24 months
regardless of the number of hours of operation due to normal shelf life degradation of the U.V. bulb.
Changing the quartz sleeve should be done at the same time U.V. lamp replacement is scheduled.
It is recommended that your water supply be tested periodically (yearly) through your local health
department or approved certified laboratory.
ELECTRICAL:
The Safe Lite series are furnished with 6' line cord that will plug into a 110V outlet. Electrical recep-
tacles must be properly grounded for safe operation. Improper grounding will void any warranty.
When possible use a separate breaker to minimize voltage fluctuations and avoid accidental shut off.
After unit is installed and water is turned on, plug the unit into 110V wall receptacle. View lamp
operation through safety Site Port lens.
NOTE: Avoid exposing your eyes to U.V. light.
Summary of Contents for Safe Lite SL-2V
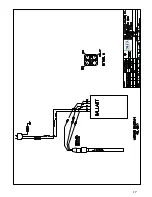
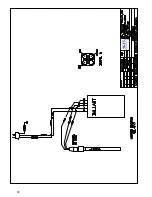
Page 16: ...16 WIRING DIAGRAM...
Page 17: ...17...
Page 18: ...18...
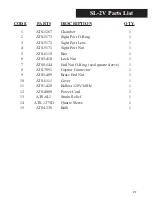
Page 19: ...19 DRAWING AND PART NUMBERS...
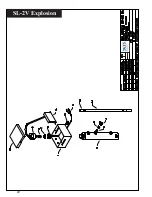
Page 20: ...20 SL 2V Explosion...
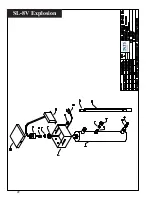
Page 22: ...22 SL 8V Explosion...


