


ROG STRIX Z270G GAMING
1-17
C
h
ap
te
r
1
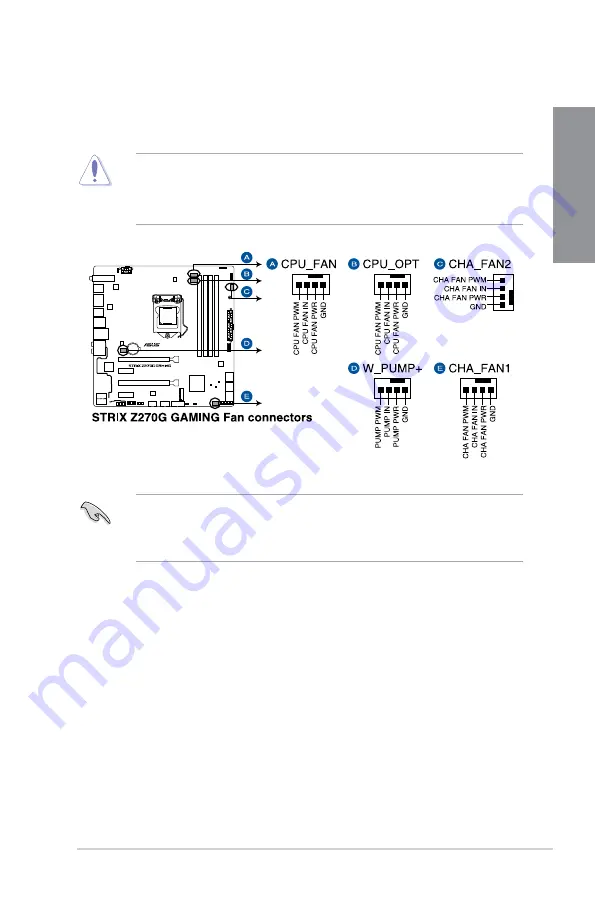
8.
CPU, CPU optional, water pump, and chassis fan connectors (4-pin CPU_FAN;
4-pin CPU_OPT; 4-pin ; 4-pin CHA_FAN1-2)
Connect the fan cables to the fan connectors on the motherboard, ensuring that the
black wire of each cable matches the ground pin of the connector.
The CPU_FAN connector supports the CPU fan of maximum 1A (12 W) fan power.
To install more fans, refer to section
2.1.8 Expansion card installation
for details.
Connect the fan of your water cooling kit to the connector.
DO NOT forget to connect the fan cables to the fan connectors. Insuf cient air ow
inside the system may damage the motherboard components. These are not jumpers!
Do not place jumper caps on the fan connectors!
Ensure that the CPU fan cable is securely installed to the CPU fan connector.
Summary of Contents for STRIX Z270G GAMING
Page 1: ...Motherboard STRIX Z270G GAMING ...
Page 16: ...xvi ...
Page 18: ...1 2 Chapter 1 Product Introduction Chapter 1 1 1 2 Motherboard layout ...
Page 38: ...1 22 Chapter 1 Product Introduction Chapter 1 ...
Page 44: ...2 6 Chapter 2 Basic Installation Chapter 2 To uninstall the CPU heatsink and fan assembly ...
Page 45: ...ROG STRIX Z270G GAMING 2 7 Chapter 2 To remove a DIMM 2 1 4 DIMM installation ...
Page 47: ...ROG STRIX Z270G GAMING 2 9 Chapter 2 2 1 6 SATA device connection OR ...
Page 51: ...ROG STRIX Z270G GAMING 2 13 Chapter 2 2 1 9 M 2 installation ...
Page 60: ...2 22 Chapter 2 Basic Installation Chapter 2 ...
Page 106: ...A 8 Appendix Appendix ...