62
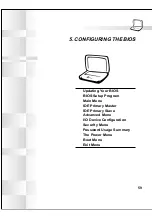
5. Configuring the BIOS
BIOS Setup Program
This Notebook PC supports a programmable EEPROM that stores the BIOS software and can be up-
dated using the provided utility as described in Flash Memory Writer Utility. This Section will guide
you through the BIOS setup program by providing clear explanations for all the options. A default
configuration has already been set. If you are either installing new devices or expanding main memory,
you will need to enter the BIOS Setup to reconfigure your Notebook PC.
A battery backed-up CMOS RAM is used to record some basic system hardware information: clock,
date, time, the error handling, and etc., even when the power is off. When the Notebook PC is turned
back on, the system is configured with the values stored in the CMOS RAM.
The settings made in the BIOS Setup program intimately affect how the Notebook PC performs. It is
important, therefore, to first understand all the Setup options, and second, to make settings appropriate
for the way you use the Notebook PC.
The BIOS (Basic Input and Output System) Setup is a menu driven software utility that enables you to
make changes to the system configuration and tailor your Notebook PC to reflect installed hardware,
alter performance, and setup power saving functions. BIOS setup is used if you are setting up the
Notebook PC for the first time, reconfiguring your system, or prompted to “Run Setup” during bootup.
This section describes how to configure your system using this utility.
Even if you are not prompted to use the Setup program, at some time in the future you may want to
change the configuration of your Notebook PC. For example, you may want to enable the Security
Password Feature or make changes to the power management settings. It will then be necessary to
reconfigure your system using the BIOS setup program so that the computer can recognize these changes
and record them in the CMOS RAM of the EEPROM.
The Setup program has been designed to make it as easy to use as possible. It is a menu-driven pro-
gram, which means you can scroll through the various sub-menus and make your selections among the
predetermined choices.
When you start up the computer, the system provides you with the opportunity to run this program. This
appears during the Power-On Self Test (POST). Press [F2] to call up the Setup utility. If you are a little
bit late in pressing the mentioned key, POST will continue with its test routines, thus preventing you
from calling up Setup. If you still need to call Setup, restart the system by pressing [Ctrl] + [Alt] +
[Delete], or by pressing the Reset button if available. You can also restart by turning the system OFF
and then back ON again. But do so only if the first two methods fail.
To access the BIOS Setup program, press the [F2] key immediately when you see the splash
screen during bootup (about 1 second after powering ON). You can also press the [ESC] key and
select “Enter Setup”. If you are late, you will have to restart your Notebook PC and try again.
There are no other methods to enter the BIOS setup.
NOTE: Because the BIOS software is constantly being updated, the following BIOS
screens and descriptions are for reference purposes only and may not exactly reflect
your BIOS screens.
Summary of Contents for S82A
Page 5: ...5 CTR 21 Approval for Notebook PC with built in Modem Italian Portuguese Spanish Swedish ...
Page 13: ...13 Top Side Front Side Left Side Right Side Rear Side 2 KNOWING THE PARTS ...
Page 81: ...81 APPENDIX Internal Modem Compliancy Glossary Index Owner Information ...
Page 84: ...84 Appendix ...
Page 91: ...91 Appendix ...


