ASUS P8B-C series
6-21
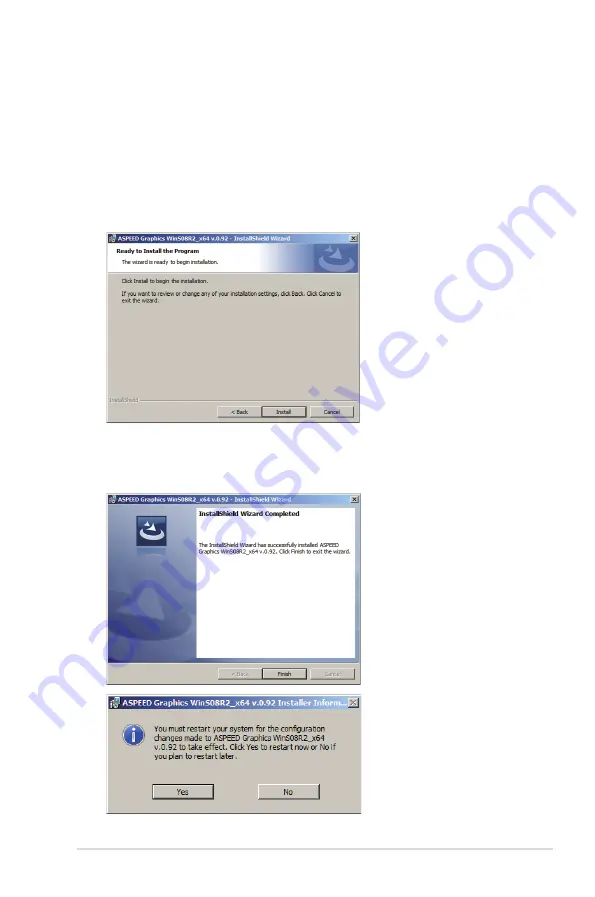
7. When the installation completes, click
Finish
and select
Yes
to restart your
computer for the configuration changes to take effect.
5. To allow the system to update the VGA driver, follow the steps shown in the
next few windows, and click
Next
when finished.
a.
Accept
the terms in the license agreement.
b. Fill in
User Name
and
Organization
. (optional)
c. Select a setup type.
6. Click
Install
to begin the installation.
Summary of Contents for P8B-C/4L
Page 1: ...Motherboard P8B C series ...
Page 23: ...ASUS P8B C series 2 5 2 2 3 Motherboard layout P8B C 4L R1 0x ...
Page 24: ...2 6 Chapter 2 Hardware information P8B C 4L R2 0x ...
Page 25: ...ASUS P8B C series 2 7 P8B C SAS 2L R1 0x ...
Page 26: ...2 8 Chapter 2 Hardware information P8B C SAS 2L R2 0x ...
Page 27: ...ASUS P8B C series 2 9 P8B C SAS 4L R1 0x ...
Page 28: ...2 10 Chapter 2 Hardware information P8B C SAS 4L R2 0x ...
Page 62: ...2 44 Chapter 2 Hardware information ...
Page 96: ...4 30 Chapter 4 BIOS setup ...
Page 150: ...5 54 Chapter 5 RAID configuration ...
Page 174: ...6 24 Chapter 6 Driver installation ...
Page 176: ...Appendix summary A ASUS P8B C series A 1 P8B C series block diagram A 3 ...
Page 177: ...ASUS P8B C series A 3 A 1 P8B C series block diagram P8B C 4L R1 0x ...
Page 178: ...A 4 Appendix A Reference information P8B C 4L R2 0x ...
Page 179: ...ASUS P8B C series A 5 P8B C SAS 2L R1 0x ...
Page 180: ...A 6 Appendix A Reference information P8B C SAS 2L R2 0x ...
Page 181: ...ASUS P8B C series A 7 P8B C SAS 4L R1 0x ...
Page 182: ...A 8 Appendix A Reference information P8B C SAS 4L R2 0x ...


