GigaX Smart Switch Centralized Network Management
9
3.2 Part 2 —Start the Switch
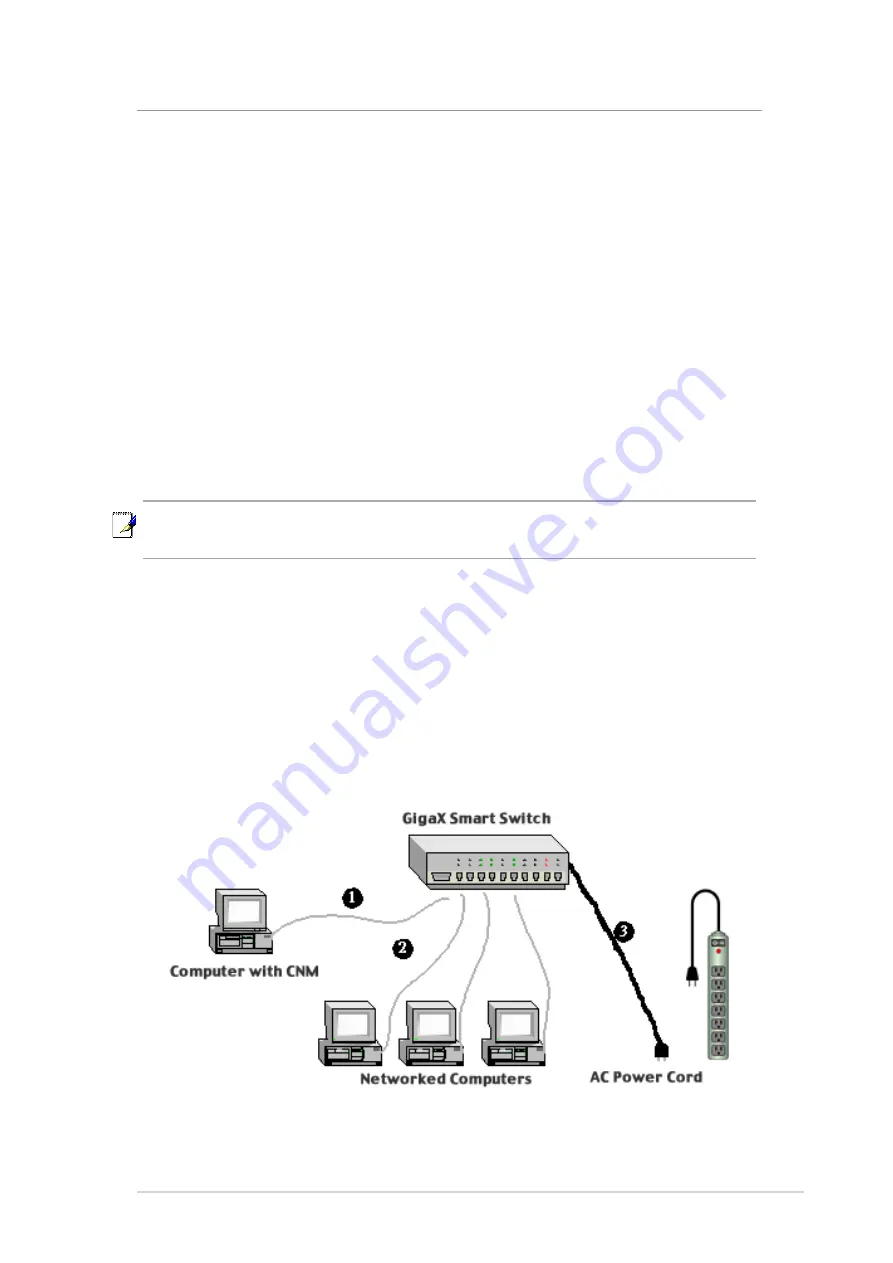
In Part 2, this guide will show you how to connect the switch to a power outlet,
to your computer (with CNM installed), and to the network.
3.2.1 Step 1. Connect to the PC with CNM Installed
The switch can be managed through the ASUS CNM software that is running
on a Windows OS computer. Please refer to the CNM installation guide for
details. Before starting the CNM application, you have to connect the PC to the
same network as the switch is attached to.
3.2.2 Step 2. Connect to computers or a LAN
You can use Ethernet cable to connect computers directly to the switch ports.
You can also connect hubs/switches to the switch ports by Ethernet cables.
Note that both the crossover or straight-through Ethernet cable can be used to
connect computers, hubs or switches.
3.2.3 Step 3. Attach the power cord.
1. Plug the female end of the AC power cord to the POWER receptacle on the
back of the switch.
2. Check the front LED indicators with the table 3.1. If the LEDs illuminate as
expected, the switch hardware is working properly.
3. Plug the male end of the AC power cord into a wall outlet or a power strip.
Figure 3.1 Overview of Hardware Connections
Note: Use twisted-pair Category 5 Ethernet cable to connect the 1000BASE-
T port. Otherwise, the link speed can not reach 1Gbps. (GigaX 1024P only)


