background image

3-18

Chapter 3: BIOS setup

Chapter 3

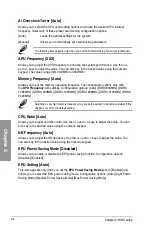
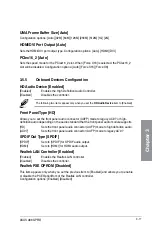
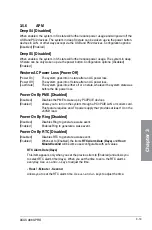
Asmedia USB 3.0 Controller [Enabled]

[Enabled] 

Enables the USB 3.0 controller.

[Disabled] 

Disables the controller.

Asmedia USB 3.0 Battery Charging Support [Disabled]

This item appears only when you set the previous item to [Enabled] and allows you to enable 

or disable the ASmedia USB 3.0 Battery Charging Support.
[Enabled] 

Enables Asmedia USB 3.0 fast battery charging support for USB 3.0 

devices complying with the BC 1.1 regulation.

[Disabled] 

Disables battery charging support.

Serial Port Configuration

The sub-items in this menu allow you to set the serial port configuration.

Serial Port [Enabled]

Allows you to enable or disable the serial port (COM). Configuration options: [Enabled] 

[Disabled]

Change Settings [IO=3F8h; IRQ=4]

This item appears only when you set the 

Serial Port

 to [Enabled] and allows you 

to select the Serial Port base address. Configuration options: [IO=3F8h; IRQ=4] 

[IO=2F8h; IRQ=3] [IO=3E8h; IRQ=4] [IO=2E8h; IRQ=3]

Summary of Contents for A88X PRO

Page 1: ...Motherboard A88X PRO ...

Page 2: ...respective companies and are used only for identification or explanation and to the owners benefit without intent to infringe Offer to Provide Source Code of Certain Software This product contains copyrighted software that is licensed under the General Public License GPL under the Lesser General Public License Version LGPL and or other Free Open Source Software Licenses Such software in this produ...

Page 3: ... 2 2 Accelerated Processing Unit APU 2 4 2 2 3 System memory 2 5 2 2 4 Expansion slots 2 17 2 2 5 Jumper 2 19 2 2 6 Onboard switches buttons 2 20 2 2 7 Onboard LEDs 2 24 2 2 8 Internal connectors 2 31 2 3 Building your computer system 2 37 2 3 1 Additional tools and components to build a PC system 2 37 2 3 2 APU installation 2 38 2 3 3 APU heatsink and fan assembly installation 2 39 2 3 4 DIMM ins...

Page 4: ...Configuration 3 16 3 5 4 NB Configuration 3 16 3 5 5 Onboard Devices Configuration 3 17 3 5 6 APM 3 19 3 5 7 Network Stack 3 20 3 6 Monitor menu 3 21 3 7 Boot menu 3 25 3 8 Tools menu 3 31 3 9 Exit menu 3 33 3 10 Managing and updating your BIOS 3 34 Chapter 4 Software support 4 1 Installing an operating system 4 1 4 2 Support DVD information 4 1 4 2 1 Running the support DVD 4 1 4 2 2 Obtaining th...

Page 5: ...RAID driver disk without entering the OS 4 21 4 5 2 Creating a RAID driver disk in Windows 4 21 4 5 3 Installing the RAID driver during OS installation 4 22 Chapter 5 Multiple GPU technology support 5 1 AMD CrossFireX technology 5 1 5 1 1 Requirements 5 1 5 1 2 Before you begin 5 1 5 1 3 Installing two CrossFireX graphics cards 5 2 5 1 4 Installing the device drivers 5 3 5 1 5 Enabling the AMD Cro...

Page 6: ...your area If you are not sure about the voltage of the electrical outlet you are using contact your local power company If the power supply is broken do not try to fix it by yourself Contact a qualified service technician or your retailer Operation safety Before installing the motherboard and adding devices on it carefully read all the manuals that came with the package Before using the product en...

Page 7: ...up menus Detailed descriptions of the BIOS parameters are also provided Chapter 4 Software support This chapter describes the contents of the support DVD that comes with the motherboard package and the software Chapter 5 AMD CrossFireX technology support This chapter describes how to install and configure multiple AMD CrossFireX and AMD Dual Graphics cards Where to find more information Refer to t...

Page 8: ...u must press the enclosed key Example Enter means that you must press the Enter or Return key Key1 Key2 Key3 If you must press two or more keys simultaneously the key names are linked with a plus sign Example Ctrl Alt Del DANGER WARNING Information to prevent injury to yourself when trying to complete a task CAUTION Information to prevent damage to the components when trying to complete a task IMP...

Page 9: ...List once the DIMMs are available on the market Hyper DIMM support is subject to the physical characteristics of individual CPUs Refer to www asus com for the latest Memory QVL Qualified Vendors List Graphics Integrated AMD Radeon HD 8000 7000 Series Graphics in A series APU Multi VGA output support DisplayPort HDMI DVI RGB ports Supports DisplayPort with max resolution 4096x2160 60Hz Supports HDM...

Page 10: ...es ASUS exclusive DIGI Power Control TPU EPU and Fan Xpert2 to optimize digital power settings system performance power savings and whole system cooling ASUS Digital Power Design Industry leading digital 6 2 phase power design ASUS CPU power utility ASUS DRAM power utility ASUS EPU EPU EPU switch ASUS TPU GPU Boost TPU switch ASUS Fan Xpert2 Featuring Fan Auto Tuning for optimized speed control an...

Page 11: ...er and Network iControl are only supported in Windows 7 and later versions ASUS exclusive overclocking features Precision Tweaker 2 vCore Adjustable CPU voltage at 0 00625V increment vDDNB Adjustable CPU NB voltage at 0 00625V increment vDRAM Bus Adjustable DRAM voltage at 0 005V increment vFCH Adjustable FCH voltage at 0 01V increment SFS Stepless Frequency Selection APU frequency tuning from 90M...

Page 12: ...onnectors 4 pin 1 x 24 pin EATX power connector 1 x 8 pin ATX 12V power connector BIOS features 64Mb Flash ROM UEFI AMI BIOS PnP DMI v2 7 WfM 2 0 ACPI 5 0 SM BIOS 2 7 Multi language BIOS ASUS EZ Flash 2 ASUS CrashFree BIOS 3 My Favorites Quick Note Last Modified log F12 PrintScreen Function F3 Shortcut Function and ASUS DRAM SPD Serial Presence Detect Memory information Support DVD contents Driver...

Page 13: ...ware devices on it check the items in your package with the list below 1 2 Package contents Check your motherboard package for the following items If any of the above items is damaged or missing contact your retailer The illustrated items above are for reference only Actual product specifications may vary with different models Chapter 1 Product introduction UserGuide ASUS A88X PRO motherboard User...

Page 14: ...o backward compatible with USB 2 0 components PCI Express 3 0 PCI Express 3 0 PCIe 3 0 is the latest PCI Express bus standard with improved encoding schemes that provide twice the performance of the current PCIe 2 0 The total bandwidth for a x16 link reaches a maximum of 32Gb s double the 16 Gb s of PCIe 2 0 in x16 mode As such PCIe 3 0 provides users unprecendented data speeds combined with the c...

Page 15: ...tion Onboard polyswitch resettable fuse prevents overcurrent and short circuit damage This extends beyond I O ports to DRAM to safeguard system and device lifespan ASUS ESD Guards Strong ESD protection for extended component lifespan Electrostatic discharges ESD can happen suddenly and their damaging effects are often underestimated ASUS ESD Guards offer an active protective circuit design that en...

Page 16: ...ol center Network iControl is only supported in Windows 7 and later versions MemOK Any Memory is A OK MemOK quickly ensures memory boot compatibility This remarkable memory rescue tool requires a mere push of a button to patch memory issues MemOK determines fail safe settings and dramatically improves your system boot success Get your system up and running in no time USB Charger 3X Faster Charging...

Page 17: ...rboard users but also the heatpipe design lowers the temperature of the chipset and power phase area through high efficient heat exchange Combined with usability and aesthetics the ASUS stylish heatpipe will give users an extremely silent and cooling experience with the elegant appearance 1 3 5 ASUS EZ DIY ASUS UEFI BIOS EZ Mode ASUS UEFI BIOS a UEFI compliant architecture offers the first mouse c...

Page 18: ...llows you to turn on and turn off your system and conveniently enter the BIOS during bootup ASUS EZ Flash 2 ASUS EZ Flash 2 is a user friendly utility that allows you to update the BIOS without using a bootable floppy disk or an OS based utility ASUS MyLogo2 This feature allows you to convert your favorite photo into a 256 color boot logo for a more colorful and vivid image on your screen CrashFre...

Page 19: ...ables in one easy step with one complete module This unique adapter eliminates the trouble of plugging in one cable at a time making connection quick and accurate ErP ready The motherboard is European Union s Energy related Products ErP ready and ErP requires products to meet certain energy efficiency requirements in regards to energy consumptions This is in line with ASUS vision of creating envir...

Page 20: ...1 8 Chapter 1 Product Introduction Chapter 1 ...

Page 21: ...l object such as the power supply case to avoid damaging them due to static electricity Hold components by the edges to avoid touching the ICs on them Whenever you uninstall any component place it on a grounded antistatic pad or in the bag that came with the component Before you install or remove any component ensure that the ATX power supply is switched off or the power cord is detached from the ...

Page 22: ...3 CHA_FAN4 CHA_FAN1 EPU_LED TPU_LED EPU TPU BIOS_FLBK FLBK_LED BATTERY Super I O ALC 1150 ASM 1042A RTL 8111GR KBMS_USB12 HDMI_DP DVI_VGA 64Mb BIOS SB_PWR CLRTC 24 4cm 9 6in AMD A88X DDR3 DIMM_A1 64bit 240 pin module DDR3 DIMM_A2 64bit 240 pin module DDR3 DIMM_B1 64bit 240 pin module DDR3 DIMM_B2 64bit 240 pin module SATA6G_56 SATA6G_34 SATA6G_12 PANEL AUDIO ES6_78 _U3_E12 LAN_USB3_12 SPDIF_OUT 30...

Page 23: ...pin USB3_34 2 30 10 BIOS Flashback button BIOS_FLBK 2 19 11 BIOS Flashback LED FLBK_LED 2 26 12 SATA 6 0 Gb s connectors SATA6G_1 6 2 27 13 DirectKey button 2 18 14 TPU LED 2 26 15 Clear RTC RAM 3 pin CLRTC 2 15 16 System panel connector 20 8 pin PANEL 2 32 17 Standby power LED SB_PWR 2 20 18 TPU switch 2 17 19 Direct connector 2 pin DRCT 2 31 20 USB 2 0 connectors 10 1 pin USB34 USB56 USB78 USB91...

Page 24: ...s with an FM2 socket designed for AMD A Series and Athlon Series Accelerated processors Ensure that you use a APU designed for the FM2 socket The APU fits in only one correct orientation DO NOT force the APU into the socket to prevent bending the pins and damaging the APU A88X PRO A88X PRO CPU socket FM2 ...

Page 25: ...ets Recommended memory configurations A DDR3 module is notched differently from a DDR or DDR2 module DO NOT install a DDR or DDR2 memory module to the DDR3 slot We recommend that you install the memory modules from the yellow slots for better overclocking capability A88X PRO A88X PRO 240 pin DDR3 DIMM sockets DIMM_A1 DIMM_A2 DIMM_B1 DIMM_B2 ...

Page 26: ... memory from the higher sized channel is then mapped for single channel operation We recommend that you install the memory modules from the yellow slots for better overclocking capability Always install DIMMs with the same CAS latency For optimal compatibility we recommend that you install memory modules of the same version or date code D C from the same vendor Check with the retailer to get the c...

Page 27: ...Ver4 21 8GB DS 10 12 12 31 1 65V GEIL GET34GB2400C9DC XMP 2GB DS 9 11 9 27 1 65V KINGSTON KHX24C11T2K2 8X XMP 4GB DS 1 65V ADATA AX3U2400GW8G11 16GB 2x 8GB DS 11 13 13 35 1 65V Vendors Part No Size SS DS Chip Brand Chip NO Timing Voltage DIMM socket support optional 1DIMM 2DIMMs 4DIMMs KINGSTON KHX2250C9D3T1K2 4GX XMP 16GB 2x 8GB DS 11 13 13 35 1 65V DDR3 2250 O C MHz capability DDR3 2200 O C MHz ...

Page 28: ...P 4GB 2x2GB DS 1 65V KINGSTON KHX2133C9AD3X2K2 4GX XMP 4GB 2x2GB DS 9 11 9 27 1 65V KINGSTON KHX2133C9AD3T1K4 8GX XMP 8GB 4x2GB DS 9 11 9 27 1 65V KINGSTON KHX2133C9AD3T1FK4 8GX XMP 8GB 4x2GB DS 1 65V PATRIOT PGD38G2133C11K XMP 16GB 4GBx4 DS 11 11 11 30 1 65V Team TXD34096M2133HC9N L 4GB DS SEC 128 HCH9 K4B2G0846D 9 11 11 28 1 65V KINGSTON KHX21C11T1BK2 16X XMP 16GB 8GBx2 DS 1 6V KINGSTON KHX21C11...

Page 29: ...rand Chip NO Timing Voltage DIMM socket support optional 1DIMM 2DIMMs 4DIMMs CORSAIR CMT4GX3M2A1866C9 XMP 4GB 2x2GB DS 9 9 9 24 1 65V CORSAIR CMT6GX3MA1866C9 XMP 6GB 3x2GB DS 9 9 9 24 1 65V CORSAIR CMZ8GX3M2A1866C9 XMP 8GB 2x4GB DS 9 10 9 27 1 50V G SKILL F3 14900CL9Q 16GBZL XMP1 3 16GB 4GBx4 DS 9 10 9 28 1 5V G SKILL F3 14900CL10Q2 64GBZLD XMP1 3 64GB 8GBx8 DS 10 11 10 30 1 5V G SKILL F3 14900CL9...

Page 30: ... G XMP 6GB 3x2GB DS 8 8 8 24 1 65V CORSAIR TR3X6G1600C9 G XMP 6GB 3x2GB DS 9 9 9 24 1 65V CORSAIR CMP8GX3M2A1600C9 XMP 8GB 2x4GB DS 9 9 9 24 1 65V CORSAIR CMZ8GX3M2A1600C7R XMP 8GB 2x4GB DS 7 8 7 20 1 50V CORSAIR CMX8GX3M4A1600C9 XMP 8GB 4x2GB DS 9 9 9 24 1 65V Crucial BL25664BN1608 16FF XMP 6GB 3x2GB DS G SKILL F3 12800CL9D 2GBNQ XMP 2GB 2x1GB SS 9 9 9 24 1 5V G SKILL F3 12800CL7D 4GBRH XMP 4GB 2...

Page 31: ...XMP 6GB 3x2GB DS 9 1 65V KINGSTON KHX1600C9D3T1BK3 6GX XMP 6GB 3x2GB DS 9 9 9 27 1 65V KINGSTON KHX1600C9D3K2 8GX XMP 8GB 2x4GB DS 9 9 9 27 1 65V KINGSTON KHX1600C9D3P1K2 8G 8GB 2x4GB DS 1 5V Super Talent WA160UX6G9 6GB 3x2GB DS 9 Transcend JM1600KLN 8GK 8GB 4GBx2 DS Transcend TK483PCW3 SanMax SMD 4G68HP 16KZ 4GB DS HYNIX H5TQ2G83BFR PBC AMD AE32G1609U1 U 2GB SS 23EY4587MB6H11503M 9 9 9 24 1 5V AM...

Page 32: ...6E1 4GB SS MICRON D9QBJ MICRON MT16JTF1G64AZ 1G6E1 8GB DS MICRON D9QBJ Transcend TS512MLK64W6H 4GB SS SEC 234 HYKO K4B4GO8468 Transcend TS1GLK64W6H 8GB DS SEC 234 HYKO K4B4GO8468 ADATA AX3U1600GW8G9 16GB 2x8GB DS 9 9 9 24 1 5V ADATA AXDU1600GW8G9B 16GB 2x8GB DS 11 11 11 28 1 5V Asint SLA304G08 ENG1B 4GB SS Asint 304G08 GN1B1301 Asint SLB304G08 EGJ1B 8GB DS PATRIOT PV332G160C9QK 8GB DS 1 5V APACER ...

Page 33: ...cial BL25664BN1337 16FF XMP 6GB 3x2GB DS 7 7 7 24 1 65V Elpida EBJ10UE8EDF0 DJ F 1GB SS ELPIDA J1108EDSE DJ F 1 35V low voltage Elpida EBJ21UE8EDF0 DJ F 2GB DS ELPIDA J1108EDSE DJ F 1 35V low voltage G Skill F3 10600CL8D 2GBHK XMP 1GB SS G SKILL G Skill F3 10600CL9D 2GBNQ 2GB 2x1GB SS 9 9 9 24 1 5V G Skill F3 10666CL8D 4GBECO XMP 4GB 2x2GB DS 8 8 8 8 24 XMP 1 35V G Skill F3 10666CL7D 8GBRH XMP 8GB...

Page 34: ...Micron MT4JTF12864AZ 1G4D1 1GB SS Micron OJD12D9LGQ Micron MT8JTF12864AZ 1G4F1 1GB SS Micron 9FF22D9KPT 9 Micron MT8JTF25664AZ 1G4D1 2GB SS Micron OJD12D9LGK Micron MT8JTF25664AZ 1G4M1 2GB SS MICRON IJM22 D9PFJ Micron MT16JTF25664AZ 1G4F1 2GB DS Micron 9KF27D9KPT 9 Micron MT16JTF51264AZ 1G4D1 4GB DS Micron OLD22D9LGK NANYA NT4GC64B8HG0NF CG 4GB DS NANYA NT5CB256M8GN CG PSC AL7F8G73F DJ2 1GB SS PSC...

Page 35: ...S ELPIDA J1108BDBG DJ F RAMAXEL RMR1870EC58E9F 1333 4GB DS ELPIDA J2108BCSE DJ F RiDATA C304627CB1AG22Fe 2GB DS RiDATA N A 9 RiDATA E304459CB1AG32Cf 4GB DS RiDATA N A 9 Silicon Power SP002GBLTU133V02 2GB SS S POWER 20YT3NG 1202 Silicon Power SP002GBLTU133S02 2GB DS Elixir N2CB1680AN C6 Silicon Power SP004GBLTU133V02 4GB DS S POWER 20YT3NG 1201 TAKEMS TMS2GB364D081 107EY 2GB DS 7 7 7 20 1 5V TAKEMS...

Page 36: ...module into A2 slot 2 DIMMs Supports two 2 modules inserted into either the yellow slots or the dark brown slots as one pair of Dual channel memory configuration We suggest that you install the modules into slots A2 and B2 for better compatibility 4 DIMMs Supports four 4 modules inserted into both the yellow and dark brown slots as two pairs of Dual channel memory configuration Visit the ASUS webs...

Page 37: ...scription 1 PCIe 2 0 x1_1 slot yellow 2 PCIe 3 0 2 0 x16_1 slot yellow single at x16 or dual at x8 x8 mode 3 PCIe 2 0 x1_2 slot yellow 4 PCI slot 1 5 PCIe 3 0 2 0 x16_2 slot dark brown at x8 mode 6 PCI slot 2 7 PCIe 2 0 x16_3 slot dark brown at x4 mode compatible with PCIe x1 and x4 devices VGA configuration PCI Express operating mode PCIe 2 0 x16_1 PCIe 2 0 x16_2 Single VGA PCIe card x16 Recommen...

Page 38: ...H SATA Controller shared HD Audio shared Onboard VGA Controller shared In single VGA card mode use the PCIe 2 0 x16_1 slot yellow for a PCI Express x16 graphics card to get better performance In CrossFireX mode use the PCIe 2 0 x16_1 and PCIe 2 0 x16_2 slots for PCI Express x16 graphics cards to get better performance We recommend that you provide sufficient power when running CrossFireX mode Conn...

Page 39: ...ns 1 2 3 Plug the power cord and turn ON the computer 4 Hold down the Del key during the boot process and enter BIOS setup to re enter data Except when clearing the RTC RAM never remove the cap on CLRTC jumper default position Removing the cap will cause system boot failure If the steps above do not help remove the onboard battery and move the jumper again to clear the CMOS RTC RAM data After clea...

Page 40: ...tem to test one set of failsafe settings If the test fails the system reboots and tests the next set of failsafe settings The blinking speed of the DRAM_LED increases indicating different test processes Due to memory tuning requirement the system automatically reboots when each timing set is tested If the installed DIMMs still fail to boot after the whole tuning process the DRAM_LED lights continu...

Page 41: ... 7 Onboard LEDs for the exact location of the TPU LED If you change the switch setting to Enable under the OS environment the TPU function will be activated after the next system bootup You may use the TurboV and Auto Tuning feature in the TurboV EVO application adjust the BIOS setup program or enable the TPU switch at the same time However the system will use the last setting you have made A88X P...

Page 42: ...ith the press of a button With DirectKey you can enter the BIOS anytime without having to press the Del key during POST It also allows you to turn on and turn off your system and conveniently enter the BIOS during bootup When the system is on and you press the DirectKey button your system will shut down Press the DirectKey button again or the Power on button to reboot and enter the BIOS directly T...

Page 43: ...he Flashback function is enabled once the light starts to flash 5 The flashing rate of the light signal accelerates along with the updating speed 6 BIOS update is complete once the light signal goes out Do not unplug the portable disk power off the system or press the CLR_CMOS button while BIOS update is ongoing otherwise update will be interrupted In case of interruption please follow the recomme...

Page 44: ...location of the onboard LED 2 DRAM LED DRAM LED checks the DRAM in sequence during motherboard booting process If an error is found the LED next to the error device will continue lighting until the problem is solved This user friendly design provides an intuitive way to locate the root problem within a second SB_PWR ON Standby Power Powered Off OFF A88X PRO A88X PRO Onboard LED A88X PRO A88X PRO D...

Page 45: ...s started 11 14 Pre memory CPU initialization is started 15 18 Pre memory System Agent initialization is started 19 1C Pre memory PCH initialization is started 2B 2F Memory initialization 30 Reserved for ASL see ASL Status Codes section below 31 Memory Installed 32 36 CPU post memory initialization 37 3A Post Memory System Agent initialization is started 3B 3E Post Memory PCH initialization is sta...

Page 46: ...rmware Auto recovery F1 Recovery condition triggered by user Forced recovery F2 Recovery process started F3 Recovery firmware image is found F4 Recovery firmware image is loaded F5 F7 Reserved for future AMI progress codes F8 Recovery PPI is not available F9 Recovery capsule is not found FA Invalid recovery capsule FB FF Reserved for future AMI error codes 60 DXE Core is started 61 NVRAM initializ...

Page 47: ... 92 PCI Bus initialization is started 93 PCI Bus Hot Plug Controller Initialization 94 PCI Bus Enumeration 95 PCI Bus Request Resources 96 PCI Bus Assign Resources 97 Console Output devices connect 98 Console input devices connect 99 Super IO Initialization 9A USB initialization is started 9B USB Reset 9C USB Detect 9D USB Enable 9E 9F Reserved for future AMI codes A0 IDE initialization is started...

Page 48: ... plug B5 PCI bus hot plug B6 Clean up of NVRAM B7 Configuration Reset reset of NVRAM settings B8 BF Reserved for future AMI codes D0 CPU initialization error D1 System Agent initialization error D2 PCH initialization error D3 Some of the Architectural Protocols are not available D4 PCI resource allocation error Out of Resources D5 No Space for Legacy Option ROM D6 No Console Output Devices are fou...

Page 49: ...ng S4 sleep state 05 System is entering S5 sleep state 10 System is waking up from the S1 sleep state 20 System is waking up from the S2 sleep state 30 System is waking up from the S3 sleep state 40 System is waking up from the S4 sleep state AC System has transitioned into ACPI mode Interrupt controller is in PIC mode AA System has transitioned into ACPI mode Interrupt controller is in APIC mode ...

Page 50: ...up when the BIOS FLBK function is enabled 5 EPU LED The EPU LED lights up when the EPU switch is turned to Enable 6 TPU LED The TPU LED lights up when the TPU switch is turned to Enable A88X PRO A88X PRO EPU LED EPU_LED A88X PRO A88X PRO TPU LED TPU_LED A88X PRO A88X PRO FLBK LED FLBK_LED ...

Page 51: ...configurations or the manual bundled in the motherboard support DVD When using NCQ set the OnChip SATA Type in the BIOS to AHCI Refer to section 3 5 2 SATA Configuration for details You must install Windows XP Service Pack 3 or later versions before using Serial ATA hard disk drives The Serial ATA RAID feature is available only if you are using Windows XP SP3 or later versions SATA6G_1 GND RSATA_T...

Page 52: ... the item to AC 97 By default this connector is set to HD Refer to 3 5 5 Onboard Devices Configuration for details A88X PRO A88X PRO USB2 0 connectors USB 5V USB_P9 USB_P9 GND NC USB 5V USB_P10 USB_P10 GND USB910 PIN 1 USB 5V USB_P7 USB_P7 GND NC USB 5V USB_P8 USB_P8 GND USB78 PIN 1 USB 5V USB_P5 USB_P5 GND NC USB 5V USB_P6 USB_P6 GND USB56 PIN 1 USB 5V USB_P3 USB_P3 GND NC USB 5V USB_P4 USB_P4 GN...

Page 53: ... black wire of each cable matches the ground pin of the connector Do not forget to connect the fan cables to the fan connectors Insufficient air flow inside the system may damage the motherboard components These are not jumpers Do not place jumper caps on the fan connectors The CPU_FAN connector supports the CPU fan of maximum 1A 12 W fan power A88X PRO A88X PRO Digital audio connector SPDIF_OUT 5...

Page 54: ...n the front panel USB 3 0 solution 7 Serial port connector 10 1 pin COM This connector is for a serial COM port Connect the serial port module cable to this connector then install the module to a slot opening at the back of the system chassis The serial port bracket COM module is purchased separately A88X PRO A88X PRO USB3 0 Front panel connector USB3_34 USB3 5V IntA_P1_SSRX IntA_P1_SSRX IntA_P1_S...

Page 55: ... is inadequate If you are uncertain about the minimum power supply requirement for your system refer to the Recommended Power Supply Wattage Calculator at http support asus com PowerSupplyCalculator PSCalculator aspx SLanguage en us for details A88X PRO A88X PRO ATX power connectors EATXPWR PIN 1 GND 5 Volts 5 Volts 5 Volts 5 Volts GND GND GND PSON GND 12 Volts 3 Volts 3 Volts 12 Volts 12 Volts 5V...

Page 56: ...r the chassis mounted system warning speaker The speaker allows you to hear system beeps and warnings ATX power button soft off button 2 pin PWRSW This connector is for the system power button Pressing the power button turns the system on Pressing the power switch for more than four seconds while the system is ON turns the system OFF Reset button 2 pin RESET This 2 pin connector is for the chassis...

Page 57: ...build a PC system 1 bag of screws Philips cross screwdriver PC chassis Power supply unit AMD FM2 FM2 APU AMD FM2 FM2 compatible CPU Fan DIMM SATA hard disk drive SATA optical disc drive optional Graphics card optional The tools and components in the table above are not included in the motherboard package ...

Page 58: ...ation Chapter 2 2 3 2 APU installation Ensure that you use a APU designed for the FM2 socket The APU fits in only one correct orientation DO NOT force the APU into the socket to prevent bending the pins and damaging the APU 1 2 4 3 ...

Page 59: ...er 2 1 2 5 3 4 2 3 3 APU heatsink and fan assembly installation Apply the Thermal Interface Material to the APU heatsink and APU before you install the heatsink and fan if necessary To install the APU heatsink and fan assembly ...

Page 60: ...2 40 Chapter 2 Hardware information Chapter 2 To uninstall the APU heatsink and fan assembly 5 3 1 4 2 ...

Page 61: ...ASUS A88X PRO 2 41 Chapter 2 1 2 3 To remove a DIMM 2 3 4 DIMM installation B A A ...

Page 62: ...ter 2 Hardware information Chapter 2 2 3 5 Motherboard installation 2 1 The diagrams in this section are for reference only The motherboard layout may vary with models but the installation steps remain the same ...

Page 63: ...ASUS A88X PRO 2 43 Chapter 2 DO NOT overtighten the screws Doing so can damage the motherboard A88X PRO 3 ...

Page 64: ...2 44 Chapter 2 Hardware information Chapter 2 2 3 6 ATX Power connection 1 2 OR ...

Page 65: ...ASUS A88X PRO 2 45 Chapter 2 2 3 7 SATA device connection OR 1 2 ...

Page 66: ... 2 2 3 8 Front I O Connector USB 2 0 AAFP To install USB 2 0 Connector To install front panel audio connector USB 3 0 To install USB 3 0 Connector IDE_LED POWER SW RESET SW IDE_LED IDE_LED PWR Reset Ground Ground 1 2 To install ASUS Q Connector ...

Page 67: ...ASUS A88X PRO 2 47 Chapter 2 2 3 9 Expansion Card installation To install PCIe x16 cards To install PCIe x1 cards To install PCI cards ...

Page 68: ...rformance for your USB 3 0 devices and Refer to the tables on the next page for LAN port LED and audio port definitions DO NOT insert a different connector to the external SATA port Rear panel connectors 1 PS 2 keyboard mouse combo port 7 AMD USB 3 0 ports 1 and 2 support ASUS USB 3 0 Boost UASP Mode Bottom port supports USB BIOS Flashback and USB Charger 2 Video Graphics Adapter VGA port 8 Extern...

Page 69: ...dications SPEED LED ACT LINK LED LAN port Activity Link LED Speed LED Status Description Status Description OFF No link OFF 10 Mbps connection ORANGE Linked ORANGE 100 Mbps connection BLINKING Data activity GREEN 1 Gbps connection Multiple display table This table indicates whether the multiple display you want to use is supported or not 8 channel speaker setup may refer to above 7 1 channel confi...

Page 70: ...2 50 Chapter 2 Hardware information Chapter 2 2 3 11 Audio I O connections Audio I O ports Connect to Headphone and Mic Connect to Stereo Speakers Connect to 2 1 channel Speakers ...

Page 71: ...ASUS A88X PRO 2 51 Chapter 2 Connect to 4 1 channel Speakers Connect to 5 1 channel Speakers Connect to 7 1 channel Speakers ...

Page 72: ...elf tests or POST While the tests are running the BIOS beeps see the BIOS beep codes table below or additional messages appear on the screen If you do not see anything within 30 seconds from the time you turned on the power the system may have failed a power on test Check the jumper settings and connections or call your retailer for assistance 7 At power on hold down the Delete key to enter the BI...

Page 73: ...s provided for BIOS item modification When you start up the computer the system provides you with the opportunity to run this program Press Del during the Power On Self Test POST to enter the Setup utility Otherwise POST continues with its test routines If you wish to enter Setup after POST press Ctrl Alt Delete or press the reset button on the system chassis to restart the system You can also tur...

Page 74: ... the Setup Mode item in section 3 7 Boot memu for details Exits the BIOS setup program without saving the changes saves the changes and resets the system or enters the Advanced Mode Selects the display language of the BIOS setup program Displays CPU temperature CPU voltage output DRAM information and CPU Chassis fan speed Power Saving mode Normal mode ASUS Optimal mode Loads optimized default Boot...

Page 75: ...eaker For changing the overclocking settings Advanced For changing the advanced system settings Monitor For displaying the system temperature power status and changing the fan settings Boot For changing the system boot configuration Tool For configuring options for special functions Exit For selecting the exit options and loading default settings The boot device options vary depending on the devic...

Page 76: ...ar A scroll bar appears on the right side of a menu screen when there are items that do not fit on the screen Press the Up Down arrow keys or Page Up Page Down keys to display the other items on the screen Navigation keys At the bottom right corner of the menu screen are the navigation keys for the BIOS setup program Use the navigation keys to select items in the menu and change the settings Gener...

Page 77: ... time language and security settings Security The Security menu items allow you to change the system security settings If you have forgotten your BIOS password erase the CMOS Real Time Clock RTC RAM to clear the BIOS password See section 2 2 5 Jumper for information on how to erase the RTC RAM The Administrator or User Password items on top of the screen show the default Not Installed After you se...

Page 78: ...s Enter when prompted to create confirm the password After you clear the password the Administrator Password item on top of the screen shows Not Installed User Password If you have set a user password you must enter the user password for accessing the system The User Password item on top of the screen shows the default Not Installed After you set a password this item shows Installed To set a user ...

Page 79: ...cking related items Be cautious when changing the settings of the Ai Tweaker menu items Incorrect field values can cause the system to malfunction The configuration options for this section vary depending on the CPU and DIMM model you installed on the motherboard Scroll down to display the following items ...

Page 80: ...e APU Frequency item settings Configuration options Auto DDR3 800MHz DDR3 1066MHz DDR3 1333MHz DDR3 1600MHz DDR3 1866MHz DDR3 2133MHz DDR3 2400MHz Selecting a very high memory frequency may cause the system to become unstable If this happens revert to the default setting CPU Ratio Auto Allows you to adjust non turbo ratio Use the and keys to adjust the value You can also key in the desired value u...

Page 81: ...Load Line Calibration Auto Load line is defined by AMD VRM spec and affects CPU voltage The CPU working voltage will decrease proportionally to CPU loading Higher value gets a higher voltage and better overclocking performance but increases the CPU and VRM thermal Configuration options Auto Regular Medium High Extreme The actual performance boost may vary depending on your CPU specifications CPU N...

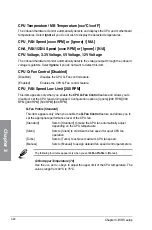
Page 82: ...age Frequency item to Auto and allows you to enable the spread spectrum to enhance system stability VRM Fixed Frequency Mode xxx This item appears only when you set the CPU Voltage Frequency item to Manual and allows you to set a fixed VRM frequency Use the and keys to adjust the value The values range from 200k Hz to 400k Hz with a 10k Hz interval CPU Power Duty Control T Probe T Probe Maintains ...

Page 83: ...ffset Mode Sign This item appears only when you set the CPU Voltage item to Offset Mode To offset the voltage by a positive value To offset the voltage by a negative value CPU Offset Voltage Auto This item appears only when you set the CPU Voltage item to Offset Mode and allows you to set the Offset voltage The values range from 0 500V to 0 500V with a 0 00625V interval CPU Manual Voltage Auto Thi...

Page 84: ...m 1 1000V to 1 4000V with a 0 1V interval APU1 2V Voltage Auto Allows you to set the APU Accelerated Processor Unit 1 2V voltage The values range from 1 2000V to 1 8000V with a 0 01V interval VDDA Voltage Auto Allows you to set the VDDA voltage The values range from 2 5000V to 2 8000V with a 0 1V interval NB VREF Voltage Auto Allows you to set the NB VREF voltage with a 0 005V interval DRAM VREFCA...

Page 85: ...cautious when changing the settings of the Advanced menu items Incorrect field values can cause the system to malfunction 3 5 Advanced menu The Advanced menu items allow you to change the settings for the CPU and other system devices ...

Page 86: ...w function Configuration options Enabled Disabled NX Mode Enabled Enables or disables the No execute page protection function Configuration options Enabled Disabled SVM Mode Enabled Allows you to enable or disable CPU virtualization Configuration options Disabled Enabled CPB Mode Auto Disables the CPB Core Performance Boost mode or set it to Auto for automatic configuration Configuration options D...

Page 87: ...set the SATA configuration IDE Set to IDE when you want to use the Serial ATA hard disk drives as Parallel ATA physical storage devices RAID Set to RAID when you want to create a RAID configuration from the SATA hard disk drives AHCI Set to AHCI when you want the SATA hard disk drives to use the AHCI Advanced Host Controller Interface The AHCI allows the onboard storage driver to enable advanced S...

Page 88: ...If no USB device is detected the legacy USB support is disabled EHCI Hand off Disabled Enabled Enables the support for operating systems without an EHCI hand off feature Disabled Disables the function USB Single Port Control Allows you to enable disable individual USB ports IGFX Multi Monitor Disabled Enables or disables the Internal Graphics Device Multi Monitor support for add on VGA devices And...

Page 89: ... legacy AC 97 SPDIF Out Type SPDIF SPDIF Sets to SPDIF for SPDIF audio output HDMI Sets to HDMI for HDMI audio output Realtek LAN Controller Enabled Enabled Enables the Realtek LAN controller Disabled Disables the controller Realtek PXE OPROM Disabled This item appears only when you set the previous item to Enabled and allows you to enable or disable the PXE OptionRom of the Realtek LAN controller...

Page 90: ...3 0 fast battery charging support for USB 3 0 devices complying with the BC 1 1 regulation Disabled Disables battery charging support Serial Port Configuration The sub items in this menu allow you to set the serial port configuration Serial Port Enabled Allows you to enable or disable the serial port COM Configuration options Enabled Disabled Change Settings IO 3F8h IRQ 4 This item appears only wh...

Page 91: ...or on state whatever the system state was before the AC power loss Power On By PME Disabled Disabled Disables the PME to wake up by PCI PCIE devices Enabled Allows you to turn on the system through a PCI PCIE LAN or modem card This feature requires an ATX power supply that provides at least 1A on the 5VSB lead Power On By Ring Disabled Disabled Disables Ring to generate a wake event Enabled Enable...

Page 92: ... This item appears only when you set the Network Stack item to Enabled When this item is disabled the IPV4 PXE boot option will not be created Configuration options Disable Link Enabled Ipv6 PXE Support Enabled This item appears only when you set the Network Stack item to Enabled When this item is disabled the IPV6 PXE boot option will not be created Configuration options Disable Link Enabled ...

Page 93: ...ASUS A88X PRO 3 21 Chapter 3 3 6 Monitor menu The Monitor menu displays the system temperature power status and allows you to change the fan settings Scroll down to display the following items ...

Page 94: ...d Low Limit 200 RPM This item appears only when you enable the CPU Q Fan Control feature and allows you to disable or set the CPU fan warning speed Configuration options Ignore 200 RPM 300 RPM 400 RPM 500 RPM 600 RPM Q Fan Profile Standard This item appears only when you enable the Q Fan Control feature and allows you to set the appropriate performance level of the CPU fan Standard Sets to Standar...

Page 95: ...n you enable the CHA_FAN1 2 3 4 Q Fan Control feature and allows you to disable or set the CHA_FAN1 2 3 4 fan warning speed Configuration options Ignore 200 RPM 300 RPM 400 RPM 500 RPM 600 RPM CHA_FAN1 2 3 4 Fan Profile Standard This item appears only when you enable the CHA_FAN1 2 3 4 Q Fan Control feature and allows you to set the appropriate performance level of the CHA_FAN1 2 3 4 fan Standard ...

Page 96: ...mum duty cycle CHA_FAN1 2 3 4 Lower Temperature 40 Displays the lower limit of the chassis temperature CHA_FAN1 2 3 4 Fan Min Duty Cycle 60 Use the and keys to adjust the minimum chassis fan duty cycle The values range from 60 to 100 When the chassis temperature is under 40ºC the chassis fan will operate at the minimum duty cycle Anti Surge Support Enabled This item allows you to enable or disable...

Page 97: ...ASUS A88X PRO 3 25 Chapter 3 3 7 Boot menu The Boot menu items allow you to change the system boot options Scroll down to display the following items ...

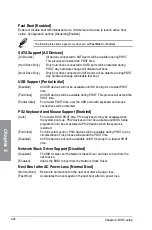
Page 98: ...uring POST This process will extend the POST time Partial Initial For a faster POST time only the USB ports with keyboard and mouse connections will be detected PS2 Keyboard and Mouse Support Enabled Auto For a faster BIOS POST time PS 2 devices will only be available when the system boots up PS 2 devices will not be available and BIOS Setup program will not be accessible via PS 2 devices when the...

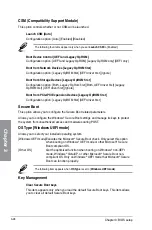
Page 99: ...isabled Disables the function Enabled The system waits for the F1 key to be pressed when error occurs DirectKey Enable Go to BIOS Disabled Disables the DirectKey function The system will only power on or off when you press the DirectKey button Go to BIOS Setup Allows the system to power on and go to BIOS Setup directly when you press the DirectKey button Option ROM Messages Force BIOS Force BIOS T...

Page 100: ...UEFI driver first Secure Boot This option allows you to configure the Secure Boot related parameters Allows you to configure the Windows Secure Boot settings and manage its keys to protect the system from unauthorized access and malwares during POST OS Type Windows UEFI mode Allows you to select your installed operating system Windows UEFI mode Executes the Microsoft Secure Boot check Only select ...

Page 101: ...Management The KEK Key exchange Key or Key Enrollment Key manages the Signature database db and Revoked Signature database dbx Key exchange Key KEK refers to Microsoft Secure Boot Key Enrollment Key KEK Delete the KEK Allows you to delete the KEK from your system Configuration options Yes No Load KEK from File Allows you to load the downloaded KEK from a USB storage device Append KEK from file All...

Page 102: ...nfiguration options Yes No Load DBX from File Allows you to load the downloaded DBX from a USB storage device Append DBX from file Allows you to load the additional DBX from a storage device so that more db s images cannot be loaded The DBX file must be formatted as a UEFI variable structure with time based authenticated variable 2 8 10 Boot Option Priorities These items specify the boot device pr...

Page 103: ...more details refer to section 3 10 2 ASUS EZ Flash 2 utility ASUS SPD Information DIMM Slot DIMM_A1 Displays the Serial Presence Detect SPD information of the DIMM module installed on the selected slot Configuration options DIMM_A1 DIMM_A2 DIMM_B1 DIMM_B2 2 8 11 Boot Override These items displays the available devices The number of device items that appears on the screen depends on the number of d...

Page 104: ...he same memory CPU configuration and BIOS version Load Save Profile from to USB Drive Allows you to load save CMOS profile from to USB drive Label Allows you to input the label of the setup profile Save to Profile Allows you to save the current BIOS settings to the BIOS Flash and create a profile Key in a profile number from one to eight press Enter and then select Yes Load from Profile Allows you...

Page 105: ... you are finished making your selections choose this option from the Exit menu to ensure the values you selected are saved When you select this option or if you press F10 a confirmation window appears Select Yes to save changes and exit Discard Changes Exit This option allows you to exit the Setup program without saving your changes When you select this option or if you press Esc a confirmation wi...

Page 106: ...utomatically update your motherboard s softwares drivers and the BIOS version easily With this utlity you can also manually update the saved BIOS and select a boot logo when the system goes into POST To launch EZ Update click EZ Update on the AI Suite 3 main menu bar Click to automatically update your motherboard s driver software and firmware Click to find and select the BIOS from file Click to s...

Page 107: ...ble it 3 Press Tab to switch to the Drive field 4 Press the Up Down arrow keys to find the USB flash disk that contains the latest BIOS and then press Enter 5 Press Tab to switch to the Folder Info field 6 Press the Up Down arrow keys to find the BIOS file and then press Enter to perform the BIOS update process Reboot the system when the update process is done This function supports USB flash disk...

Page 108: ... system requires you to enter BIOS Setup to recover BIOS settings To ensure system compatibility and stability we recommend that you press F5 to load default BIOS values DO NOT shut down or reset the system while updating the BIOS Doing so can cause system boot failure 3 10 4 ASUS BIOS Updater The ASUS BIOS Updater allows you to update BIOS in a DOS environment This utility also allows you to copy...

Page 109: ...e system to a DOS environment 1 Insert the DOS bootable USB flash drive with the latest BIOS file and BIOS Updater to your computer s USB port 2 Boot your computer When the ASUS Logo appears press F8 to show the BIOS Boot Device Select Menu 3 Select the USB flash drive as the boot device The DOS screen appears 0203 A88XPRO CAP 8194 2013 07 12 15 25 48 07 12 2013 A88X PRO ASUSTek BIOS Updater for D...

Page 110: ...ter Restart your computer DO NOT shut down or reset the system while updating the BIOS to prevent system boot failure For BIOS Updater version 1 30 or later the utility automatically exits to the DOS prompt after updating BIOS Ensure to load the BIOS default settings to ensure system compatibility and stability Select the Load Optimized Defaults item under the Exit menu Refer to section 2 10 Exit ...

Page 111: ... Use the setup procedures presented in this chapter for reference only Refer to your OS documentation for detailed information Ensure that you install the Windows XP Service Pack 3 or Windows 7 64 bit Windows 7 Windows 8 64 bit Windows 8 operating systems OS before installing the drivers for better compatibility and system stability The contents of the support DVD are subject to change at any time...

Page 112: ...bat Reader from the Utilities menu before opening the files The screenshots in this section are for reference only The actual software manuals in the support DVD vary between models 1 Click the Manual tab Click ASUS Motherboard Utility Guide from the manual list on the left 2 The Manual folder of the support DVD appears Double click the folder of your selected software 3 Some software manuals are ...

Page 113: ...port DVD in the optical drive The Special tab appears if your computer has enabled the Autorun feature 2 Click Utilities tab AI Suite 3 3 Follow the onscreen instructions to complete the installation 4 After AI Suite 3 is installed restart your computer Using AI Suite 3 You can launch AI Suite 3 for the following Windows operating systems For Windows 7 click on the notification area For Windows 8 ...

Page 114: ...e only The actual screenshots vary with models Refer to the software manual in the support DVD or visit the ASUS website at www asus com for detailed software configuration USB 3 0 Boost Network iControl EZ Update System Information USB BIOS Flashback Remote GO Ai Charger USB Charger Select an advanced power saving mode Click to auto detect the best settings based on actual usage ...

Page 115: ...ing Unit TPU Energy Processing Unit EPU DIGI Power Control and Fan Xpert 2 4 Way Optimization The 4 Way Optimization utility allows you to automatically tweak the TPU EPU DIGI Power Control and Fan Xpert 2 to their optimal settings DO NOT remove your fan during the tuning process Select an advanced power saving mode Click to auto detect the best settings based on actual usage ...

Page 116: ...n the AI Suite 3 main menu bar Tick to enable or disable Ai Charger Tick to apply the selection Ai Charger screen Check manufacturer specifications if your USB device complies with Battery Charging Specification 1 1 BC 1 1 Actual charging speeds may vary depending on the charging rate and specifications of your USB device To ensure normal charging function disconnect and reconnect your USB device ...

Page 117: ... the BIOS and select the boot logo that will display during POST Launching EZ Update To launch EZ Update click or tap on the top right corner of the menu then click EZ Update on the AI Suite 3 main menu bar EZ Update screen Click to select a boot logo Click to update the BIOS Click to automatically update your motherboard s driver software and firmware Click to search and select the BIOS file ...

Page 118: ...ur USB 3 0 device to the USB 3 0 port 2 From the USB 3 0 Boost screen select a USB device 3 To enable UASP on your USB device click UASP To revert to its normal transfer rate click Normal Refer to the software manual in the support DVD or visit the ASUS website at www asus com for detailed software configuration Use USB 3 0 devices for better performance Data transfer speed varies with USB devices...

Page 119: ...l the LAN drivers before using this utility Network iControl can only support the onboard LAN EZ Start screen EZ Profile screen Tick to assign a schedule of your network programs to avoid network congestions Click to save the profile settings or rename the profile Select a program from this list and click to add to your network profile Click to select a network profile Click to set the program as ...

Page 120: ...settings Click to fast charge your USB device Indicates that the connected USB device is in charging mode Click to stop charging your USB device Click to select the type of USB device that you wish to charge when the system is in sleep hibernate or shutdown mode Ensure to connect your USB device into the USB port that supports this utility Refer to section 2 3 10 Rear panel connection of your user...

Page 121: ...e 2 Click Apply to save the BIOS download schedule Click Cancel to cancel the download schedule Downloading the updated BIOS Before you start downloading ensure that you have installed the USB storage device to your computer s USB port that supports USB BIOS Flashback Refer to section 2 3 10 Rear panel connection of your user manual for more details Set a schedule for the BIOS Update download Clic...

Page 122: ...w BIOS click from the Save to field select the USB flash drive then click Download 3 After the download is complete click OK To download the updated BIOS 1 From the USB BIOS Flashback screen click Check for New BIOS Update Wait for the system to check the latest BIOS version ...

Page 123: ...o launch System Information click or tap on the top right corner of the menu then click System Information on the AI Suite 3 main menu bar Viewing the motherboard information From the System Information screen click the MB tab to view the motherboard s information Viewing the CPU information From the System Information screen click the CPU tab to view the processor s information ...

Page 124: ...4 14 Chapter 4 Software support Chapter 4 Viewing the SPD information From the System Information screen click the SPD tab to view the memory s information ...

Page 125: ...errors and giving users plug and play convenience Follow the installation wizard to install the Realtek Audio Driver from the support DVD that came with the motherboard package If the Realtek audio software is correctly installed you will find the Realtek HD Audio Manager icon on the taskbar Double click on the icon to display the Realtek HD Audio Manager Realtek HD Audio Manager Configuration opt...

Page 126: ...ansfer rate double that of a single disk alone thus improving data access and storage Use of two new identical hard disk drives is required for this setup RAID 1 Data mirroring copies and maintains an identical image of data from one drive to a second drive If one drive fails the disk array management software directs all applications to the surviving drive as it contains a complete copy of the da...

Page 127: ...isks into the drive bays 2 Connect the SATA signal cables 3 Connect a SATA power cable to the power connector on each drive 4 4 3 Setting the RAID item in BIOS You must enable the RAID function in the BIOS Setup before creating RAID set s using SATA HDDs To do this 1 Enter the BIOS Setup during POST 2 Go to the Advanced menu SATA Configuration and then press Enter 3 Set the type of the SATA connec...

Page 128: ...enter the option you need press ESC to exit the utility The RAID BIOS setup screens shown in this section are for reference only and may not exactly match the items on your screen To create a RAID volume using more than four hard disk drives ensure that the SATA connectors 5 6 are set to RAID mode Option ROM Utility c 2009 Advanced Micro Devices Inc View Drive Assignments 1 LD View LD Define Menu ...

Page 129: ...ts Port ID Drive Model Capabilities Capacity GB Assignment 01 00 xxxxxxxxx xxxxxxx xxxxxx Y 02 00 xxxxxxxxx xxxxxxx xxxxxx Y 03 00 xxxxxxxxx xxxxxxx xxxxxx N 04 00 xxxxxxxxx xxxxxxx xxxxxx N LD No LD Name RAID Mode Drv LD 1 Logical Drive 1 RAID 0 2 Strip Block 64 KB Fast Init ON Gigabyte Boundary ON Cache Mode WriteThru Please press Ctrl Y key to input the LD Name or press any key to exit If you d...

Page 130: ...AID 0 2 xxxxxx Functional Displaying a RAID set information To display a RAID set information 1 In the Main Menu press 2 to enter the LD View LD Define Menu function 2 Select a RAID item and press Enter to display its information Option ROM Utility c 2009 Advanced Micro Devices Inc Any Key To Continue View LD Defination Menu Drives Assignments Port ID Drive Model Capabilities Capacity GB 01 00 xxx...

Page 131: ...rive as the primary boot device 4 Insert the support DVD into the optical drive 5 Save changes and exit BIOS 6 When the Make Disk menu appears press 1 to create a RAID driver disk 7 Insert a formatted floppy disk into the USB floppy disk drive then press Enter 8 Follow the succeeding screen instructions to complete the process 4 5 2 Creating a RAID driver disk in Windows To create a RAID driver di...

Page 132: ...ons to complete the installation To install the RAID driver for Windows Vista or later OS 1 During the OS installation click Load Driver to allow you to select the installation media containing the RAID driver 2 Insert the USB flash drive with RAID driver into the USB port or the support DVD into the optical drive and then click Browse 3 Click the name of the device you ve inserted go to Drivers R...

Page 133: ...equired by your system See Chapter 2 for details 5 1 2 Before you begin For AMD CrossFireX to work properly you have to uninstall all existing graphics card drivers before installing AMD CrossFireX graphics cards to your system To uninstall existing graphics card drivers 1 Close all current applications 2 For Windows XP go to Control Panel Add Remove Programs For Windows 8 Windows 7 Vista go to Co...

Page 134: ...two CrossFireX graphics cards The following pictures are for reference only The graphics cards and the motherboard layout may vary with models but the installation steps remain the same 1 Prepare two CrossFireX ready graphics cards 2 Insert the two graphics card into the PCIEX16 slots If your motherboard has more than two PCIEX16 slots refer to Chapter 2 in this user manual for the locations of th...

Page 135: ...chnology Download the latest driver from the AMD website www amd com 5 1 5 Enabling the AMD CrossFireX technology After installing your graphics cards and the device drivers enable the CrossFireX feature through the AMD VISION Engine Control Center in Windows environment Launching the AMD VISION Engine Control Center To launch the AMD VISION Engine Control Center Right click on the Windows desktop...

Page 136: ...nabling Dual CrossFireX technology 1 In the AMD VISION Engine Control Center window click Performance AMD CrossFireXTM 2 Select Enable CrossFireXTM 3 Select a GPU combination from the drop down list 4 Click Apply to save and activate the GPU settings made 2 3 4 ...

Page 137: ...the BIOS Setup utility 2 Go to Advanced NB configuration IGFX Multi Monitor set IGFX Multi Monitor to Enabled 3 Press F10 to save the changes and exit BIOS settings Select OK to confirm 5 2 3 Installing AMD Graphics Driver To install the driver that supports Dual Graphics technology 1 Insert the Support DVD that comes with your motherboard into the optical drive The DVD automatically displays the ...

Page 138: ...want to set the onboard graphics card as your main monitor follow the instructions below 1 Right click on the Windows desktop and select AMD VISION Engine Control Center 2 In the AMD VISION Engine Control Center window click Performance AMD Radeon Dual Graphics then select Disable AMD Radeon Dual Graphics Click Apply 3 From the next screen select the desktop you want to configure from the drop dow...

Page 139: ...ifferent from that to which the receiver is connected Consult the dealer or an experienced radio TV technician for help The use of shielded cables for connection of the monitor to the graphics card is required to assure compliance with FCC regulations Changes or modifications to this unit not expressly approved by the party responsible for compliance could void the user s authority to operate this...

Page 140: ...heck local regulations for disposal of electronic products DO NOT throw the mercury containing button cell battery in municipal waste This symbol of the crossed out wheeled bin indicates that the battery should not be placed in municipal waste REACH Complying with the REACH Registration Evaluation Authorisation and Restriction of Chemicals regulatory framework we published the chemical substances ...

Page 141: ...mont CA 94539 USA Telephone 1 812 282 3777 Fax 1 510 608 4555 Web site usa asus com Technical Support Telephone 1 812 282 2787 Support fax 1 812 284 0883 Online support support asus com ASUS COMPUTER GmbH Germany and Austria Address Harkort Str 21 23 D 40880 Ratingen Germany Fax 49 2102 959911 Web site www asus de Online contact www asus de sales Technical Support Telephone 49 1805 010923 Support ...

Page 142: ... 301 489 24 V1 5 1 2010 09 EN 302 326 2 V1 2 2 2007 06 EN 302 326 3 V1 3 1 2007 09 EN 301 357 2 V1 4 1 2008 11 EN 302 291 1 V1 1 1 2005 07 EN 302 291 2 V1 1 1 2005 07 2006 95 EC LVD Directive EN 60950 1 A12 2011 EN 60065 2002 A12 2011 2009 125 EC ErP Directive Regulation EC No 1275 2008 Regulation EC No 642 2009 Regulation EC No 278 2009 2011 65 EU RoHS Directive Ver 130208 CE marking Declaration ...

Reviews: