Chapter 2: Hardware Information
2-20
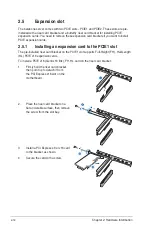
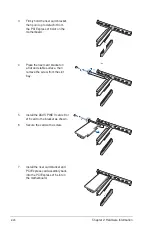
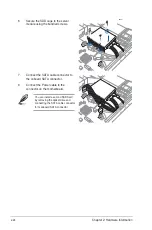
4.
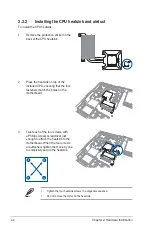
Place the riser card bracket on
a flat and stable surface, then
remove the screw from the slot
bay.
3.
Firmly hold the riser card bracket,
then pull it up to detach it from
the PCI Express x16 slot on the
motherboard.
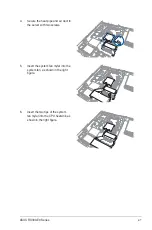
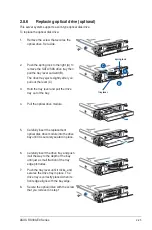
5.
Install the ASUS PIKE II card x8 or
x16 card to the bracket as shown.
6.
Secure the card with a screw.
2
5
Q-Code
1
Q-Code
1
2
5
Q-Code
1
Q-Code
1
2
5
Q-Code
1
Q-Code
1
2
5
Q-Code
1
Q-Code
1
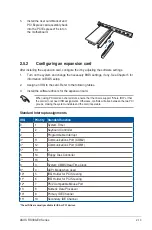
7.
Install the riser card bracket and
PCI Express card assembly back
into the PCI Express x16 slot on
the motherboard.
Summary of Contents for 90SV038A-M34CE0
Page 1: ...1U Rackmount Server RS300 E9 PS4 RS300 E9 RS4 User Guide ...
Page 22: ...Chapter 1 Product Introduction 1 10 ...
Page 48: ...Chapter 2 Hardware Information 2 26 ...
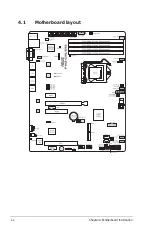
Page 54: ...Chapter 4 Motherboard Information 4 2 4 1 Motherboard layout ...
Page 97: ...5 19 ASUS RS300 E9 Series Intel Server Platform Services Intel TXT Information ...
Page 146: ...6 18 Chapter 6 RAID Configuration ...
Page 157: ...ASUS RS300 E9 Series 7 11 8 Press Restart Now to complete the setup process ...
Page 163: ...Appendix A Appendix ...
Page 164: ...A 2 Appendix P10S C 4L SYS block diagram ...
Page 168: ...A 6 Appendix ...

