background image

Programming with the KC 3

Operating Instructions V 112 - 

Version 07-2009A

Page 16 

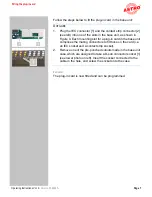
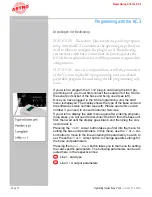
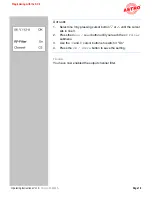
Selecting the slot

A

UFGABE

1.

 line 1 by pressing cursor button 

 or 

 until the cursor sits in 

line 1.

2.

Press cursor button 

 or 

, until the display shows the slot and 

particular channel you require (the example on the left is for slot 
6, channel A).

E

RGEBNIS

:

You have now selected the slot for the card and the channel you 
wish to configure. Once you have made all the remaining settings 
for this channel, you need to configure the other channel by repea-
ting the entire procedure described below.

Input parameters

HINWEIS

:  

The input parameters can only be set using the 

HE programming software (see the section "Programming 
with the HE programming software").

Specifying the output parameters

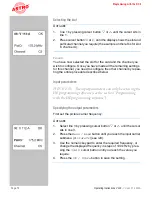
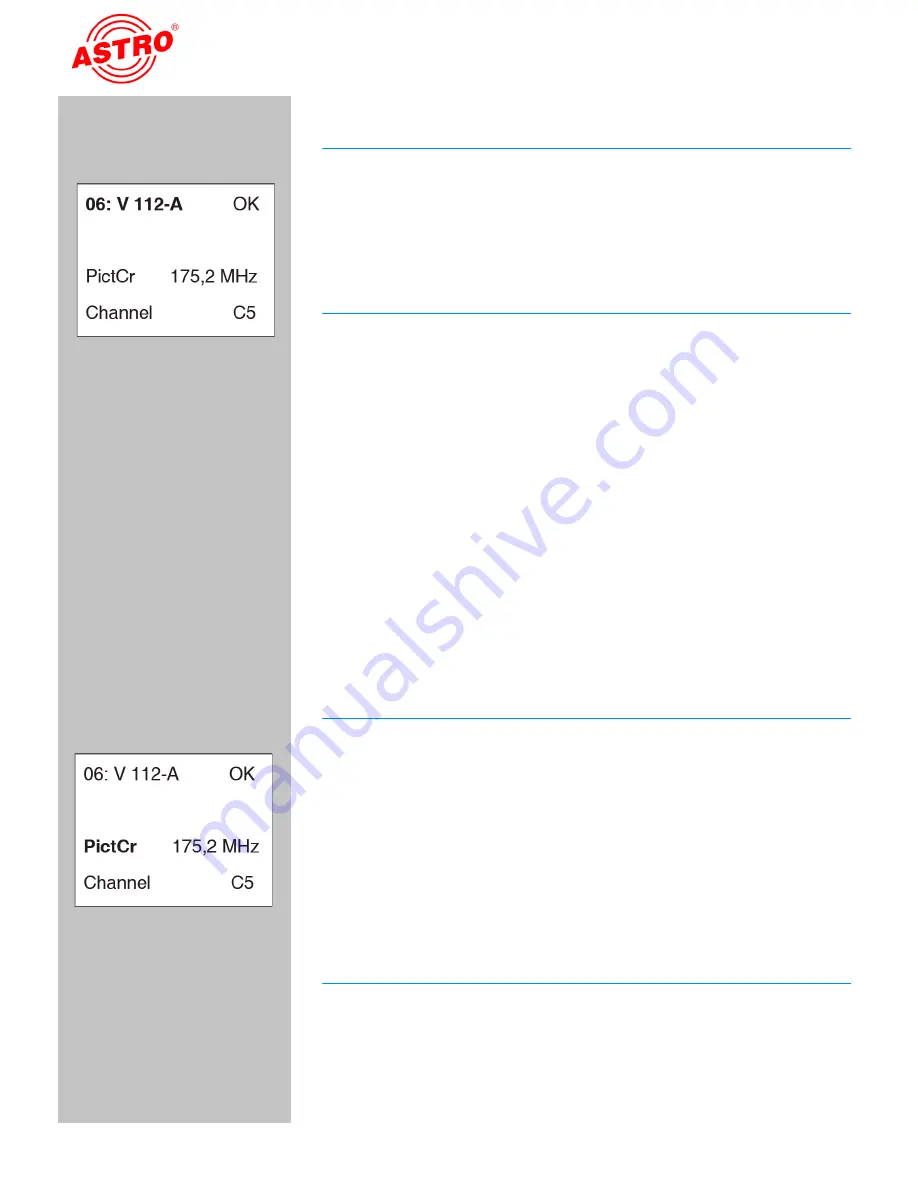
First set the picture carrier frequency:

A

UFGABE

1.

Select line 3 by pressing cursor button 

 or 

 until the cursor 

sits in line 3.

2.

Press the 

Menu / Read

 button until you reach the input carrier 

submenu (

PictureCr

) (see left).

3.

Use the numeric keypad to enter the required frequency, or 
change the displayed frequency in steps of 100 kHz by pres-
sing the 

 or 

 cursor button until you reach the value you 

require.

4.

Press the 

OK / Store

 button to save the setting.

Summary of Contents for V 112

Page 1: ...Version 07 2009A ...

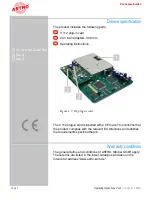
Page 2: ...put channel filter 2 Input A 3 Input B Figure 1 V 112 plug in card C The V 112 plug in card is labelled with a CE mark This confirms that the product complies with the relevant EC directives and satisfies the requirements specified therein Warranty conditions The general terms and conditions of ASTRO Strobel GmbH apply These terms are listed in the latest catalogue and also on the Internet at addr...

Page 3: ...able output chan nels can be set in the frequency range 47 862 MHz the output levels of each plug in card can be adjusted electro nically to the same level using the KC3 external programming unit or the HE programming software the input level can be adjusted using the HE programming software electronic level adjustment for the output signal excellent signal quality even after combining thanks to c...

Page 4: ...before using the unit and keep them for future use Follow the instructions below to ensure best possible protection from immediate danger The unit must only be installed and operated by experts as specified in EN 60065 or by persons who have been instructed by experts Servicing must only be performed by qualified service personnel The hazard and safety information given in the operating instructio...

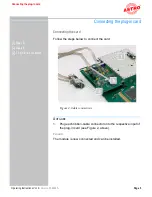
Page 5: ...card Connecting the card Follow the steps below to connect the card 1 Input B 2 Input A 3 15 pin D sub connector Figure 2 Cable connections AUFGABE 1 Plug each ribbon cable connector onto the respective input of the plug in card see Figure 2 above ERGEBNIS The module is now connected and can be installed ...

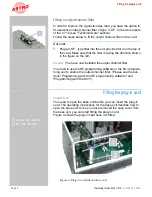
Page 6: ...e figure on the left ERGEBNIS You have now installed the output channel filter You need to use the HE programming software or the KC3 program ming unit to enable the output channel filter Please see the sec tions Programming with the HE programming software and Programming with the KC3 Fitting the plug in card VORBEREITUNG You need to open the base unit before you can insert the plug in card The o...

Page 7: ...wn in Figure 4 Each mounting slot for a plug in card in the base unit comprises the mating connectors to fit those on the card i e an IEC socket and a contact strip socket 2 Remove one of the pre punched cutouts made in the base unit case which are designed to take a D sub connector socket 1 see lower photo on left Insert the socket connected to the cable in the hole and screw the socket onto the ...

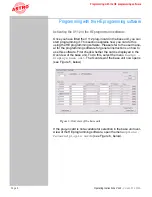
Page 8: ...he HE programming software Please refer to the user manu al for the programming software for general instructions on how to use this software First check whether the card is displayed in the Overview of the base unit To do this select the menu Design Displays base unit The Overview of the base unit now opens see Figure 5 below Figure 5 Overview of the base unit If the plug in card is not available...

Page 9: ... not the case click on the checkbox to activate the card ERGEBNIS The plug in card is now activated If you click on the Read button see left in the Overview the V 112 plug in card is now shown in the slot being used Specifying the input parameters and baseband parameters In order to be able to specify the input parameters and baseband parameters you first need to open the detailed settings for the...

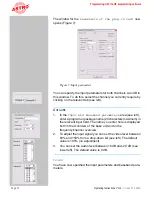
Page 10: ...GABE 1 In the Input and baseband parameters area see left enter a program or package name 20 characters maximum in the relevant input field The name you enter here is displayed both in the Overview of the base unit and in the frequency channel overview 2 To adjust the input signal you can set the video level between 80 and 150 from a drop down list see left The default value is 100 no adjustment 3...

Page 11: ... or removing a check mark in the relevant checkbox 3 If you have installed the optional output channel filter in the V 112 you must select Yes from the RF channel filter drop down list 4 Use the audio mode drop down list to set the audio mode see left You have the following options available Mono Stereo Dual L R and Dual R L 5 You can apply the configuration changes to the plug in card by clicking...

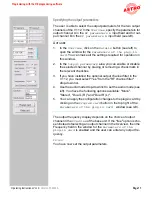
Page 12: ...w to set the audio standard AUFGABE 1 Select in the top left corner one of the options N2 NICAM or NICAM I by enabling the relevant button 2 Select the picture audio carrier spacings for the 1st and 2nd sound carriers from the respective drop down list see left 3 Enter the sound carrier level for channels A and B in the input fields for the 1st and 2nd sound carrier for each channel 4 You can appl...

Page 13: ...e 9 be low Figure 9 Adjusting the output level Follow the steps below to adjust the output level for the card AUFGABE 1 Click on the Parameter read button to display the values that currently exist see left 2 Adjust the output level for channels A and B by selecting the value you require from the drop down list between 5 dB and 15 5 dB see left 3 Calibrate channels A and B by entering an RF offset...

Page 14: ... the base unit being used see left Once you have plugged in the KC3 programming unit the start menu is displayed The display shows the type of the base unit and the software version number see left Please quote this version number if you need to consult Customer Services If you wish to display the start menu again after entering program ming steps you will need to disconnect the KC3 from the base ...

Page 15: ...g in card in detail Setting the base unit bus address If several base units are connected together you must make sure that all connected base units are set to different bus addresses in order to avoid conflicts on the ASTRO bus The base units are de livered with the address preset to 241 Follow the steps below to set the bus address for the base unit AUFGABE 1 After plugging in the connector from ...

Page 16: ...other channel by repea ting the entire procedure described below Input parameters HINWEIS The input parameters can only be set using the HE programming software see the section Programming with the HE programming software Specifying the output parameters First set the picture carrier frequency AUFGABE 1 Select line 3 by pressing cursor button or until the cursor sits in line 3 2 Press the Menu Rea...

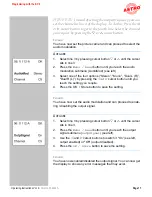
Page 17: ...menu AudioMod see left 3 Select one of the four options Stereo Mono Dual L R Dual R L by pressing the or cursor button until you reach the setting you require 4 Press the OK Store button to save the setting ERGEBNIS You have now set the audio modulation and can proceed to enab ling disabling the output signal AUFGABE 1 Select line 3 by pressing cursor button or until the cursor sits in line 3 2 Pr...

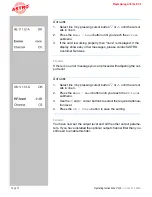
Page 18: ...stomer Services ERGEBNIS If there is no error message you can proceed with adjusting the out put level AUFGABE 1 Select line 3 by pressing cursor button or until the cursor sits in line 3 2 Press the Menu Read button until you reach the RF level submenu 3 Use the and cursor buttons to select the required attenua tion level 4 Press the OK Store button to save the setting ERGEBNIS You have now set t...

Page 19: ... Select line 3 by pressing cursor button or until the cursor sits in line 3 2 Press the Menu Read button until you reach the RF filter submenu 3 Use the and cursor buttons to switch it On 4 Press the OK Store button to save the setting ERGEBNIS You have now enabled the output channel filter ...

Page 20: ...Quick reference guide to programming with the KC3 Operating Instructions V 112 Version 07 2009A Page 20 Quick reference guide to programming with the KC3 ...

Page 21: ...Quick reference guide to programming with the KC3 Page 21 Operating Instructions V 112 Version 07 2009A ...

Page 22: ...ve not been open circuited or short circuited If you are unable to correct the problem please contact ASTRO Customer Services Servicing and repair Provided all the directions given in these operating instructions are followed and the device is used in accordance with its intended purpose then no special servicing is required HINWEIS BIf repairs are carried out the regulations in standard DIN VDE 0...

Page 23: ...0 100 Intermodulation distance dB typ 60 Return loss dB 10 Spurious frequency distance dB typ 60 TV standard PAL SECAM B G D SECAM L A2 NICAM Video signal to noise ratio dB typ 60 Audio Video Input 15 pin SUB D jack per jack 2 A V input signals Audio Input level V RMS 0 5 600 Ω Frequency range Hz 40 15000 Signal to noise ratio dB typ 45 Video Bandwidth 25 Hz 4 8 MHz Input level Vss 1 75 Ω Common D...

Page 24: ...lly or in full without prior agreement of the ASTRO company These operating instructions have been written by ASTRO Strobel Kommunikationssysteme GmbH Olefant 1 3 D 51427 Bergisch Gladbach Bensberg Tel 02204 405 0 Fax 02204 405 10 eMail kontakt astro kom de Internet www astro kom de All the information contained in this document has been checked in good faith The ASTRO company cannot be held liabl...

Reviews: