background image

18

In live screen, if 

 button of the remote controller or front panel is pressed, or if the mouse 

cursor is placed over the end of the top area, the top menu is appeared. 
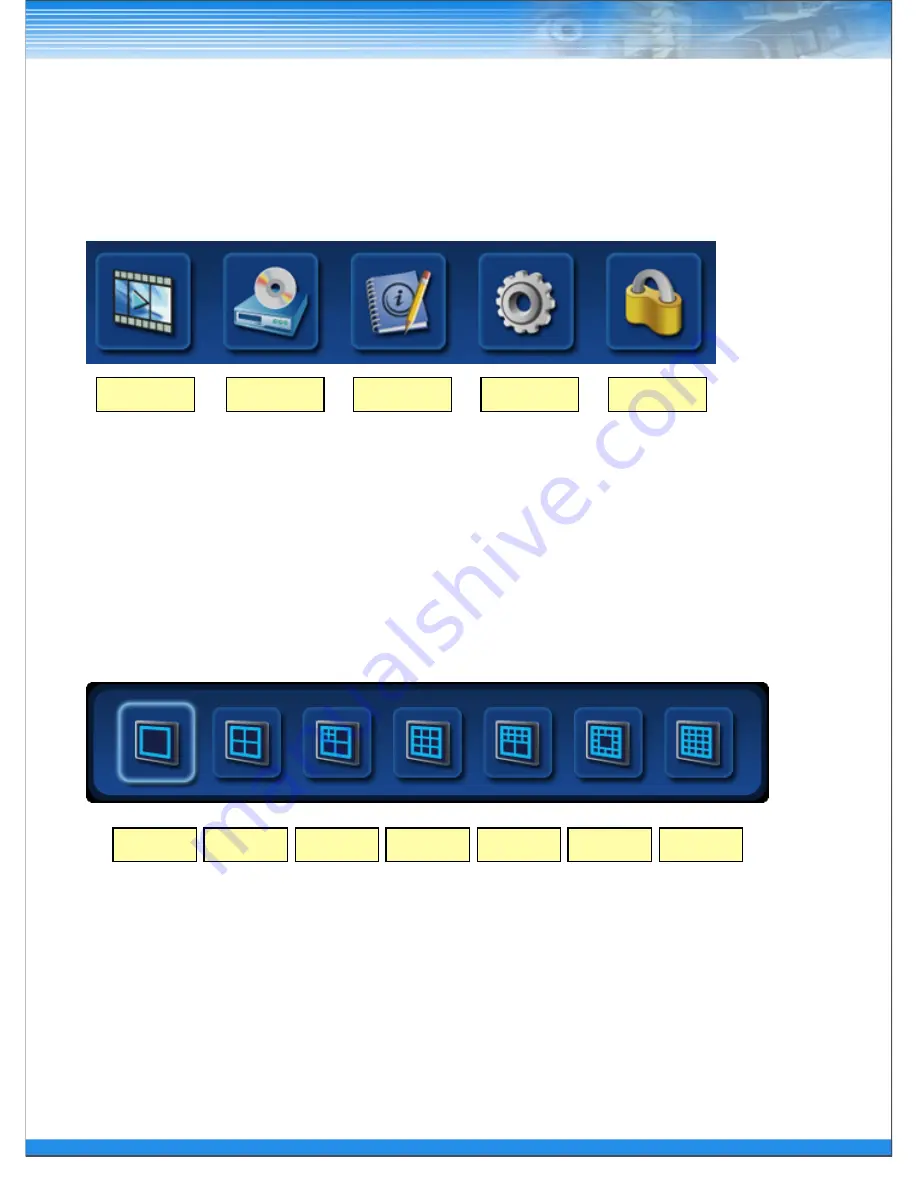
Search

7

10

13

16

4.1.1 Top Menu

Backup

Status

Setup

Log-out

In Live screen, if 

 button of the remote controller or front panel is pressed, or if the mouse cursor is placed 

over the end of the bottom area, the bottom menu is appeared. 

4.1.2 Bottom Menu

Wednesday, February 29, 12

Summary of Contents for DT-1600

Page 1: ...DT MT Series Digital Video Recorder Manual Rev 3 DT 1600 DT 800 MT 1600 MT 800 MT 400 Wednesday February 29 12 ...

Page 2: ...ONABLE PROTECTION AGAINST HARMFUL INTERFERENCE WHEN THE EQUIPMENT IS OPERATED IN A COMMERCIAL ENVIRONMENT THIS EQUIPMENT GENERATES USES AND CAN RADIATE RADIO FREQUENCY ENERGEY AND IF NOT INSTALLED AND USED IN ACCORDANCE WITH THE INSTRUCTION MANUAL MAY CAUSE HARMFUL INTERFERENCE TO RADIO COMMUNICATIONS OPERATION OF THIS EQUIPMENT IN A RESIDENTIAL AREA IS LIKELY TO CAUSE HARMFUL INTERFERENCE IN WHIC...

Page 3: ...ly by following the operating instructions adjust only those controls that are covered by the operating instructions as an improper adjustment of other controls may result in damage and will often require extensive work by a qualified technician to restore the equipment to its normal operation E If the equipment has been dropped or the cabinet damaged F When the equipment exhibits a distinct chang...

Page 4: ...T Series 3 2 2 MT Series 3 2 2 MT Series 3 2 2 MT Series 3 2 2 MT Series 3 2 2 MT Series 14 3 3 Remote Controller 3 3 Remote Controller 3 3 Remote Controller 3 3 Remote Controller 3 3 Remote Controller 3 3 Remote Controller 3 3 Remote Controller 3 3 Remote Controller 15 4 LIVE 4 LIVE 4 LIVE 16 4 1 Live Screen 4 1 Live Screen 4 1 Live Screen 4 1 Live Screen 4 1 Live Screen 4 1 Live Screen 16 4 1 1 ...

Page 5: ...RD SETUP 5 4 RECORD SETUP 5 4 RECORD SETUP 5 4 RECORD SETUP 5 4 RECORD SETUP 5 4 RECORD SETUP 48 5 4 1 RESOLUTION 5 4 1 RESOLUTION 5 4 1 RESOLUTION 5 4 1 RESOLUTION 5 4 1 RESOLUTION 5 4 1 RESOLUTION 48 5 4 2 SCHEDULE 5 4 2 SCHEDULE 5 4 2 SCHEDULE 5 4 2 SCHEDULE 5 4 2 SCHEDULE 49 5 4 3 RECORD 5 4 3 RECORD 5 4 3 RECORD 5 4 3 RECORD 50 5 4 4 AUDIO 5 4 4 AUDIO 5 4 4 AUDIO 51 5 4 5 MANUAL 5 4 5 MANUAL ...

Page 6: ...up data 7 1 Play with backup data 7 1 Play with backup data 7 1 Play with backup data 7 1 Play with backup data 7 1 Play with backup data 7 1 Play with backup data 7 1 Play with backup data 7 1 Play with backup data 71 8 APPENDIX 8 APPENDIX 8 APPENDIX 8 APPENDIX 72 8 1 Firmware Upgrade 8 1 Firmware Upgrade 8 1 Firmware Upgrade 8 1 Firmware Upgrade 8 1 Firmware Upgrade 8 1 Firmware Upgrade 72 8 2 W...

Page 7: ...not install the product near heating devices It may cause fire Do not place the power cord near heating devices The exterior of the cord may peeled off causing electric shock or fire Do not install the product in a place where a large amount of oil smoke or moisture exists Do not install the product in a vehicle or a place where water is splashed It may cause electric shock or fire Do not place th...

Page 8: ...pair is required contact the reseller Failure to follow this instruction may cause electric shock or fire 1 3 Cleaning and Usage related Unplug the power plug during lightning thunderstorm or when not in use for long periods of time It may cause electric shock or fire When taking the battery out from the remote control keep them away from children to prevent from swallowing incidents Keep the batt...

Page 9: ...posite input ports depending on model 4 8 16 Support IP camera input DT series Various Recording mode Manual Schedule Event Various Search functions Date Hour search Calendar search Event Search Various Playback functions Normal Fast Slow Step Reverse Smart Panorama Repeat Overwrite Recording function The DVR menu structure and on screen display is presented in a simple to use and logical GUI form...

Page 10: ... Organization SMS CAMERA IP Camera PTZ KEYBOARD MAIN SPOT MONITOR MIC SIREN SENSOR SPEAKER PTZ LCD VGA MONITOR Video out Network Video input Audio Input Audio Output Sensors Input Alarm Out Wednesday February 29 12 ...

Page 11: ... Pause Front LED Recording LED Recording LED is turned on when DVR is recording Network LED Network LED is turned on when DVR is connected by network Enter button Memory stick PS 2 Mouse LED IP Camera E SATA Only DT series Direction Key Panorama playback Direction Key Smart playback Remote controller IR Number button Fast reverse play button PTZ Fast play button REPLAY Status window Buzzer Lock Re...

Page 12: ...utton Enter Setup menu User need to Admin access permission Return to previous screen if this button is pressed again ESC button Exit current screen or return to previous screen ROTATE button Preset Display next channel if this button is pressed In PTZ mode It is used Preset function button BACKUP button Zoom Enter Backup menu Return to previous screen if this button is pressed again In PTZ mode i...

Page 13: ... Event recording Otherwise if user try to playback with Smart search the screen is returned to live mode ENTER button Execute the selected button or save the setup value FAST REVERSE PLAY button PTZ Playback with fast reverse Playback speed is changed if this button is pressed repeatedly In PTZ mode it is used to Zoom out function button In live mode switch to PTZ mode by this button FAST FORWARD ...

Page 14: ...Input 16 Loop out RS 232 RS 485 Power On off Switch AC Inlet 4 Alarm out 16 Audio in 1 Audio out 16 Sensor Input HDMI Monitor VGA out 1 x e SATA IP camera Input Option Network 1 2 3 6 4 5 7 8 9 10 11 12 13 14 15 2 3 4 5 6 7 8 9 10 11 12 13 14 15 1 Wednesday February 29 12 ...

Page 15: ...S 232 1 Main out 2 Spot out 2 3 4 7 8 9 12 13 1 11 5 6 Analog camera Input 16 Loop out AC Inlet 1 3 8 4 2 9 16 Sensor Input 13 VGA out Option 11 Network 10 Audio In Out 6 HDMI Monitor 12 10 PTZ RS 485 5 4 Alarm out 7 Wednesday February 29 12 ...

Page 16: ...s the first digit Example If the unit address is 1 the input value is 01 A single remote controller can change ID from 0 to 19 and independently control up to 20 DVRs ID RECOR D ROTATE DISPLA Y MENU ESC LOCK LOG OUT REPEAT NUMBE R PTZ PRESET PTZ IRIS Direction Key Panorama Play ENTE R Direction Key Smart Play Direction Key Play Fast Reverse Play PTZ Fast Forward Play PLAY Direction Key Reverse Pla...

Page 17: ...o Icon When sound is generated in live mode Freeze Icon When live is paused Sequence Icon When screen is rotated continuously Record Status Icon Camera Name Screen Expand Reduction Window Current Event Information Icon Backup Progress Status Live Screen Sequence Icon PTZ Control Information Current Channel Information Icon Current Date and Time Execution Information Message 4 1 Live Screen Wednesd...

Page 18: ...end of the top area the top menu is appeared Search 1 4 7 9 10 13 16 4 1 1 Top Menu Backup Status Setup Log out In Live screen if button of the remote controller or front panel is pressed or if the mouse cursor is placed over the end of the bottom area the bottom menu is appeared 4 1 2 Bottom Menu Wednesday February 29 12 ...

Page 19: ...will be appeared 4 1 3 CAMEO Menu CAMEO CHANGE The live camera can be changed to the selected channel If the camera number is selected at the pop up menu shown below the camera is changed to the selected channel FREEZE Live screen of the selected channel can be paused FREEZE ALL Live screen of the all channels can be paused SEQUENCE Live screen is rotated Wednesday February 29 12 ...

Page 20: ... ENTER button on PTZ Camera channel Press the ENTER button again then the CAMEO menu will be appeared Select PTZ menu on the Live CAMEO menu Press the ENTER button again the above PTZ menu screen will be appeared Zoom Control In PTZ mode press the Zoom Back button Zoom in Fast reverse play button Zoom out The fast forward play button Focus Control In PTZ mode press the Focus Search button Fast rev...

Page 21: ...d If the created preset lists are set to ON recording is made with preset tour PATTERN SETUP Pattern can be created by movement zoom focus and iris After pressing the BEGIN button adjust the PTZ camera position or zoom and then press the END button All directions up down left and right zoom and iris settings are recorded PATTERN TOUR PTZ camera moves according to the saved pattern AUTO FOCUS POWER...

Page 22: ...ETUP menu After select the menu the following Log in window will be appeared Enter the password by the key buttons and press the ENTER button The default password 1111 5 1 GENERAL SETUP Select the GENERAL menu In this category there are General Alarm Disk Monitor Account Configuration setup and Shutdown Wednesday February 29 12 ...

Page 23: ...A NO Set the beginning number of camera If set this value to 17 the camera number start with 17 MENU TIMEOUT Keep the Menu screen for this value then escape from Menu PLAYBACK PROTECT Prohibit the playback of passed data Select 0 to 99 days If set 3 days can not playback the data that elapsed 3 days BACKUP CONFIRM Confirm the backup process Log in process HDD OVERWRITE Select on off to overwrite d...

Page 24: ...Display date on live screen or not DATE TIME Change date and time NTP Select the usage of NTP setting DVR time is synchronized with NTP server and get the standard time The default server is pool ntp org and User can input other server Sync now Synchronize immediately Auto Sync Synchronize every day automatically HOLIDAY Add or delete holiday 5 1 1 GENERAL Wednesday February 29 12 ...

Page 25: ...Press the SET button then alarm device will be operated ALARM CLEAR TEST Press the CLEAR button then alarm device will not be operated INSTALL Display initial HDD install and information NOTE When install HDD first time after install HDD should format by the INSTALL button 5 1 2 ALARM OUT 5 1 3 DISK Wednesday February 29 12 ...

Page 26: ...ATEST RECORD Display the latest recorded data information DISK CHECK Check the data from the earliest recorded to the latest recorded MOUSE RESET Reset the mouse connection USB RESET Reset the USB connection USB FORMAT Format the connected USB 5 1 3 DISK Wednesday February 29 12 ...

Page 27: ...r RAID If hard disk brand or model is different Disk error can be happened RAID This function for only DT series RAID SETUP Select the RAID level RAID0 RAID1 and RAID5 RAID Display RAID on off status DISK STATUS Display disk status RAID STATUS Display RAID status RATE Display process rate Wednesday February 29 12 ...

Page 28: ...d Rebooting for RAID booting time is longer than normal About 5 minutes WARNING When RAID is built all data of HDD will be deleted If data is saved on HDD backup the data After build RAID the type will be changed to RAID and recognize to 1 HDD Supported RAID level is 0 1 5 Wednesday February 29 12 ...

Page 29: ...inutes Displayed with GOOD if the building is finished without any problem RAID 1 For building RAID Level 1 building time depends on the HDD capacity In case of 1TB HDD it will take 24 48 hours Check the status on RAID STATUS and RATE Wednesday February 29 12 ...

Page 30: ...30 RAID 5 For building RAID Level 1 building time depends on the HDD capacity In case of 1TB HDD it will take 24 48 hours Check the status on RAID STATUS and RATE Wednesday February 29 12 ...

Page 31: ...x the screen by connected monitor OSG OUT Select the monitor for menu scree to display BORDER COLOR Change the border color ALPHA BLENDING Set the transparency of menu Set 1 to 20 and 20 is closer to the more transparent RESOLUTION selected screen ALPHA BLENDING selected screen 5 1 4 MONITOR Wednesday February 29 12 ...

Page 32: ...OTE Default ADMIN password is 1111 Initial user name can be modified but can not delete CAUTION Default Admin account must not be deleted before add new user If delete default Admin user before add new Admin user can not access on SETUP menu By the PERM menu can give permission to each ID 5 1 5 ACCOUNT Wednesday February 29 12 ...

Page 33: ...tting DATE Display the latest saved date LOAD Load the saved data SAVE Save the set data DEL Delete the saved data on Slot EXPORT Export the set data to USB or DVD IMPORT Import the set data to USB or DVD DEFAULT selected screen EXPORT selected screen 5 1 6 CONFIG Wednesday February 29 12 ...

Page 34: ...34 RESTART Restart the DVR SHUTDOWN Shutdown the DVR 5 1 7 SHUTDOWN Wednesday February 29 12 ...

Page 35: ...appeared INSTALL Select On Off button to use camera HIDDEN Select On Off button to hide camera on live view Record operate correctly NOTE If select INSTALL OFF Camera name and number are not displayed 35 In this category there are Camera PTZ Spot Sequence and Private Zone setting 5 2 1 CAMERA 5 2 CAMERA SETUP Select the CAMERA Menu Wednesday February 29 12 ...

Page 36: ...T Select the Baud Rate for using PTZ camera ID Select the ID for using PTZ camera TYPE Show the PTZ protocol list NOTE baud rate data bit parity stop bit ID and protocol depend on PTZ camera for using CAUTION When connect the camera on the RS 485 port refer to the manual of camera manufacture 5 2 1 CAMERA 5 2 2 PTZ Wednesday February 29 12 ...

Page 37: ...EQUENCE Select On Off for sequence screen INTERVAL Select the interval time to move next channel The max value is 256 sec POPUP Select On Off for pop up screen when event is occurred NOTE Same channel image can not be displayed on each spot monitor CAMERA selection screen INTERVAL selection screen 5 2 3 SPOT Wednesday February 29 12 ...

Page 38: ...time for CAMEO sequence NOTE CAMEO sequence means selected camera is rotated in select cameo of division screen Camera image which is shown on the other CAMEO of division screen is not included in CAMEO sequence DWELL TIME selected screen CAMERA SELECT 선택화면 5 2 4 SEQUENCE Wednesday February 29 12 ...

Page 39: ...cation and press the OK button Drag and move it to include the desired area and press the OK button As a result the area is covered and hidden with the selected color TIP On the screen if click the right button of mouse a menu will be appeared Using this menu a selected area can be delete or saved or returned previous menu ZONE selected screen Mouse right button selected screen 5 2 5 PRIVATE ZONE ...

Page 40: ...amera manual URL Input the URL for RTSP by the IP camera model REC Select on off for recording If set to OFF can not see live image and also recorded image on the remote software NOTICE IP camera live image is shown only by the remote software IP camera live image can not be shown in DVR live screen Virtual Keyboard Wednesday February 29 12 ...

Page 41: ...ESS Input the IP address that it should be same network class SUBNET MASK Input the subnet mask NOTICE IP Address should be inputted same IP class as IP camera EX If IP camera address is 192 168 0 1 4 IP address of ETHERNET2 should be 192 168 0 xxx Wednesday February 29 12 ...

Page 42: ...tion trigger Select 1 to 5 level AREA Select the motion area TIP If select the ACTIVE LEVEL AREA menu can change all settings at once In this menu there are Motion Alarm in Video Loss System and Display setup 5 3 EVENT SETUP Select the EVENT menu 5 3 1 MOTION Wednesday February 29 12 ...

Page 43: ...E When the status is Red square can move any direction to select When the status is Green color can select motion area or cancel the set area After set the motion area if select the MENU button the following screen will be appeared SELECT ALL Select all motion area CLEAR ALL Clear all motion area SAVE Save the changed setting CLOSE Close the pop up screen EXIT Exit the motion area setup Wednesday ...

Page 44: ...ER Select On Off for buzzer PRESET Set the preset number When motion is triggered the PTZ camera move to the set preset number position E MAIL Select On Off for e mail notification TIP If select to the DEFAULT only record the channel which is occurred event Wednesday February 29 12 ...

Page 45: ...If select the ACTIVE TYPE menu can change all settings at once ACTION RECORD Select the channel for record ALARM Select On Off for alarm BUZZER Select On Off for buzzer PRESET Set the preset number When motion is triggered the PTZ camera move to the set preset number position E MAIL Select On Off for e mail notification Wednesday February 29 12 ...

Page 46: ...e all setting at once ACTION RECORD Select On Off for record ALARM Select On Off for alarm BUZZER Select On Off for buzzer PRESET Set the preset number When motion is triggered the PTZ camera move to the set preset number position E MAIL Select On Off for e mail notification Wednesday February 29 12 ...

Page 47: ... the warning temperature C 0 to 100 F 32 to 212 DISK FULL WARNING Select On Off to disk full warning USED SPACE Display the used space ALARM Select the channel for alarm out BUZZER Select On Off for buzzer MESSAGE Select On Off for message 5 3 4 SYSTEM MAIL Select option On Off for e mail notification POWER MENU LOGIN FAIL DISK FULL LOG IN SMART Wednesday February 29 12 ...

Page 48: ...48 DISPLAY Select display time by second Select 0 to 100 EVENT MESSAGE Select On Off to display event message EVENT POPUP Select On Off to pop up 5 3 5 DISPLAY Wednesday February 29 12 ...

Page 49: ...In this menu there are Resolution Schedule Record Audio Manual Filter setup Select the RECORD menu 5 4 1 RESOLUTION RESOLUTION Select the resolution by each channel STD CIF HIGH Half D1 HIGHEST D1 Wednesday February 29 12 ...

Page 50: ...KEND Set the weekend zone CUSTOM selected screen CUSTOM Set 3 different recording setup by day and time REC0 REC1 REC2 This is related with RECORD menu so CUSTOM mode should be matched with RECORD menu TIP For REC0 REC1 REC2 recording change the setting SETUP MODE to TYPICAL and enter to the RECORD menu then change the setting 5 4 2 SCHEDULE Wednesday February 29 12 ...

Page 51: ...olution Post recording time 5 to 100 second TIP The frame can be set by the direction button in setup screen If set to Typical in SCHEDULE menu the DAY NIGHT WEEKEND menu will be changed to REC0 REC1 REC2 Also set the frame and resolution RECORD screen after select TYPICAL menu 5 4 3 RECORD Wednesday February 29 12 ...

Page 52: ...4 4 AUDIO TIP If select the RECORD menu can change all setting at once 5 4 5 MANUAL SPEED Select the recording frame by each channel Quality Select the resolution by each channel AUDIO Select On Off for audio recording by each channel Wednesday February 29 12 ...

Page 53: ...53 FILTER Select On Off for day and night Although record is set by continuous recording If there is no movement DVR do not record 5 4 6 FILTER Wednesday February 29 12 ...

Page 54: ... OFF DVR get IP address from router automatically HOST NAME Type any Host name IP ADDRESS Type IP address Available when DYNAMIC IP is OFF SUBNET MASK Type Subnet mask Available when DYNAMIC IP is OFF GATEWAY Type Gateway Available when DYNAMIC IP is OFF DNS SERVER Type DNS server Available when DYNAMIC IP is OFF CHECK INTERNET Check internet status for use Wednesday February 29 12 ...

Page 55: ...ESS Input the IP address that it should be same network class SUBNET MASK Input the subnet mask NOTICE IP Address should be inputted same IP class as IP camera EX If IP camera address is 192 168 0 1 4 IP address of ETHERNET2 should be 192 168 0 xxx Wednesday February 29 12 ...

Page 56: ...SS END ADDRESS When select RANGE option type the IP address to accept Input the acceptable IP address SMS PORT TCP Select SMS port WEB PORT TCP Select Web port REMOTE RESTART Select On Off to restart DVR at remote REMOTE CONFIG Select On Off to change configuration Wednesday February 29 12 ...

Page 57: ...ernal device MODEL Select the protocol to use PORT Select the Baud Rate DATA bit Parity Stop Bit RS 485 INPUT SETUP SERIAL TYPE Select external device MODEL Select the protocol to use PORT Select the Baud Rate DATA bit Parity Stop Bit Wednesday February 29 12 ...

Page 58: ... on DDNS server PASSWORD Input the password from the registered on DDNS server ROUTHER IP Select On Off for sending IP information to the DDNS server If use any router this setting should be ON STATUS Check the connection status NOTE For using DDNS server firstly connect the DDNS server and register Host name User name password then input those information on above menu Wednesday February 29 12 ...

Page 59: ...t the E mail address to receive SERVER MAIL SERVER Select the mail server SMTP server DVR System USER NAME Input the user name USER E MAIL Input the user e mail address SERVER ADDRESS Input the server address SERVER PORT Input the server port LOGIN ID Input the Login ID LOGIN PASSWORD Input the Login password Wednesday February 29 12 ...

Page 60: ...60 5 6 SYSTEM SETUP In this menu there are System Log Status Version Select the SYSTEM menu 5 6 1 SYSTEM LOG Check the system log by the left right direction button Wednesday February 29 12 ...

Page 61: ...61 5 6 2 STATUS DISK Display HDD Status CHECK SMART NOW Check the smart SMART INFORMATION Show the smart information RECORD Display RECORD Status Wednesday February 29 12 ...

Page 62: ...62 5 6 2 STATUS AUDIO Display AUDIO Status 5 6 3 VERSION Display DVR version and information Wednesday February 29 12 ...

Page 63: ...s and press the ENTER button The default password 1111 QUICK SEARCH Search by date hour minutes in detail CALENDAR Search by date and time with Calendar EVENT SERARCH Search by event OVERLAPPED LIST Search the overlapped data by changing time GO TO FIRST Search with initial saved data GO TO LAST Search with the latest saved data Wednesday February 29 12 ...

Page 64: ...Search Date Time Backup Progress Repeat Time Information Fast reverse play Reverse play Pause Play Jump to Start Repeat Exit Search mode Play 1 frame forward Execution Information Message Search Screen Recorded Audio Information Icon Fast forward play Division Screen Jump to the End When mouse cursor is placed over on the bottom side the Search menu is appeared 6 1 1 Search Menu Wednesday February...

Page 65: ...orange color 6 1 2 CALENDAR SEARCH b Select the time by the direction button After select hour minutes will be appeared NOTE The time graph color is different by the recording mode Continuous Recording Blue Audio Recording Light Blue Event Recording Red Wednesday February 29 12 ...

Page 66: ... image by selected event 6 1 3 EVENT SEARCH DATA Select Date to search MOTION Select On Off event for search ALARM IN Select On Off event for search VIDEO LOSS Select On Off event for search SELECT CAMERA Select the camera for search VIEW SEARCH LOG Display selected event log Wednesday February 29 12 ...

Page 67: ...LAPPED LIST If user change the time or applied DST Daylight Saving Time there will be overlapped data After select the list if select the PLAY button can search QUICK SEARCH or EVENT SEARCH Wednesday February 29 12 ...

Page 68: ...ANORAMA button By mouse click the right mouse button and click the PANORAMA Search Playback with frame by frame 6 1 6 SMART SEARCH During normal search press the SMART button Find only event and playback automatically without interval Wednesday February 29 12 ...

Page 69: ... the LOCK button When press one time the start position is set press one more time the end position is set By mouse click the below red circle button Only playback the set section repeatedly In search screen display the following mark Wednesday February 29 12 ...

Page 70: ...nu FAST REVERSE When reverse play up and down play speed FAST FORWARD When forward play up and down play speed PAUSE Pause the playback FORWARD PLAY Playback the data REVEERSE PLAY Reverse Play the data DISPLAY Display division screen 1 4 9 16 Remote Controller or Front button Button Explanation in Search mode Wednesday February 29 12 ...

Page 71: ...kup EARLIEST RECORD Display the earliest record LATEST RECORD Display the earliest record REQUIRE SPACE Display the data capacity for selected data WRITE Start the backup On the Top menu select the BACKUP menu After select the menu the following Log in window will be appeared Enter the password by the key buttons and press the ENTER button The default password 1111 Wednesday February 29 12 ...

Page 72: ...72 After backup the DVR Player is copied with data Backup data only can be played on DVR Player at PC Can export to JPEG still shot 7 1 Play with backup data Wednesday February 29 12 ...

Page 73: ...e DVR After restart when upgrade window is appeared select the START button After upgrade remove the USB and select OK button Then DVR is restarted If select OK button without removing USB DVR upgrade is started again after restart After restart DVR can check that upgrade is finished Memory Stick 8 APPENDIX 8 1 Firmware Upgrade Wednesday February 29 12 ...

Page 74: ...r Domain name of DVR http 210 58 xx xx http test ddnsdvr com In case of other Web port input the address as http test ddnsdvr com XXXX XXXX is assigned web port number 3 User Have to allow download ActiveX In case of Windows not allow to download the ActiveX Go to the Security Tab on IE and check all ActiveX to Enable 4 Install the ActiveX 5 Input ID Password then click the Connect button 8 2 Web ...

Page 75: ...75 Division screen Control Brightness control Contrast control PTZ Zoom In Zoom Out ALARM SEARCH Open data Exit Search Connect Disconnect 8 2 1 Web viewer Functions Wednesday February 29 12 ...

Page 76: ...but it is recorded Video is hidden in Live view but it is recorded System Private Zone Block the private zone in live camera view Block the private zone in live camera view System Auto Time Synch By NTP Network Time Protocol By NTP Network Time Protocol System SMART Alarm Auto Detect Monitoring HDD s problem Auto Detect Monitoring HDD s problem Event Source Motion Alarm In Video loss Motion Alarm ...

Page 77: ...Network Time Protocol System Firmware Update Firmware Update Via USB Auto firmware upgrade via Network Via USB Auto firmware upgrade via Network Via USB Auto firmware upgrade via Network Via USB Auto firmware upgrade via Network System SMART Alarm SMART Alarm Auto Detect Monitoring HDD s problem Auto Detect Monitoring HDD s problem Auto Detect Monitoring HDD s problem Auto Detect Monitoring HDD s ...

Page 78: ... is returned factory default Need to backup the configuration before initialize DVR Not work mouse USB mouse should be supported PS 2 Check the PS 2 support Mouse should be connected on port B properly Refer to the Front Panel Configuration Reset the USB Mouse Set on System Manager Not record on DVR If the recording LED does not flicker check the below items HDD should have enough space otherwise ...

Page 79: ... is connected on Audio port Turn on the Audio in the CAMEO menu Select the channel which is connected Audio and turn on CAMEO menu will be appear when click the right button of mouse No sound in search Set to Audio ON If set to OFF sound is not heard during search Although the record icon is lighted if there is no audio input sound is not heard Audio record can be changed Main Menu Record Setup No...

Page 80: ...Wednesday February 29 12 ...

Reviews: