Aseptico AEU-20 Operation And Maintenance Manual Download Page 4

2.

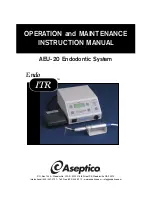
SETTING UP THE UNIT:

1. Unpack the console and check that the unit

is compatible with the voltage from the
power source.  Use the 110V unit for 110-
120V 60Hz voltages, and the 220V unit for
220-250V 50Hz voltages.  For alternative
voltages (220V-250V), confirm that the
type of plug cap is correct for the country
of usage and carries the proper certifica-
tion markings.  The correct cord is shipped
with the console.

2. Attach the remote power cord to the back

of the console and plug into a grounded
electrical receptacle.

3. Connect the M-8 10K motor to the recepta-

cle on the lower front panel of the console.

4. Attach the appropriate “E” Type handpiece

to the motor, i.e. a 1:8 reduction contra
angle.

5. Attach the supplied foot control to the con-

nector on the back of the unit marked
“Foot Switch”.  An On/Off type or a variable
speed type foot control may be used.

MOTOR

NOTE: The hand motor will remain sufficiently cool
during the normal intermittent use (IEC 601 defined
frequency of use) for which it was designed.

“E” TYPE 

HANDPIECE

POWER

CORD

HANDPIECE

CONSOLE

M8-10K 

MOTOR

FOOT SWITCH

Summary of Contents for AEU-20

Page 1: ...ENANCE INSTRUCTION MANUAL AEU 20 Endodontic System Endo ITR TM P O Box 1548 Woodinville WA 9 8333 216th Street SE Woodinville WA 98072 International 425 487 3157 Toll Free 800 426 5913 www aseptico co...

Page 2: ...ING Serious injury or death may result if ignored CAUTION Damage to property or the environ ment may result if ignored NOTE Important additional information and hints P O Box 1548 Woodinville WA 98072...

Page 3: ...ries Congratulations This system is engineered to provide many years of reliable service Please read the instructions provided in this manual to receive the best and longest service from your Aseptico...

Page 4: ...ord to the back of the console and plug into a grounded electrical receptacle 3 Connect the M 8 10K motor to the recepta cle on the lower front panel of the console 4 Attach the appropriate E Type han...

Page 5: ...ion 4 Ratio Selector Calibrates the RPM dis play to read accurately for up to four differ ent handpiece ratios Push the ratio up down arrow until the indicator light matches the handpiece you are usin...

Page 6: ...and operates the motor in a continu ous 360 rotation at maximum torque Operating speed and torque level for each ratio position are stored in the computer memory For most endodontic root canal applic...

Page 7: ...the handpiece being used i e 1 8 for a 1 8 handpiece or 1 16 for a 1 16 handpiece 3 Adjust the up down arrows on the RPM display to the desired operating speed on the RPM readout NOTE The RPM display...

Page 8: ...Pulses 3 Minimum Temperature 132 C 270 F Full Cycle Time 4 minutes Minimum Dry time 40 minutes Flash Sterilization For immediate use only C Gravity Unwrapped Minimum Temperature 132 C 270 F Full Cycl...

Page 9: ...ly with any of the above instructions may void your warranty WARNING HANDPIECES Thorough cleaning and lubrication of handpieces after each use and before sterilization is very important to ensure prop...

Page 10: ...lo fuse for 110 volts 0 16A 250V slo blo fuse for 220 volts Check motor plug connection Check foot switch connection Depress foot switch Increase RPM Check that an instrument is properly seated in the...

Page 11: ...9 NOTES...

Page 12: ...discretion to repair or replace any defective component or product in part or whole Aseptico shall be the sole arbiter of such action In the event of alleged defect under warranty the purchaser is to...

Reviews: