SERIES
-
B
-
9
-
Initial Operation
1.
Gradually open the inlet valve (make sure that the outlet valve, if installed, is open).
WARNING
Take precaution while operating the filter as the filter may enter a flushing
mode automatically, without prior warning.
2. Check the filter assembly and its connections for leaks.
3. Perform a flushing cycle by disconnecting the low pressure tube from the differential pressure
indicator (closing of the electrical circuit) – re-connect it immediately as flushing starts.
4. Verify that the hydraulic flushing valve closes after 5 seconds.
5. Verify that the hydraulic piston fully extends during backflush.
6. When the filter is clean, verify that the differential pressure between inlet and outlet does not
exceed 0.1 bar.
7. Check that the differential pressure indicator is set to 7 psi or 0.5 bar.
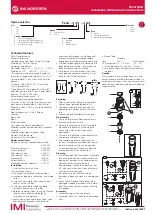
8. Perform an additional flushing cycle manually by operating the handle (turn clockwise 90
°
)
located on the solenoid valve (See Figure 3).
Figure 3: Battery Removal & Installation
Operating
Handle