background image

Safety

The voltages produced in the High Voltage circuit can reach peaks of 400V! Take precautions 
not to electrocute yourself! If you are not sure what this means, please do not use this clock 
and return it for a full refund.

A shock from the clock high voltage circuit is at least a nasty bite. At worst it can kill you.

We decline any responsibility in the case of injury or death. You must be qualified to use this 
clock, it is not intended for anyone unqualified.

REPEAT: If you are not sure what this means, do not use the clock!

General

The clock has different modes of operation, which you select using the pushbutton.

First Start and calibration

When you start the clock up th very first time, it will start in “First Start Mode”. This mode is 
intended to simplify the set up of the hardware. It cycles through the digits “0” - “9” and drives 
the High Voltage Generator with a basic setting which does no dimming.

To 

EXIT First Start Mode, press the pushbutton when the display shows “88:88:88”, 

and the clock will enter calibration mode!

The clock will display “88:88:88” for several seconds. This is for the calibration of the High 

Voltage Generator to match the power adapter you have attached. During this time you might 
hear some faint crackling noises from the generator. This is normal.

After finishing the calibration, the version number (“00:47:07”) will be displayed for about a 
second. The clock will then go into normal operating mode.

You will use this function when you are building the High Voltage circuit.

For a video of the startup process, please see:

https://youtu.be/XA3LOPLX8vI

Once you have exited First Start Mode, it will not enter it again until you do a factory reset (See
below).

Clock Mode

After the first start, each time you start up the unit, the clock will go into normal clock mode 
and will display the time. In normal clock mode, the time will be displayed.

Every 10 minutes (at “xx:x9:15”, the clock will do “Anti-Cathode Poisoning”, which will cycle all 
the digits for about 15 seconds.

This is not an error! It is important to keep the tubes healthy in the long term.

Summary of Contents for Modular Rev3

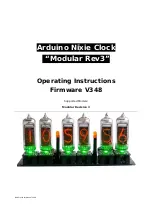
Page 1: ...Arduino Nixie Clock Modular Rev3 Operating Instructions Firmware V348 Supported Models Modular Revision 3 NixieClockUserManualV348...

Page 2: ...ckage Contact Information If you want to get in contact with us please email to nixie protonmail ch We ll usually get back to you right away We can help you with kits or construction We also offer dis...

Page 3: ...s also increases tube life Absolutely silent operation Some Nixie clocks emit an irritating buzz or hiss which is especially annoying if you keep the clock in a bedroom Automatic week day or weekend b...

Page 4: ...ress the pushbutton when the display shows 88 88 88 and the clock will enter calibration mode The clock will display 88 88 88 for several seconds This is for the calibration of the High Voltage Genera...

Page 5: ...he clock comes with a Real Time Clock RTC module which provides a battery backed time source that remembers the time even when the clock is not powered up Overview Normally the clock is in Time Displa...

Page 6: ...100 darkest 999 brightest Version Display the version number The format will be VV vv 07 where major version is VV minor version is vv and the 21 is the id for the version display 00 48 04 IP Address...

Page 7: ...f you do nothing The clock is in this mode In this mode a short press cycles through the values given in Time Display Mode but always returns to the standard time display after 5 seconds Time and Date...

Page 8: ...very other day 6 Hours or week days This blanks all day during the week days and between the start and end hour every other day 7 Hours on weekends This blanks between the start and end hour on weeken...

Page 9: ...efore blanking the display in seconds Default 300 Max 3600 Min 60 17 flashing PIR Timeout Shorter You can set the amount of time that the clock will wait before blanking the display in seconds Back Li...

Page 10: ...the PWM On pulse is Normally you should not have to change this but you can try changing this is the HV generation is noisy or you have unusual tubes 27 flashing Increase Minimum dim This setting allo...

Page 11: ......

Page 12: ...tton more than 8 seconds the clock will enter filament healing mode All the power will be placed through a single filament of a single digit to clean it A short press will change the selected filament...

Page 13: ...Revisions V0348 22Jun2017 Split user manual and construction manual...

Reviews: