


MARK IMAGE SETUP
MARK IMAGE function is very useful, because it protects marked images from
being overwritten. During playback, you can mark images to store them on HDD
safely free from being overwritten after HDD starts to overwrite.
MARK IMAGE SETUP
SELECT , PRESS ENTER
TOTAL FRAME 0
START TIME
/ / : :
END TIME
/ / : :
PLAY IMAGE
DELETE IMAGE
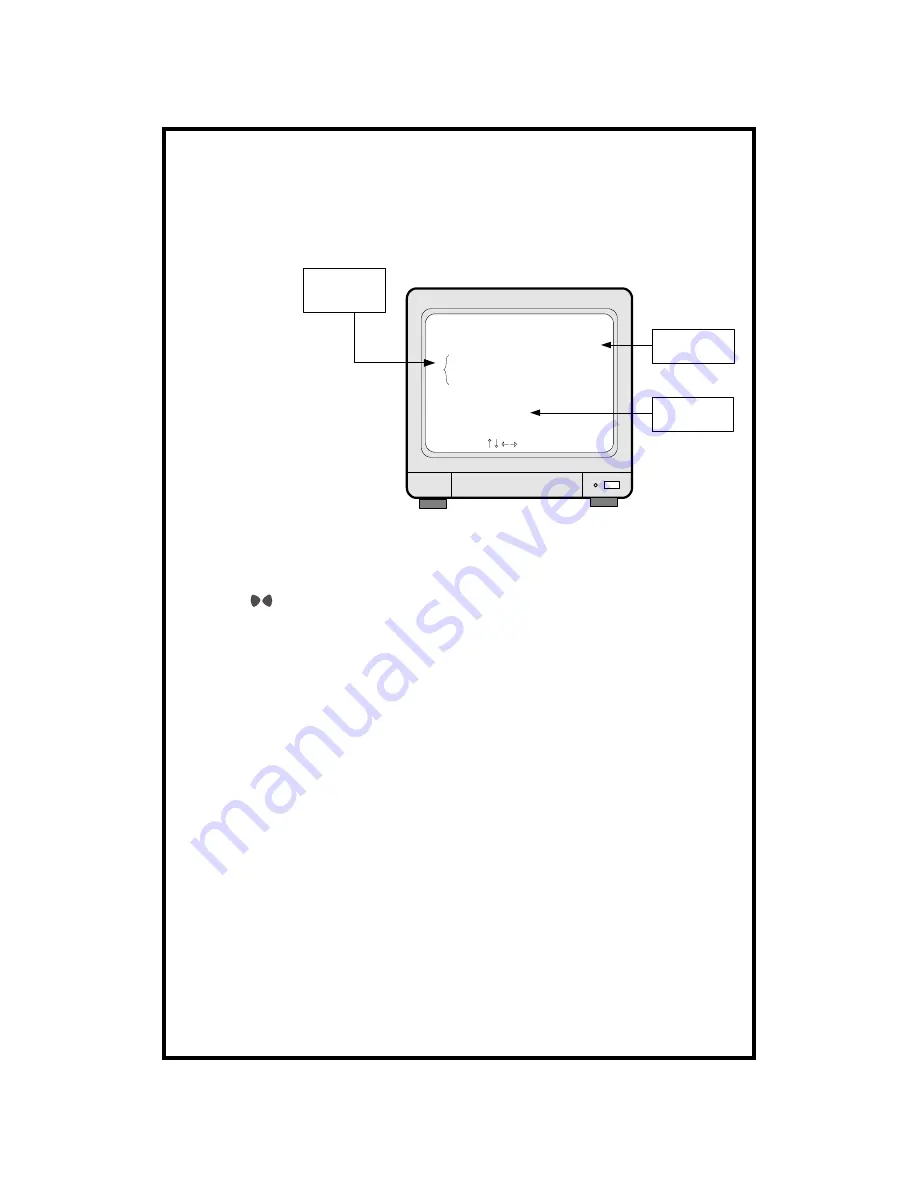
Numbers of images
on HDD
Delete or play only
marked images
Start and end of
data recorded
Display of MARK IMAGE
SETUP
1) While you see pictures replayed, press [MARK] button. You will see
“
PAUSE
"
and
“
SPD
"
displayed.
2) Using
button, move as many as you want to mark, and then press [MARK]
button.
3) Pictures between 1st [MARK] button and 2nd [MARK] button are all marked
and stored separately on HDD.
4) If you mark many images, instead of choosing image by image, cancel PAUSE
by pressing[PAUSE] button in step 1). Images are replayed in normal speed.
Then press [MARK] button to end mark images.
If HDD space assigned for marked image is full,
“
FULL
"
is displayed and
[MARK] button doen not work.
(HDD space for marked imaged : The system arranges automatically, and it
corresponds to space for recording 10 minutes in maximum recording rate.)
5) To play marked images, select PLAY IMAGE, and to delete marked images
slect DELETE IMAGE.
Notice :
HDD CLEAR command does not clear marked images, and DELETE
MARK IMAGE command just delete marked images.
PRODUCT ID : Serial number of product. Necessary for manufacturer to know
manufacturing date, program version number, and others.
- 32 -