PAGE 19
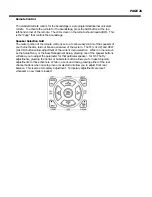
particular speaker by pressing the appropriate button on the Speaker Selection Grid. (see
Remote Control)
2. Test Tone OFF
The default setting is NO. By setting this to YES, there will be no Test Tones when you
enter the Setup Mode. This allows for Test Tones from an external source to be used
during channel balancing.
3. Separate ON/OFF
The default setting is NO. By setting this to YES, the AUD button on the remote control
is used to power the Soundstage On, and the POWER button is used to power the
Soundstage Off. This setting can be used while using Macro commands to ensure that a
specific On, or Off command is issued.
4. Auto Power On
The default setting is NO. By setting this to YES, the Soundstage will initialize, and
power up to the last used input when AC power is introduced. When set to NO, the
processor will initialize and go into standby when AC power is introduced.
5. Power On Volume
The default setting is NO. When set to NO, the Soundstage will power up to the volume
level it was at when it was powered down. Using the LVL UP and LVL DN buttons, a
volume setting between 10 and 55.5 can be selected allowing the processor to power up
at that particular volume level.
6. AutoMute On Input
The default setting is YES. The Auto Format Detection of the Soundstage requires that it
read a flag from the digital bitstream. This can cause a slight delay in the detection of a
standard PCM signal from a CD player. To eliminate this delay set to NO. This may cause
a short burst of noise to emit from the main speakers before certain modes can be
determined, and loaded.
7. Custom Input Names
A custom input name of up to eight letters can be assigned to each source input. The
default setting for each input is NO, and when set to NO the name displayed will be the
default input name. When you enter this menu, the custom name applies to the current
selected source input. Press the LVL UP key to enter the Custom Input Name selection
menu. The CENTER (PAUSE) button and the SUBWOOFER (STOP) button are used to
scroll through the available alphanumeric values. The LVL UP button advances to the
next letter, and the LVL DN button steps back to the previous letter. To turn the custom
input name off for that particular input, press the LVL DN button until you get to the first
letter. When you press the LVL DN button again, the custom input name will read NO.
Press the MENU button to exit the custom input name selection menu, and save the
current setting.

