background image

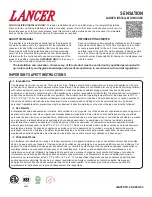
Installation Instructions continued from page 9

12. Install the Drain Lines, Air Check Valve Assembly, and Air Gap

• Connect 

1/2

I.D. drain line to the drain outlet of both valves;

outlet side (

see Figure 8

). Use the supplied elbows and spring clips. 

• Place the ferrule inside the brass nut and screw the brass nut onto

the brass adapter of the aeration valve; inlet side (

see Figure 9

).

• Assemble the air check valve assembly in this order: elbow, pvc

tubing, air check valve with molded arrow pointing down, pvc
tubing, and air in-take screen (

see Figure 9

). After assembly, push

the elbow into the brass adapter (

see Figure 9

).

• Run the drain lines to an approved air gap and drain (

see Figure 10

).

SPRING CLIP

1/2

 DRAIN LINE

ELBOW

Figure 8*

Helpful Tips: The aeration drain line can
tee into the drain line of the filter or to an
approved independent drain.

The drain line emits surges of excess air
from the aeration tank and must be
secured.

Figure10

Helpful Tips: The drain line emits surges
of excess air from the aeration tank and
must be secured.

10

BRASS ADAPTER

AERATION VALVE

FERRULE

BRASS NUT

ELBOW

PVC TUBING

AIR CHECK VALVE

PVC TUBING

AIR IN-TAKE SCREEN

Figure 9*

Complete system not shown

*

Complete system not shown

*

Summary of Contents for RainSoft EC4 OXYTECH 150 PLUS MM

Page 1: ...EC C4 4 O OX XY YT TE EC CH H C Ch he em mi ic ca al l f fr re ee e i ir ro on n s su ul lf fu ur r a an nd d m ma an ng ga an ne es se e r re ed du uc ct ti io on n W WA AT TE ER R T TR RE EA AT TM M...

Page 2: ...fication Information 4 Installation Instructions 5_11 System Start Up 12 Understanding the Customer Settings 13 Programming the Customer Settings 14 15 Understanding a Manual Regeneration 16 System Al...

Page 3: ...ld be limited to a maximum of 1 0 ppm Operational Specifications Plumbing 3 4 to 11 4 Drain Line 1 2 Water Pressure 20 psi 120 psi 137 89 kPa 827 37 kPa Actual Influent Flow Rate Water available from...

Page 4: ...alarms press any key on the computer Maintenance Requirements Cleaning the Valves Annually Your system will sound an alarm when this service is required Please follow the on screen prompts and contact...

Page 5: ...well pump flow rate 4 Locate a Site for the System The installation site must have a level smooth and clean surface see Figure 1 The two tanks should be installed after the pressure tank and as close...

Page 6: ...2 WARNING THE RISER PIPES ARE NOT INTERCHANGEABLE Close off the top of the filter tank riser pipe see Helpful Tip With the funnel provided add fills 1 4 to the filter tank see Figure 3 Before adding...

Page 7: ...alve O ring seals against the aeration tank WARNING THE CONTROL VALVES ARE NOT INTERCHANGEABLE 7 Turn Off the Water and Drain the Plumbing Turn off the water at the meter or the pressure tank Open all...

Page 8: ...1 check valve on the raw water supply feeding the aeration tank see Figures 5 1 5 2 The check valve must be installed in vertical upflow position with a minimum 12 water column above the check valve s...

Page 9: ...t pipes with water in them or while attached to the system steam will damage the plastic parts in the valves Do not point the soldering torch directly at the tanks or valves These composite mate rials...

Page 10: ...ing and air in take screen see Figure 9 After assembly push the elbow into the brass adapter see Figure 9 Run the drain lines to an approved air gap and drain see Figure 10 SPRING CLIP 1 2 DRAIN LINE...

Page 11: ...gether see Figure 12 One way connection only Plug the 24VAC transformer into a 110 VAC 60 Hz or 230 VAC 50 Hz outlet The installation is complete Please proceed to System Startup on page 12 11 Importa...

Page 12: ...l will display Press the Enter key to select NOW the computer will provide a 10 second countdown before regeneration During regeneration the aeration system will purge water from the aeration tank and...

Page 13: ...lt setting may interfere with other RainSoft products The filter and air regenerations should not be set for the same time of day Time of Air Regeneration Sets the time of day only on the hour that th...

Page 14: ...TIME OF DAY the computer will display Use the Adjust Up and Adjust Down keys to change the hour of day Press the Menu Forward key to access the minutes of day Use the Adjust Up and Adjust Down keys to...

Page 15: ...R REGEN the computer will display Use the Adjust Up or Adjust Down key to change the hour of regeneration if desired Press the Menu Forward key to advance to NUMBER OF PURGE the computer will display...

Page 16: ...will provide a 10 second countdown before regeneration To select LATER press the Menu Forward key and then the Enter key the computer will display 16 MANUAL REGEN FILTER AIR BOTH FILTER REGEN NOW OR...

Page 17: ...ration Avg Water Use Displays the average water use gallons per day Current Flow Rate Displays the flow rate through the system when water is used gallons per minute Vacation Mode Displays the ON OFF...

Page 18: ...18 Filter Valve Exploded View 19 25 12 13 A B 22 14 3 2 1 4 5 7 8 6 24 21 20 23 18 16 17 18 15 11 10 9...

Page 19: ...Aeration Valve Exploded View 38 36 37 22 33 29 28 27 21 C 7 8 6 5 4 13 14 2 12 1 11 15 9 10 3 17 16 18 30 31 32 19...

Page 20: ...20 Filter Control Exploded View 11 8 9 Pin 1 2 3 Pin 1 2 10 6B 6A 5 1 5 4 7...

Page 21: ...21 Aeration Control Exploded View Pin 3 2 1 Pin 2 1 2 3 7 4 5 1 8 5 12 8 6A 6B 13 14...

Page 22: ...2 17950 INJECTOR CAP SOFTENER 17 4 17951 10 24 X 1 SCREW HEX WASHER HEAD 18 2 17617 C INJECTOR PLUG ASSEMBLY 19 2 17557 COMPOSITE BYPASS VALVE 20 2 17958 O RING 015 21 2 13329 O RING 014 22 1 17939 1...

Page 23: ...19536 SEALED SWITCH C NC MALE CONNECTOR RED 6B 2 19537 SEALED SWITCH C NO FEMALE CONN BROWN 7 4 18135 4 X 1 1 4 SLOTTED HEX WASHER TYPE 25 8 6 17542 4 20 X 3 8 SCR PAN H PHIL SS 9 1 19732 OUTDOOR EC4...

Page 24: ...er for service 1 Reset the time of day hour of regenerations 2 Verify that auto daylight savings time is set to ON 2 Systems regenerate at the wrong time 1 The raw water has changed 2 The bypass valve...

Page 25: ...itation of incidental or consequential damages so parts of the above limitation or exclusion may not apply to you This warranty gives you specific legal rights and you may also have other rights which...

Page 26: ...26 26 26 26 26 NOTES NOTES...

Page 27: ...27 NOTES...

Page 28: ...inSoft Division of Aquion Inc 2080 East Lunt Avenue Elk Grove Village Illinois 60007 Main Switchboard 1 847 437 9400 Customer Service 1 800 860 7638 www rainsoft com 2011 RAINSOFT DIVISION OF AQUION I...

Reviews: