background image

11 

60
61
62
63

64

65

66

67

Micro intellectual control


68

One button to control open, stp amd close. 

69

The light is on white opening or closing the door, three minutes later the light is off automatically. 

70

The unit running is controlled by computer program. 

71

Test the force of open or close the door, the optional 

72

function is photo beam, auto-close, lock door, etc. 

73

The door pauses momentarily then rebounds when it 

74

reached the hinders on the closing way. 

75

The protecting functions are overload, over hot or low 

76

power input.


77
78

DC Motor


79

Low noise, soft start, slow stopping to protect the unit and make sure it can be usedm for a long timea 

80

situación de trabajo puede ser mostrada en la pantalla LED.


81
82

LED Display


83

Working situation can be shown on the LED screen.


84

85

Decoding


86

Rolling code


87
88

Manual Disengangement


89

Open and close the door by hand without power.


90
91

Optional Functions


92

Photo beam, battery backup and wall buttom 

93

94
95
96
97

98

99

100

Power Input


220 V +- 10 %  50 60 Hz


Reception Frequency


433.92 MHz


Motor


24 V DC


Decoding


Rolling code


Working Temperature


> - 20 º C, <+50º C


Transmitter Power


27 A 12 V battery


Relative Humidity


< 90 %


Globe


24 V 5 W / LED


Open and close force


600 N, 800 N, 1200 N


Courtesy light time


3 minutes


101

102

103

104

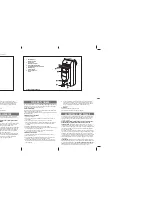
2. Technical  Specifications


1. Functions

Summary of Contents for MATIC BOX

Page 1: ...OX IT Manuale di uso e installazione operatore per garage GB Instruction for use and installation garage opener ES Manual de usuario e instalaci n Operador de puertas de garaje Operador de puertas de...

Page 2: ...allazione pag 4 3 1 Strumenti raccomandati 3 2 Installazione dell operatore e della guida 4 Pannello di controllo e trasmettitore pag 5 5 Connessioni e terminali aggiuntivi pag 6 6 Programmazione dell...

Page 3: ...scaldamento o scarsa potenza in ingresso etc MotoreDC Rumorosit contenuta avviamento graduale arresto lento per proteggere l unit e garantire una lunga durata Display a LED Lo stato di funzionamento v...

Page 4: ...o M8 opzionale Parete Guida Porta AngolareFirmware tipo a U Alimentatore Vite e dado M8 Dado M6 Codice a barre Guida Vite e dado M8 Dado M6 Codice a barre Guida Staffa testata Vite ad espansione molla...

Page 5: ...completo vedi foto sotto per evitare di modificare il limite di posizione quando si modifica il valore di forza F1 Utilizzare le viti M6 3 x 20 per fissare il binario alla testa del motore con il mor...

Page 6: ...6 5 Collegamenti e terminali opzionali Bottone a parete Batteria tampone Fotocellula...

Page 7: ...o la posizione di chiusura premere SET 6 2 6 La porta si apre e si chiude automaticamente per identificare i requisiti di sensibilit per l apertura e la chiusura in termini di forza 6 2 7 Visualizza p...

Page 8: ...o P1 6 7 2 Premere UP tre volte viene visualizzato P4 6 7 3 Premere SET per visualizzare la situazione corrente Premere UP per aumentare la chiusura automatica di un minuto o premere DOWN per diminuir...

Page 9: ...mi 7 2 Guida alla risoluzione dei problemi 7 2 1 Problema Cause Soluzione 7 2 2 La catena rumorosa La catena allentata Regolare il dado M8 facendo riferimento alla sezione 3 2 C 7 2 3 Il motore non fu...

Page 10: ...ag 11 3 Installation pag 12 3 1 Recommended tools 3 2 Installing the operator and the guide 4 Control panel and transmitter pag 13 5 Connections and additional terminal pag 14 6 Programming the operat...

Page 11: ...t DC Motor Low noise soft start slow stopping to protect the unit and make sure it can be usedm for a long timea situaci nde trabajopuedesermostradaen la pantallaLED LED Display Working situation can...

Page 12: ...12 3 1 Recommended Tools 3 2 Installing the operator and rail 3 Installation...

Page 13: ...tion as photo below to avoid changing the limit position when the force selected in F1 and there are many maneuvers Using M6 3 x 20 screws fix the rail to the motor head with the U shaped clamp to mak...

Page 14: ...14 5 Connections and additional terminals button Battery backup Photo beam...

Page 15: ...en the door has reached the closed position press SET 6 2 6 The door opens and closes automatically to map the open and close sensitivity force requirements 6 2 7 It displays to show setting is comple...

Page 16: ...three times it displays P4 6 7 3 Press SET to show current situation Press UP to increase the auto close one minute or press DOWN to decrease one minute Maximum degree is b9 minimum is b0 Press SET T...

Page 17: ...amount of lubricant to active 7 2 Examination Guide 7 2 1 1 Problem Causes Solution 7 2 2 The chain is noisy The chain is too loose Adjust nut M8 referring to 3 2 C 7 2 3 The motor does not work The s...

Page 18: ...s p gina19 3 Instalaci n p gina20 a Herramientasrecomendadas b Instalandoel operadory la gu a 4 Panelde controly transmisor p gina21 5 Conexionesy terminalesopcionales p gina22 6 Programando el operad...

Page 19: ...entradade pocovoltaje etc MotorDC Bajoruido arranquesuave parolentoparaprotegerla unidady asegurarsequepuedeserusadodurante muchotiempo DisplayLED La situaci nde trabajopuedesermostradaen la pantallaL...

Page 20: ...tuercaM8 TuercaM6 C digo Ra l debarras Ra l Carrointerior Tornillo M6 Carroexterior Horquilla Brazo C Restaurar Relajar Soporte Tornilloexpandible Muelle Ra l de fi Pared Tornilloy tuercaM6 Ajustartu...

Page 21: ...bierta seg nfotode abajo paraevitarque cambie la posici nlimitecuandola fuerzaseleccionadaen F1 y hayamuchasmaniobras UsandotornillosM6 3x 20 fijarelcarrila la cabezadelmotorcon la abrazaderacon forma...

Page 22: ...22 5 Conexiones y terminales opcionales Bot n de pared Bater a de seguridad Fotoc lula...

Page 23: ...antener pulsado DOWN y parpadear CL Cuando la puerta alcance la posici n de cerrada presionar SET 6 2 6 La puertaabrir y cerrar autom ticamenteparagrabarlosrequerimientosde sensibili dad defuerzaen ap...

Page 24: ...esionar SET para mostrar la situaci n actual Presionar UP una vez y en el display aparecer H1 la barrera fotoel ctrica est activada Presionar DOWN una vez y el display aparecer H0 la barrera fotoel ct...

Page 25: ...anismo 7 2 Gu a 7 2 1 Problema Causas Soluci n 7 2 2 La cadenahaceruido La cadenaest muysuelta AjustarlatuercaM8delaparta do3 2 C 7 2 3 Elmotorno funciona Elenganchenoest bien conectadoo elfusibleesta...

Page 26: ...ue una manipulaci n incorrecta de los residuos podr a provocar en las personas y el medio ambiente Aprimatic Doors se reserva el derecho de aportar las modificaciones o variaciones que retenga oportun...

Reviews: