70
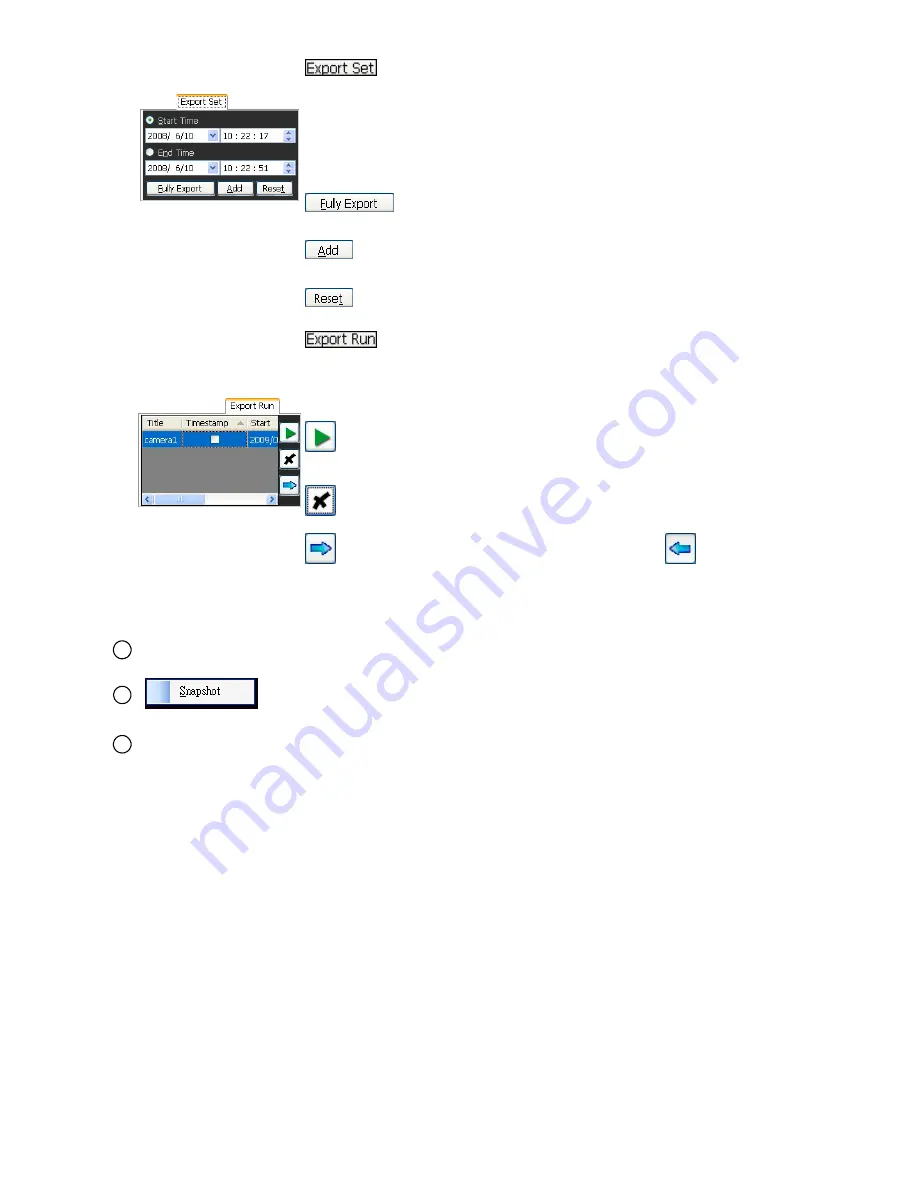
: Click to set the export function. The function fits the
starting and ending points of an image display, when
the user wants to transfer a file.
Start/ End time:
Set the start and end time that you want to export
(backup) the recorded files to the AVI files.
Note:
You also can click to select the recorded file
on the recording list above.
: Click to add the whole selected video to the
arranged exporting list.
: Click to add the selected part of the recorded video (with
time setting) to the arranged exporting list.
: Click to reset the Start/End time.
: Click to run the export function.
Timestamp: Checkmark to add on the timestamp to the exported
file.
: Click to run the export function of the selected work on the
list.
: Click to delete the arranged work.
: Click to enlarge the Export Run column. Click
to back to
the original form.
NOTE:
To change the folder for saving the exported AVI files please go to the Config
setting page (
Config\ Custom\ Path Settings\ Folder for Export AVI Clips\
).
3
The display area.
4
Provides the image capturing function. Right click on the display area to
show this icon, then click left to capture a jpeg file of the video.
5
Scroll bar for video searching: Drag the square on the bar to search the video. You can
click or pull the indicator on the scroll bar to the point you want to see.
Summary of Contents for LC-7233
Page 2: ......
Page 101: ...99 Figure 6 ...


