


6
2
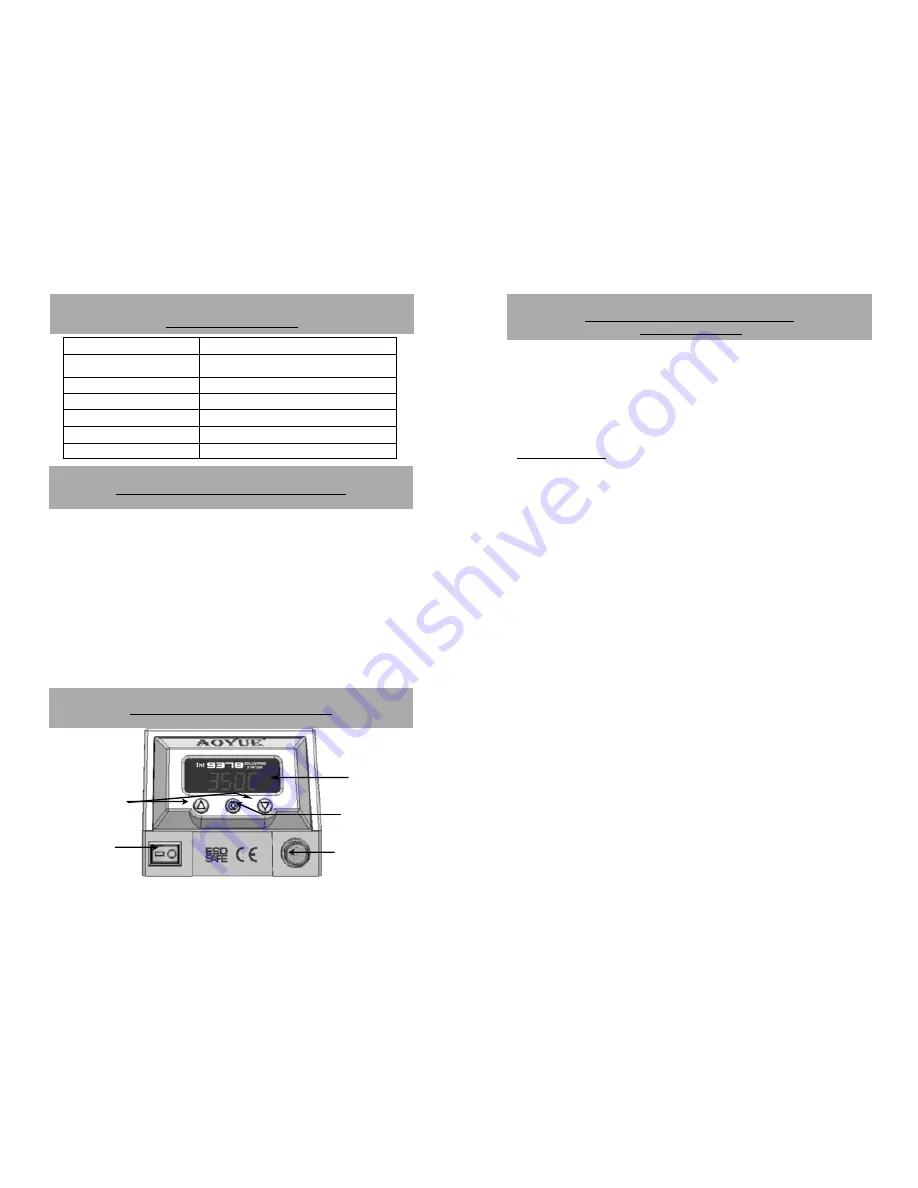
1
Main
Display
Increase/
decrease buttons
3
Main power
switch
5
Solder iron
connector
4
Set Button
SPECIFICATION
Voltage Input :
available in 110V / 220V
Station Dimensions:
110(w) x98 (h) x 155 (d) mm
Weight:
1.5Kg
Power Consumption:
Up to 75W (60W with default Iron)
Temperature Range:
200°C - 480°C
Heating Element
Ceramic heater
Output voltage:
24V
CONTROL PANEL GUIDE
FUNCTIONS and FEATURES
Microprocessor-controlled ESD safe Soldering station.
Muti-tool system: tweezers, sculpting pen, composite tip, others.
Intelligent station automatically recognized plugged tool.
Compatible with Lead free applications.
High power heating element for fast heat recovery.
Large display with digital controls.
Programmable sleep timer, with auto sleep and wake up function.
Digital offset.
System-lock out feature.
Quick jump to favorite settings.
Switch between Centigrade and Fahrenheit scale.
11
Aoyue
936 规格
OPERATING GUIDELINES
3. “t000” indicates that the sleep function is currently turned off. To
adjust the timer settings press the increase or decrease button.
Sleep timer is adjustable from 2 to 60 minutes.
4. To save the settings, repeatedly press the SET button until the
display shows the word “SAVE”. Press the decrease button to save
and exit from the system configuration mode.
F. SYSTEM LOCK
The System lock feature disables adjustment to both temperature
and system configuration. The display will show “ SAFE” when system
lock feature is enabled. To disengage system lock press and hold all
three buttons for more than 15 seconds.
To activate the system lock feature:
1. With the unit turned On, Press and hold the SET button to enter the
system configuration mode.
2. Repeatedly press the “SET” button until “L0FF” is displayed. This
denotes that we are now configuring the system lock setting.
3. “L0FF” indicates that the system lock function is currently disabled.
To engage the system lock press the decrease button to switch the
lock feature to “LOn”.
4. To save and activate the system lock settings, repeatedly press the
SET button until the display shows the word “SAVE”. Press the
idecrease button to save and exit from the system configuration
mode.
5. The display would show the word “ SAFE”, indicating system lock is
enabled.
When the system lock feature is enabled changing of temperature
and system settings are blocked. The system lock must be disengaged
to re-enable access to the system.
To de-activate the system lock:
1. With the unit turned On, press and hold the INCREASE, SET and
DECREASE button for more than 15 seconds.
2. The display would switch from “SAFE” to the set temperature
display when system lock has been disengaged.


