5
1.6
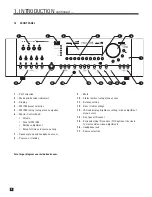
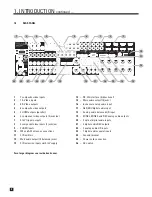
REMOTE CONTROL
1
– Learn – for customization of remote
2
– Power On and Power Off
3
– Control mode.
These are not source selection keys (see #17).
4
– • Copy MAIN when ZONE2, ZONE3, or RECORD is selected.
• LIST for PVRs.
5
– Previous / next source seek
6
– Bass / treble selection for adjustment
7
– RECORD path selection (must be in MAIN control mode)
8
– Balance
9
– Navigation:
• Setup menu (press and hold Menu for 3 seconds)
• Back (for setup)
• Status (press Select)
• FM • AM direct entry (press and hold Select for 3 seconds)
• FM • AM tuning
• Adjustment for surround mode, dynamics, THX,
levels, bass, treble, timers, brightness, and lip-sync
• FM • AM seek
• Adjustment for balance and lip-sync
10
– THX selection
11
– FM • AM preset up/down
12
– Sleep timer selection / timers setting
13
– Volume up/down and mute
14
– Channel selection for level, bass, treble, and balance
15
– Numeric pad and shortcuts:
• 1-6: FM • AM preset
• 7: Video processing menu (press and hold for 3 seconds)
• 8: Front panel brightness setting
• 8: Lip-sync selection (press and hold for 3 seconds)
• 9: Tone Bypass
• 0: Dynamics selection
• 0: Video input adjustments (press and hold for 3 seconds)
16
– • Surround mode selection
• Video selections (press and hold for 3 seconds)
17
– Next source
18
– Source selection
Front:
Infrared transmitter and receiver.
Bottom:
Battery cover. When battery voltage is low the control mode key will blink
5 times after a key is pressed.
1. INTRODUCTION
continued …
34
3
4
4
2
8
10
12
16
17
13
9
5
6
7
1
3
11
18
15
14
Summary of Contents for Statement D2v
Page 1: ...STATEMENT D2v OPERATING MANUAL UPDATES www anthemAV com S O F T W A R E V E R S I O N 2 0 x...
Page 8: ......
Page 87: ...79...
Page 100: ...THE BIG PICTURE FRONT PANEL...
Page 101: ...THE BIG PICTURE REAR PANEL...


