14
15
9.Control of the ArcPower 36 via RS-232
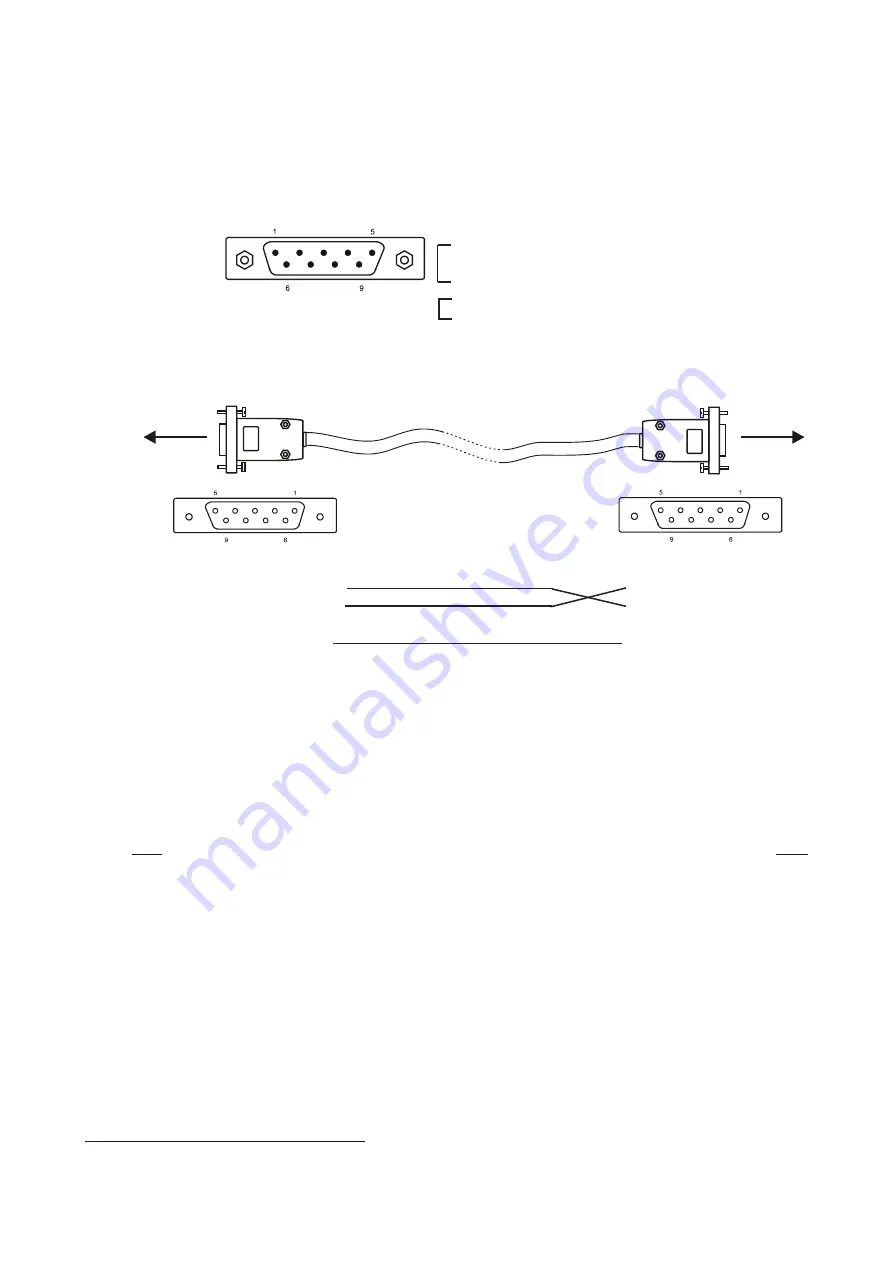
9.1Wiring an RS-232 serial port
9-pin D connector (male)
Front view of the socket:
RS-232 cable:
9-pin D connector- female
9-pin D connector - female
ArcPower driver
PC
Pin 1:
Pin 1:
Pin 2: Received Data
Pin 2: Received Data
Pin 3: Transmited data
Pin 3: Transmited data
Pin 4:
Pin 4:
Pin 5: Signal ground
Pin 5: Signal ground
Pin 6:
Pin 6:
Pin 7:
Pin 7:
Pin 8:
Pin 8:
Pin 9:
Pin 9:
The maximum cable length according to the standard is 15 metres or the cable length equals to a capacitance
of 2500 pF.
9.2 Selecting a zone
The number of the zone distinguishes individual drivers which are controled via RS-232 interface.
Select
SPE
in main menu of the ArPower 36 ,press [ENTER],use [UP] and [DOWN] buttons to select
Zon
.
The option enables to select desired number of the zone (from 0 to 9).Press [ENTER],use [UP] and [DOWN]
buttons to select zone number and press [ENTER] to confirm selection.
9.3 Setting a serial port of PC
The serial port of your personal computer hould be configured as follows:
9600 Baud,8 Data Bits,Non Parity,One Stop Bit,No Flow Control Required.
9.4 Zone commands
The ArcPower 36 uses the 3 types of the zone commands which can be used in a suitable software running
on PC.
All zone commands stated below have to be send to the ArcPower 36 in ASCII codes.
Type 1: Selection of the preset colours
The syntax of the command is:
zone Z red;
zone Z green;
Pin 1: Not connected
Pin 2: Received Data
Pin 3: Transmitted Data
Pin 4:
Pin 5: Signal Ground
Pin 6:
Pin 7:
Pin 8:
Pin 9: Not connected
Summary of Contents for ArcPower 36
Page 1: ...version 3 1 ...
Page 19: ...19 ...


