5
6. Control menu (Standard and Easy control mode)
The ArcPar 100 is equipped with 2-row LCD display which allows to set the fixture´s behaviour according to
your needs, obtain information on its operation, test its various parts and lastly program it, if it has to be used
in a stand-alone mode.
Control panel
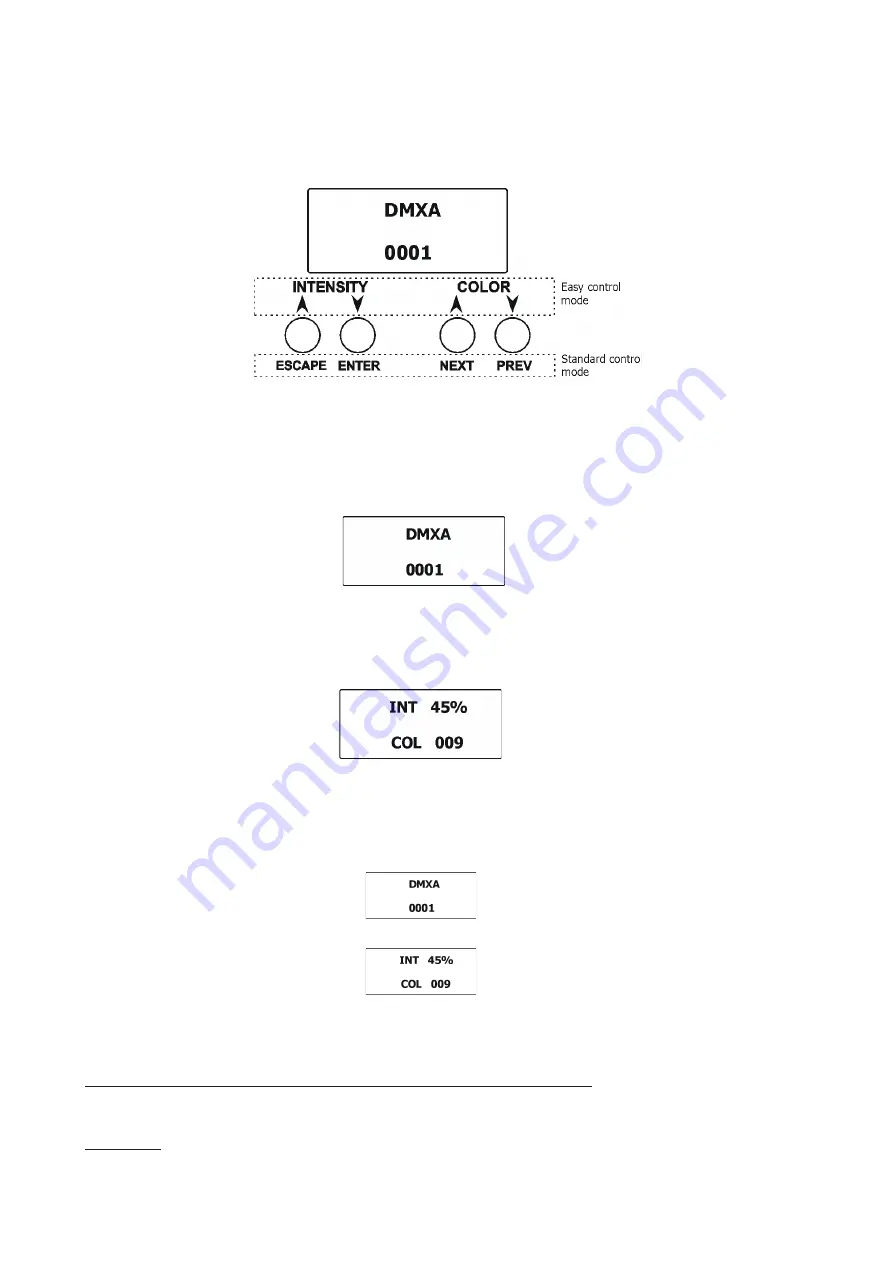
The four control buttons have the following functions:
Standard control mode (default setting)
[ESCAPE] button used to leave the menu without saving changes.
[NEXT] , [PREV] buttons for moving between menu items and for value adjusting.
[ENTER] button used to enter the selected menu (menu item) and to confirm adjusted value.
After switching the fixture on, the display shows current DMX address.
Easy control mode
[INTENSITY] buttons used to set light intensity (dimmer).
[COLOR] buttons used to set colour
After switching the fixture on, the display shows adjusted dimmer intensity and colour before switching the
ArcPar 100 off.
When the fixture is switched off, both adjusted color and light intensity are saved into memory to use them
after switching the fixture on.
Note: DMX control in this mode is disabled.
Switching the fixture to Easy control mode
When the current DMX address is displayed:
press the [NEXT] and [PREV] buttons at the same time until the screen for the Easy control mode appears.
For switching to the Standard control mode, press the [NEXT] and [PREV] buttons at the same time until the
screen for the Standard control mode appears.
The following menu items are accessible in the Standard control mode only.
6.1 Addressing and master/slave setting (DMXA)
Set DMXA
-
Use this menu item to set the DMX start address of the fixture, which is defined as the first channel
from which the ArcPar 100 will respond to the controller.
If you set, for example, the address 31, the ArcPar 100 will use channels 31 - 44 for control (if Mode 1 is
selected).
Summary of Contents for ArcPar 100
Page 1: ...Version 1 4 US...
Page 35: ...35...
Page 36: ...36...
Page 37: ...37...
Page 38: ...38...


