41
7.2.9 Audio management
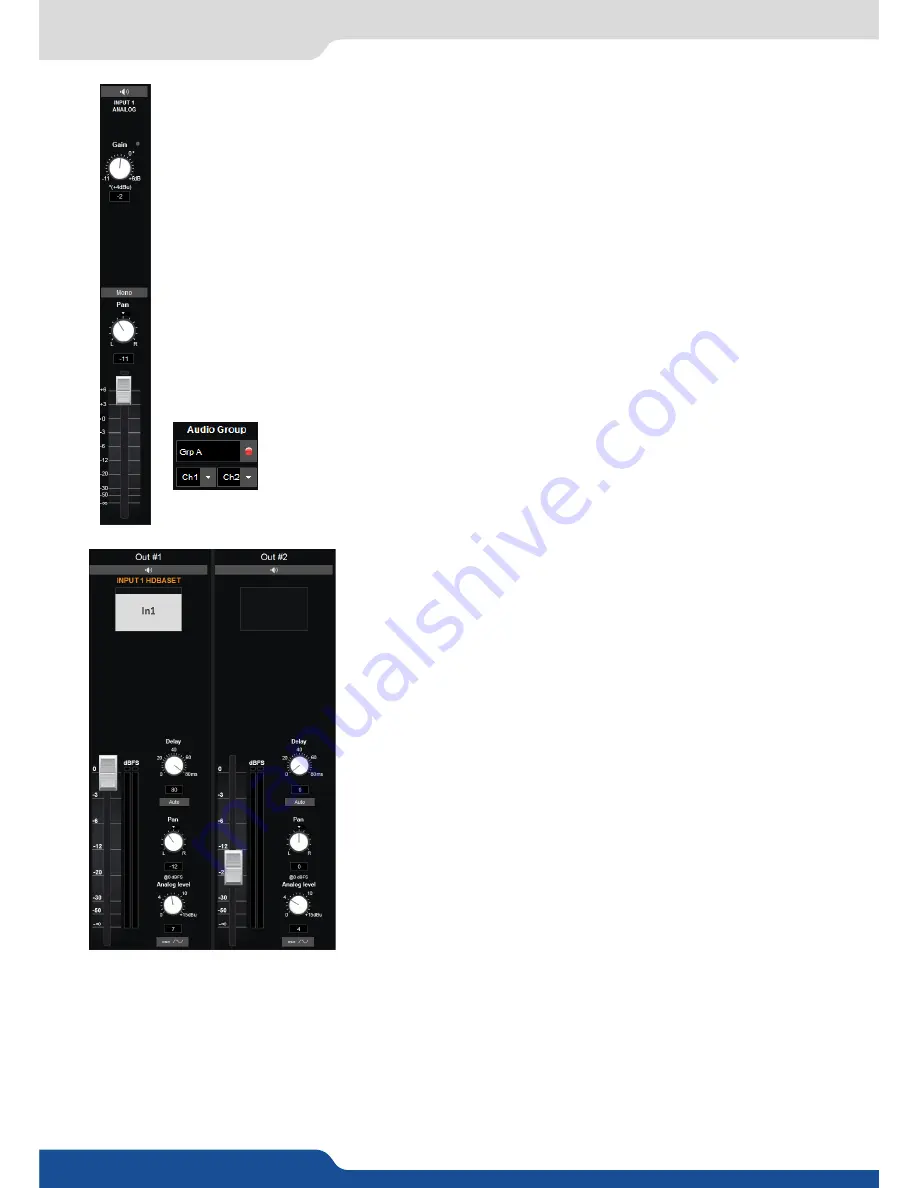
To setup your analog audio input, simply click on
“ON PRELIST”
, if you have a Preview output,
the audio input will be played on it. Then adjust the
GAIN
from
-11 to +6dB
.
A red indicator light will be displayed if you reach the input clip. If the input clip light is being
illuminated, it means that the input gain is too high and the signal is being distorted. To solve this
issue, decrease the gain value. The
0dB
corresponds to a
+4dBu
signal in input.
The gain manual adjustment is only available for analog input.
For every input, you have the possibility to set up your source as a mono audio or stereo audio
source.
You have the possibility to adjust the level vs right level using the Pan knob.
All input still have their own level which is
0 by default
, decrease or increase the value to modify
the sound level:
Specific feature:
- DIGITAL SOURCE:
all digital sources will have their sample rate displayed,
- SDI SOURCE:
on SDI source you can choose 2 channels on one of the 4 groups.
The available audio output controls depend on the device setup
configuration. As you are in matrix mode, you will have 2 programs
audio outputs.
For the audio output, you will find:
- A LEFT/RIGHT PAN ADJUSTMENT
- A GAIN ADJUSTMENT:
this setting will help you to calibrate the
analog audio output component. Depending on the device you will
use after the analog way device, adjust carefully the analog gain.
Basically, for a 0 level, the default value is 4 dBu.
- A MASTER LEVEL:
it indicates the level of your input. On its right, a
bar will move up and down to indicate the audio level in real time. A
red button will turn on if the maximum level is reached.
- A DELAY ADJUSTMENT:
the delay can be automatically calculated
or manually adjusted. To adjust it manually, first disable the
Auto
button.


