UG-447
Evaluation Board User Guide
Rev. 0 | Page 8 of 16
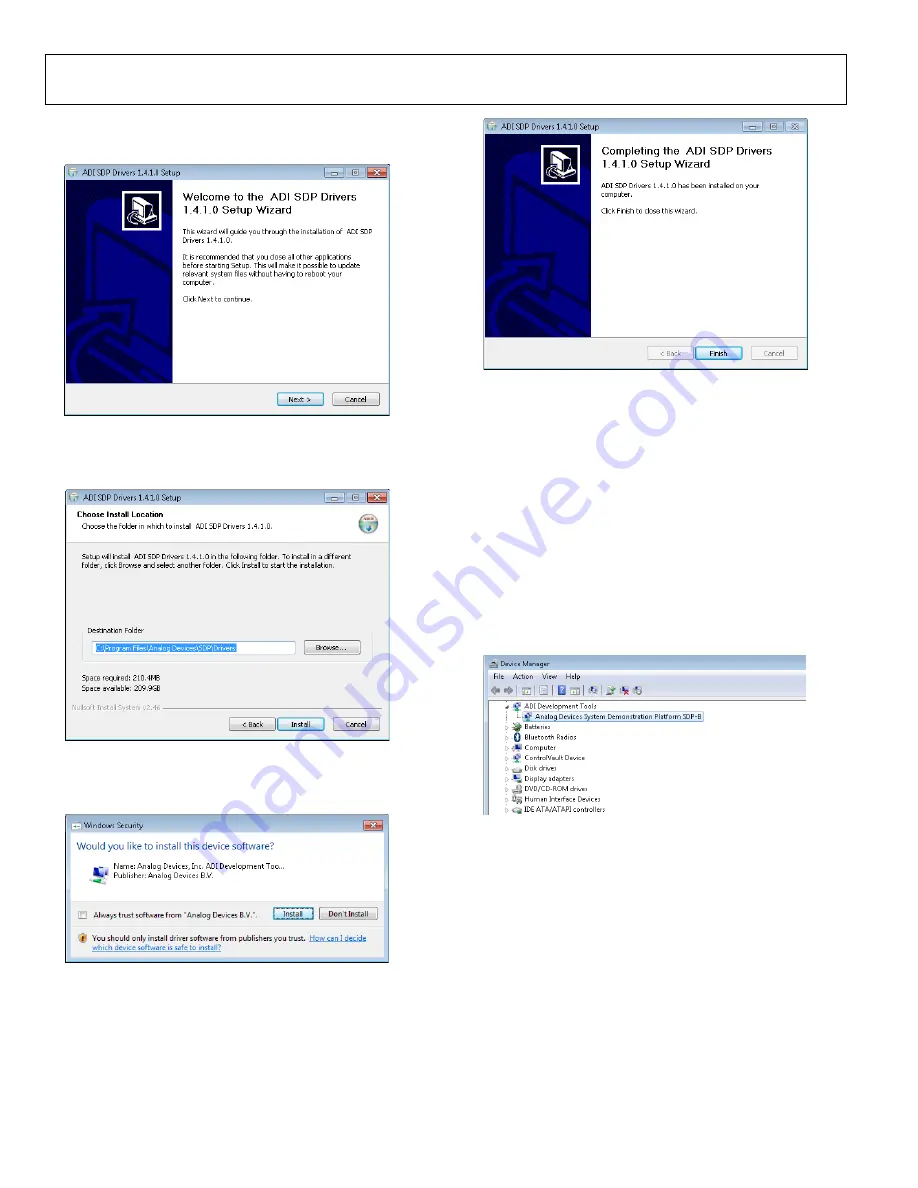
5.
When the evaluation software installation is complete, click
Next
to proceed with the installation of the drivers.
Figure 8.
EVAL-SDP-CB1Z
Drivers Installation—Setup Wizard
6.
The setup wizard opens. Click
Next
to begin the driver
installation process.
Figure 9.
EVAL-SDP-CB1Z
Drivers Installation—Choose Install Location
7.
Select a destination folder for the SDP drivers, and click
Install
.
Figure 10.
EVAL-SDP-CB1Z
Drivers Installation—Windows Security
8.
Click
Install
to proceed with the installation.
Figure 11.
EVAL-SDP-CB1Z
Drivers Installation—Complete
9.
Click
Finish
.
After installation from the CD is complete, connect the
EVAL-
AD7091SDZ
board to the
EVAL-SDP-CB1Z
board as described
in the Evaluation Board Hardware section.
When you first plug in the
EVAL-SDP-CB1Z
board via the USB
cable provided, allow the
Found Hardware Wizard
to run.
After the drivers are installed, you can check that the board is
connected correctly by looking at the
Device Manager
of the
PC. The
Device Manager
can be found by right-clicking
My
Computer
>
Manage
>
Device Manager
from the list of
System Tools
, as shown in Figure 12. The
EVAL-SDP-CB1Z
SDP-B board should appear under
ADI Development Tools
.
This completes the installation.
Figure 12. Device Manager
LAUNCHING THE SOFTWARE
After the
EVAL-AD7091SDZ
and
EVAL-SDP-CB1Z
boards
are correctly connected to your PC, the
EVAL-AD7091SDZ
software can be launched.
To launch the software, perform the following steps:
1.
From the
Start
menu, select
Programs
>
Analog Devices >
AD7091(R) > AD7091(R).
The main window of the
software then opens (see Figure 13).
2.
If the
EVAL-AD7091SDZ
board is not connected to the
USB port via the
EVAL-SDP-CB1Z
when the software
is launched, a connectivity error displays (see Figure 14).
Connect the evaluation board to the USB port of the PC,
wait a few seconds, click
Rescan
, and follow the instructions.
10922-
008
10922-
009
10922-
010
10922-
0
1
1
10922-
012


