UG-076
Evaluation Board User Guide
Rev. A | Page 4 of 16
EVALUATION BOARD SOFTWARE
Use the following instructions to set up the
evaluation
board software.
SOFTWARE INSTALLATION
Do not connect the evaluation board until the software
installation is complete.
1.
The latest evaluation software and documentation can be
downloaded from the Analog Devices website.
2.
If the software was downloaded, skip to Step 3. If using the
CD, insert the
evaluation software CD. Double-
click
My Computer
, and then double-click the
AD9520EV
CD
icon. A window opens showing the contents of the CD
divided into four sections:
,
Layout
,
Schematic
,
and
Software
. The file named
readme.txt
contains a descrip-
tion of the CD contents and may contain additional as well
as any last minute instructions or information. Double-
click the
Software
folder.
3.
Double-click
AD9520Eval_Setup1.1.0.exe
. (Note that the
website may have a newer version.) Follow the installation
instructions. The default installation location for the
evaluation software is
C:\Program Files\Analog
Devices\AD9520 Eval Software\
.
RUNNING THE SOFTWARE
Power up and connect the evaluation board to the PC. See the
Evaluation Board Hardware section for details on the various
connectors on the evaluation board.
1.
Double-click
AD9520 Eval Software
evaluation software. Depending on whether the evaluation
board was found by the software, either light blue text
appears in a pop-up window indicating that the evaluation
board was found, or red text appears indicating that the
evaluation board was not found.
2.
If the evaluation board is found, click anywhere in the pop-
up window with the
Evaluation Software Ready
message,
and the main window for the software appears. Proceed to
the Evaluation Software Components section for details
about running the software.
If the evaluation board is not found, a dialog box appears
allowing the user to select which AD9520 evaluation board is
connected while the software runs in standalone mode.
Standalone mode is useful for viewing and generating register
setup files.
See the Evaluation Board Hardware section for instructions to
connect the evaluation board. Alternatively, the user can use the
software in standalone mode, and specify which version of the
is used. The standalone mode is useful for verifying
register settings for a given PLL setup.
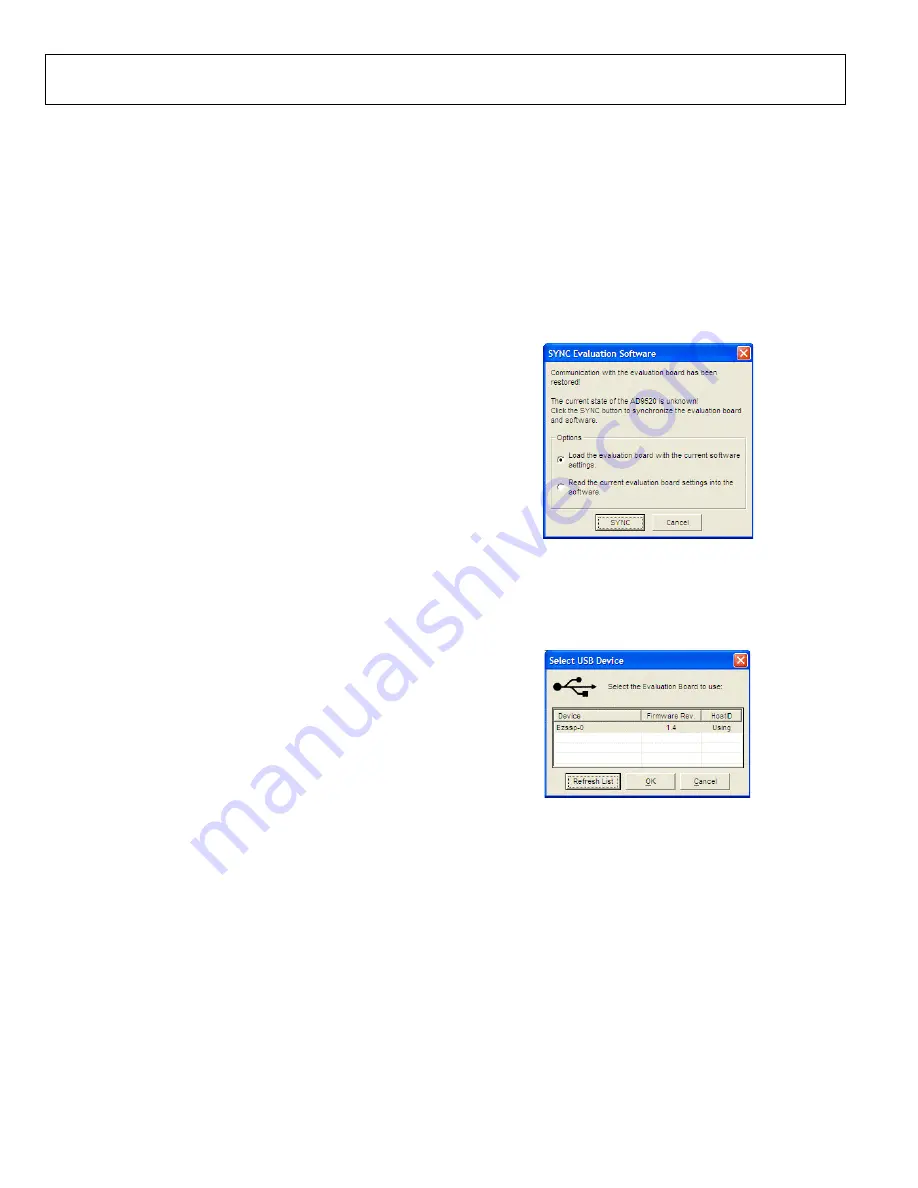
If the evaluation board is connected while the evaluation
software is running, the window in Figure 2 appears to prompt
the user to load the evaluation board with the evaluation
software settings or read the evaluation board with the
evaluation software settings.
0
874
6-
00
2
Figure 2.
SYNC Evaluation Software
Window
If the evaluation board was not automatically detected when it
was connected, the user can also click
Select Evaluation Board
from the
I/O
menu (see Figure 24), and select
Ezssp-0
,
Ezssp-1
,
or
Ezssp-2
.
08
74
6-
0
03
Figure 3.
Select USB Device
Window
See the Evaluation Software Components section for a
description of the evaluation software features, or the Quick
Start Guide to the AD9520 PLL section for details on the
individual blocks of the


