background image

26 

AMROTEC®


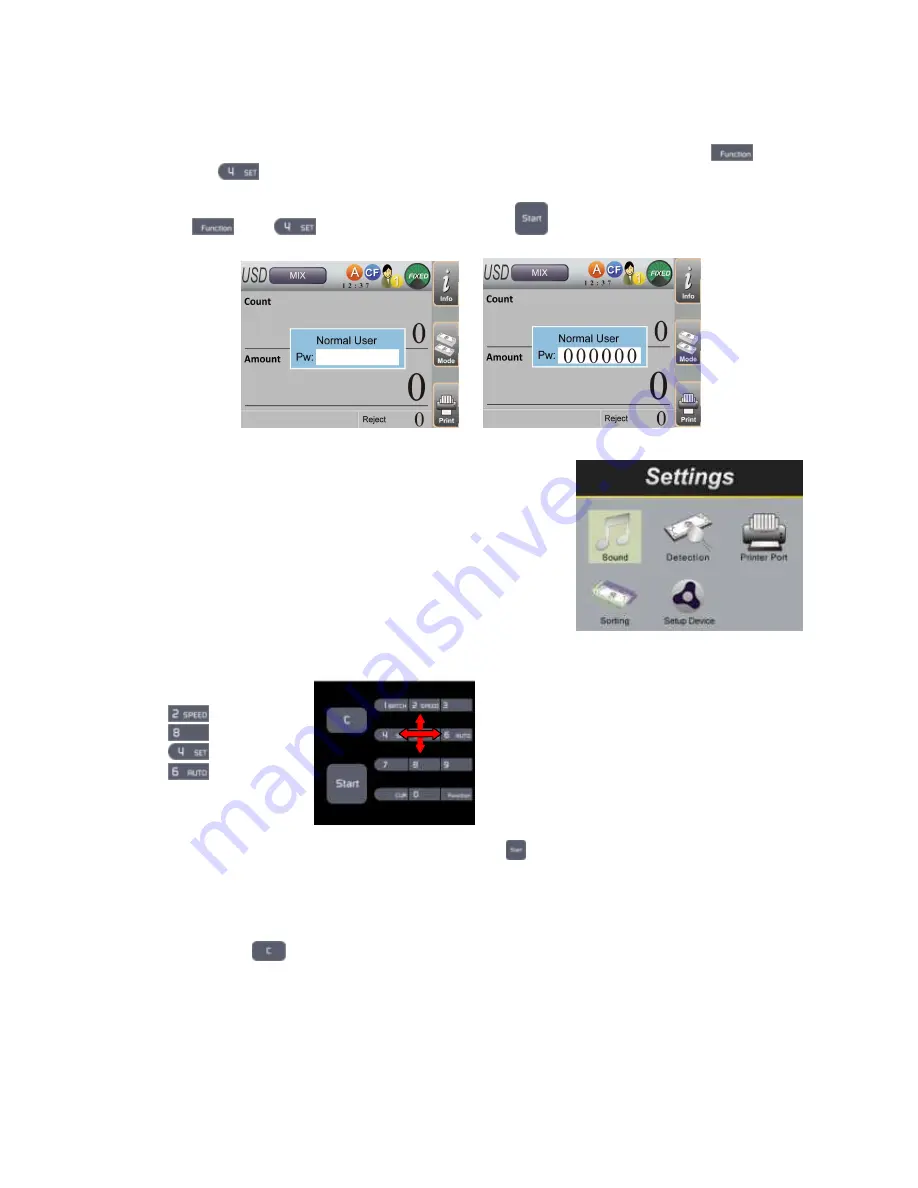
Set Function and its Parameter Settings 


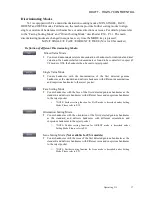
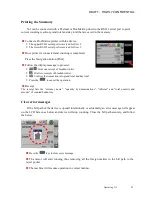
To set a function and its parameters, firstly, enter into Setting Mode by pressing 


followed by 

  key. After pressing these two keys, a password requirement will prompt on the 

screen; Enter password provided to you by your sales representative and press [Start] key to confirm.   

        [   

  and 


 Password (XXXXX) 


 Setting Mode ]   


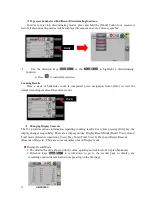
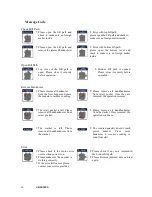
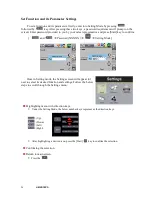
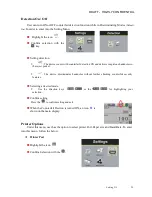
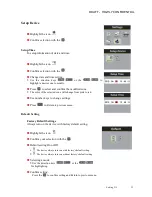
Once in Setting mode, the Settings screen will appear for 

user to select its desired function and settings. Follow the below 
steps to scroll through the Settings menu:   


After highlighting a desired icon, press the [Start] 

  key to confirm the selection.


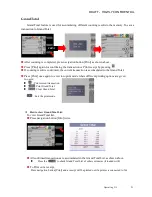
Confirming the selection. 


Return to main screen. 


Press the 

.


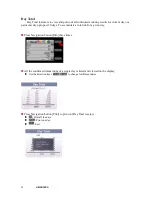
Highlighting menu with direction keys. 


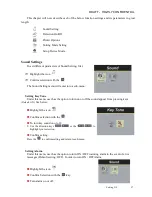
Under the Setting Mode, the below number keys represent as the direction keys:


: (Up) 
: (Down) 
: (Left)


: (Right). 


Summary of Contents for X-1 Series

Page 1: ...HIGHLY CONFIDENTIAL DRAFT X 1 Series Currency Discriminating Counter with Stacker and Reject pocket Instruction Manual Vol 1 0...

Page 2: ...nting Speed 14 Batch Counting 15 Selection of Currency 16 Discriminating Modes 17 Definition of different Discriminating Modes 17 Counting Results 18 ADD mode 20 Grand Total 21 Day Total 22 Printing t...

Page 3: ...DRAFT HIGHLY CONFIDENTIAL 3 Chapter 5 Maintaining X 1 34 Open Bill Path 35 Cleaning X 1 35 Appendix Specification 36 Limited Warranty Disclaimer Service 37...

Page 4: ...4 AMROTEC Chapter 1 Introduction Introduction 5 FCC Compliance Statement 5 Abbreviations and Acronyms 5 Safety Precautions 6 Electrical Safety 6 Warnings 6 Cautions 6...

Page 5: ...ates uses and can emit radio frequency energy and if not installed and used in accordance with the instruction manual may cause harmful interference in radio communications Operation of this equipment...

Page 6: ...an authorized X 1 service provider for assistance 5 Keep liquids away from X 1 Do not operate the Currency Counter if it is wet Also do not touch the Currency Counter if you are wet If a spill occurs...

Page 7: ...DRAFT HIGHLY CONFIDENTIAL 7 Chapter 2 Overview of X 1 X 1 at a Glance 8 Overview of Control Panel 9 Overview of LCD Display 9...

Page 8: ...trol Panel Reject Pocket Stacker Pocket 3 5 Inch color TFT LCD Display Hopper Guide Top Bill Path Open Bottom Bill Path Open Remote Display Socket SD Card Upgrade Socket Power Socket Power Switch PC C...

Page 9: ...ion Keys 3 5 Inch TFT LCD Display Navigation Keys INFO MODE PRINT C Clear Start User 1 C Clear Start User 2 Current Time Auto Manual Operation Sorting Mode ADD Mode Currency Result Currency Detection...

Page 10: ...Operation 12 Auto Manual Start Mode 14 Counting Speed 14 Batch Counting 15 Selection of Currency 16 Discriminating Modes 17 Definition of different Discriminating Modes 17 Counting Results 18 ADD mod...

Page 11: ...Power Switch button to Off O Placing Bills on the Note Hopper To operate the device without malfunctioning please follow the below instructions Avoid counting wet excessively dirty or spoiled banknote...

Page 12: ...rs function in details The RIGHT set of keys is for User 2 Press the on the right side to switch to User 2 Press to clear results of the current User X 1 control panel is equipped with two sets of and...

Page 13: ...r the to highlight CNT mode Press the to confirm the selection Density Level In CNT mode user has the option to select between different density level to adjust double detection While in CNT mode Pres...

Page 14: ...ice starts counting operation only after the key is pressed Counting Speed At CNT mode user has the option to adjust the counting speed however counting speed is fixed for all discriminating modes at...

Page 15: ...y pieces Set a batch quantity by pressing number keys and the device counts the preset number The machine stops once the counted number reaches a preset quantity How to set a batch by amount in MIX mo...

Page 16: ...ilable currencies and CNT Count Mode are shown sequentially on the left top of the LCD display Press and hold the A list of all the available currencies that the machine is equipped with would be disp...

Page 17: ...e first detected geniune banknotes as the standard and delivers banknote with different denominations and suspicious banknotes to the reject pocket Face Sorting Mode Counts banknotes with the face of...

Page 18: ...The X 1 provides various information regarding counting results Every time pressing Info key the display changes sequentially There are 4 display modes Display Result Mode Detail View Grand Total mode...

Page 19: ...umulated to Grand Total list Day Total Day Total feature only available when ADD mode is activated In Day Total mode all confirmed transactions for the current day is accumulated to Day Total list Pre...

Page 20: ...ve Press Print button for confirming the count result and to enter into Print mode At this time user has option to print the current result by pressing Start or Print Press Print button again to add t...

Page 21: ...is accumulated to the Grand Total Exit the print mode How to view Grand Total List To view Grand Total list Press navigation button Info twice Press navigation button Print and a receipt will be prin...

Page 22: ...to past 30 days To accumulate a total run for a given day Press Navigation button Info three times All the confirmed transactions of a single day is listed and viewed on the display Use the direction...

Page 23: ...device will stop counting Close the bill path securely and follow the below Connect a Dot Matrix printer with the device The upper RS232 serial port is reserved for User 2 The lower RS232 serial port...

Page 24: ...all banknotes from the Note hopper and place them again to resume counting Please remove all bankbanknotes from reject pocket Once they are removed the operation resumes The reject pocket is full Plea...

Page 25: ...gs 26 Sound Settings 27 Setting Key Tone 27 Setting Alarm 27 Detection On Off 29 Printer Options 29 Print Paper 30 Printer Baud Rate BPS 30 Sorting Mode Setting 31 Face Sorting Mode 31 Orientation Sor...

Page 26: ...ress Start key to confirm and Password XXXXX Setting Mode Once in Setting mode the Settings screen will appear for user to select its desired function and settings Follow the below steps to scroll thr...

Page 27: ...into a sub menu Setting Key Tone Under this menu user has the option to turn on or off the sound appear from pressing keys Default ON See below Highlight the icon Confirm selection with the To turn ke...

Page 28: ...picious Alarm sound Highlight the icon Suspicious Note Alarm Confirm Selection with the key Turn alarm on or off When alarm is turned ON the device sounds with a message code shown on the LCD display...

Page 29: ...knotes to the reject pocket The device discriminates banknotes without further checking counterfeit security features Selecting a desired mode Use the direction keys or the for highlighting your selec...

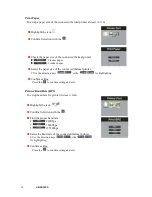
Page 30: ...the proper baud rate 9600bps 38400bps 115200bps Select the baud rate of the connected thermal printer Use the direction keys or the for highlighting Confirm setting Press the to confirm setting and ex...

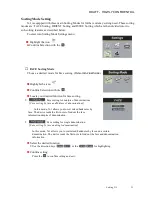
Page 31: ...tion with the Locate your desired function for face sorting Face sorting for mixture of denominations Face sorting by face and Mixture of denominations In this mode X 1 allows you to sort mixed bankno...

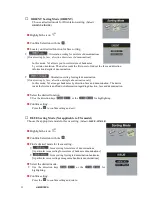
Page 32: ...banknotes by direction face and denomination The device reads the first note and find out information regarding direction face and denomination Select the desired function Use the direction keys or t...

Page 33: ...of the selected zone will change from pink to red Use number keys to change settings Press to Return to previous menu Default Setting Factory Default Settings Always turn on the device with factory de...

Page 34: ...34 AMROTEC Chapter 5 Maintaining X 1 Open Bill Path 35 Cleaning X 1 35 Limited Warranty Disclaimer Service 37...

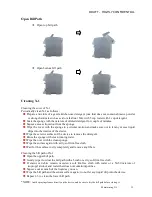
Page 35: ...exterior surface of the device to remove the detergent Rinse the sponge with clean running water Wipe the over with the clean sponge Wipe the surface again with a dry soft lint free cloth Wait for th...

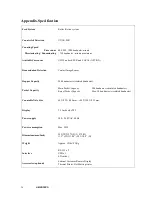
Page 36: ...500 banknotes circulated banknotes Main Pocket Capacity 200 banknotes circulated banknotes Pocket Capacity Reject Pocket Capacity Max 30 banknotes circulated banknotes Countable Note Size 60 X 85 X 0...

Page 37: ...not be liable for any incidental or consequential damages for breach of any express or limited warranty on this products or any part thereof Except to the extent prohibited by applicable law manufactu...

Page 38: ......

Reviews: