American Megatrends, Inc.
AMIDebug
™ Rx – User Manual
Copyright ©2017
American Megatrends Inc. ● Public Document
Page 9 of 36
Using AMIDebug Rx for BIOS Checkpoints
Identifying Systems That Support AMIDebug Rx
Systems supporting AMIDebug Rx functionality will have a support string present in the BIOS Setup,
under the Advanced
menu (“AMI Debug Rx Enabled!”). The manufacturer’s documentation may also
indicate that AMIDebug Rx is supported.
Locating the USB Debug Port
AMIDebug Rx
will only communicate with the system under test on the “USB debug port.” Please refer
to the manufacturer’s documentation to locate this port.
Checkpoint Functionality
Turn off the system under test (SUT). Set the OPTION SWITCH to checkpoint mode (RIGHT) and
connect the AMIDebug Rx to the USB debug port on the SUT. Turn on the SUT. AMIDebug Rx will
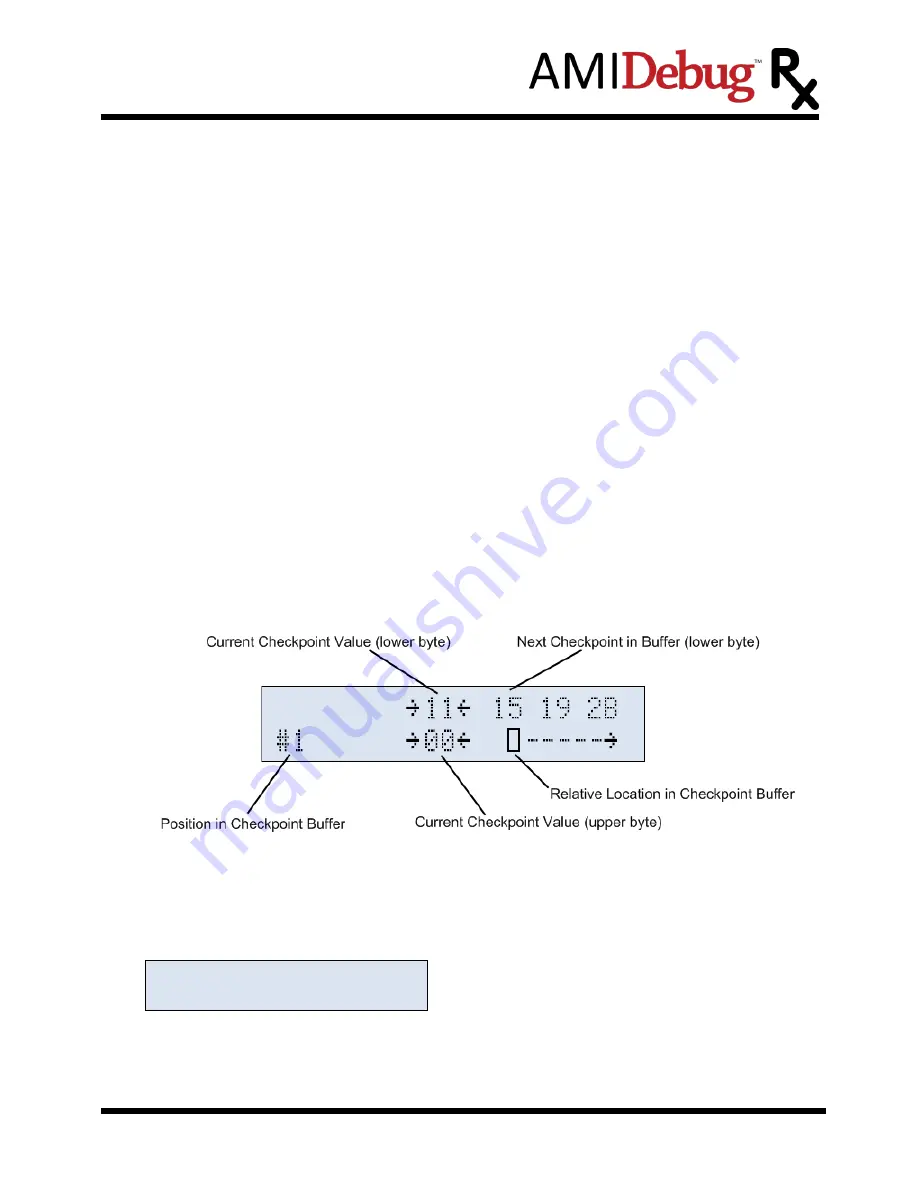
power on and start displaying data sent to the USB debug port. By default POST checkpoints are
displayed in a right justified format.
Changing the Checkpoint Display Format
The SELECT button is used switch the display mode, showing the same checkpoint data with string
descriptions and timing information. Descriptions are based on the lower checkpoint byte only.
While in CHECKPOINT mode, the SHIFT key also affects the display mode. Checkpoint lower-byte
values are displayed on the bottom line, while the checkpoint upper-byte value and progress bar are
shown on the top.


