Chapter 2 - Installation
22
Step 5 Connect the Power Supply
The power supply should match the physical
configuration of the chassis. Make sure
that the power switch is Off before
assembly.
Before attaching all components, make sure
that the proper voltage has been selected.
Power supplies often can run on a wide
range of voltages, but must be set
(usually with a switch) to the proper
range. Use at least a 200 watt (or larger)
power supply, which should have built-in
filters to suppress radiated emissions.
The filters help the OEM pass the
appropriate FCC certification testing.
If all EISA expansion slots are filled, a
standard 200-250 watt power supply is not
sufficient. A 300-450 watt power supply is
needed if all slots are used.
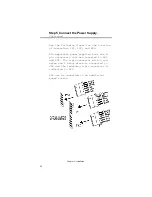
Connect to PS1 and PS2
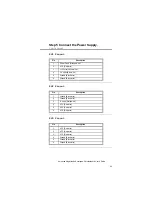
The power supply is connected to PS1 and
PS2 on the motherboard. A third connector
(PS3) is supplied for some 400 watt power
supplies which have three power plugs.
Summary of Contents for 16 Series
Page 8: ......
Page 18: ...Chapter 2 Installation 10 ...
Page 28: ...Chapter 2 Installation 20 properly installed call Technical Support ...
Page 50: ...Chapter 2 Installation 42 floppy disk with Enterprise II motherboard ...
Page 51: ...American Megatrends Enterprise II Motherboard User s Guide 43 ...
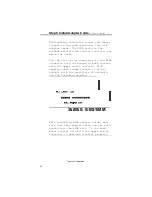
Page 63: ...American Megatrends Enterprise II Motherboard User s Guide 55 Press Del to run AMIBIOS Setup ...
Page 66: ...Chapter 4 BIOS Setup 58 Default values loaded Press any key to continue ...
Page 100: ...Appendix B EISA Configuration Worksheets 92 check the options installed ...
Page 106: ...Appendix B EISA Configuration Worksheets 98 Share ___ Yes ___ No ...
Page 109: ...American Megatrends Enterprise II Motherboard User s Guide 101 Share ___ Yes ___ No ...
Page 114: ...Appendix B EISA Configuration Worksheets 106 Share ___ Yes ___ No ...
Page 117: ...American Megatrends Enterprise II Motherboard User s Guide 109 Share ___ Yes ___ No ...
Page 121: ...American Megatrends Enterprise II Motherboard User s Guide 113 ...


