EN
15
Functional test – Ambu® aScope™
1. Ensure that the endotracheal tube slides over the insertion cord without resistance
2. Carefully slide the bending control lever forward and backwards in each direction until it stops. Confirm that the bending section functions
smoothly and correctly.
3. Slide the bending lever slowly to its neutral position. Confirm that the bending section returns smoothly to an approximately straight position.
4. Connect the Ambu® aScope™ to the Ambu® aScope™ Monitor to check picture signal
Inspection of the image – Ambu® aScope™ Monitor
1. Turn the Ambu® aScope™ Monitor power on.
2. Adjust the brightness and contrast level as appropriate.
3. If the object cannot be seen clearly, wipe the lens using a clean cloth.
4. Check the battery indicator on the monitor. If the time remaining is not sufficient for the procedure – charge the monitor.
5. Be sure the power supply is present and working.
Testing of the Luer channel – Ambu® aScope™
1. Ensure the channel is patent by injecting 2ml air through the channel with the syringe.
2. Insert a 2ml syringe of sterile water into the channel, depress the plunger, and ensure there are no leaks at the Luer entry, and that water is
emitted from the distal end.
12. Use of the Ambu® aScope™ system
In case of massive bleeding in the airway do not use Ambu® aScope™.
If needed remove secretion or blood from the airway before and during the procedure. Appropriate suction device or other standard procedures can be
used for this purpose.
The Ambu® aScope™ system operator must be a physician or medical personnel who has appropriate medical qualifications,
and moreover has undergone sufficient training in endoscopic procedures via the oral and nasal routes.
Please be aware that these instructions do not explain or discuss clinical intubation procedures. They describe only the basic operation and precautions
related to the operation of this Ambu® aScope™ system.
Before initial use of the Ambu® aScope™ system, it is essential that the operator is familiar with the warnings, precautions, notes, indications and contrain-
dications found in these user instructions.
The Ambu® aScope™ system must be handled in accordance with the recognised medical rules and procedures for endotracheal intubation with an
endoscope.
Do not try to operate the bending section lever while the bending section is inside the endotracheal tube. Adjustment is not possible
inside the tube and control wires may break if the lever is operated forcibly.
Operating the Ambu® aScope™
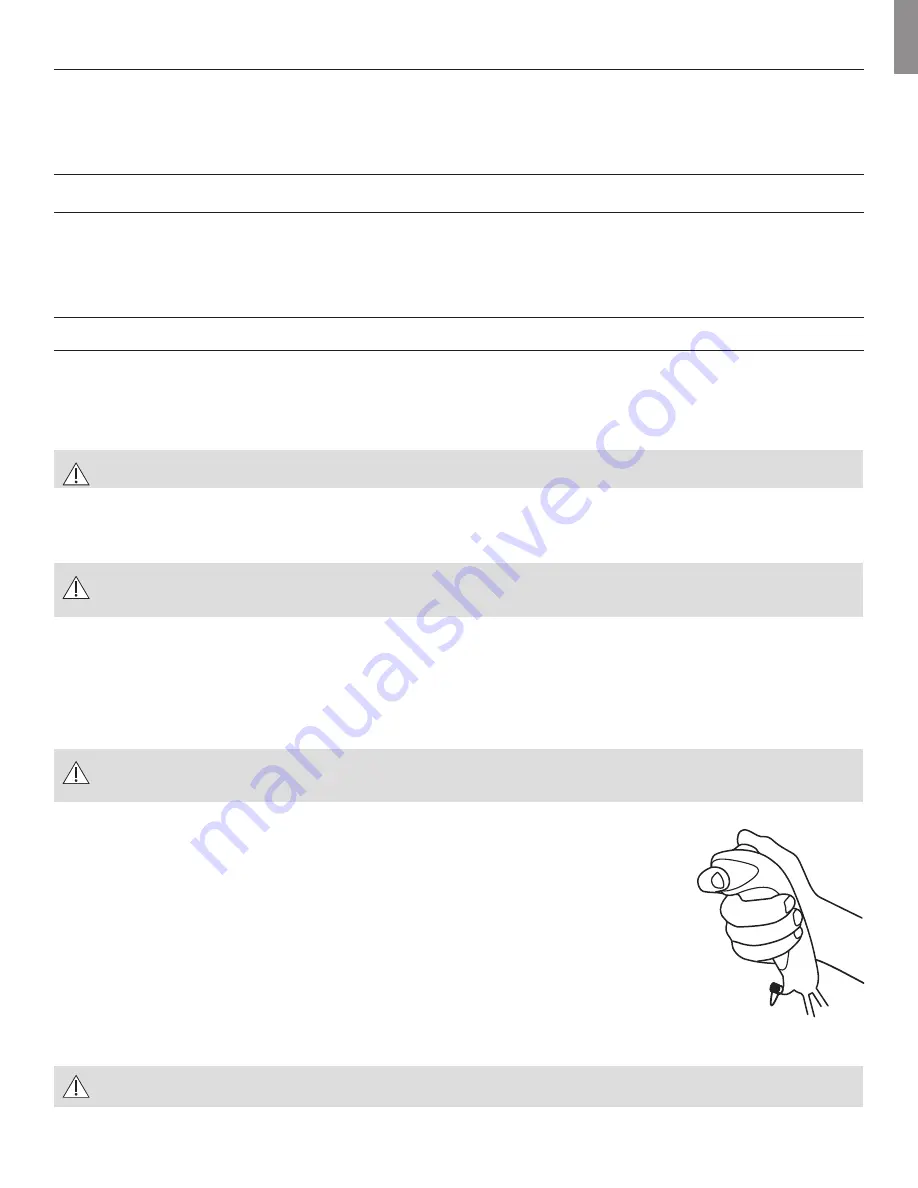
The handle of the Ambu® aScope™ is designed to be held by either the left or right hand. The recommended hand
position is shown.
When the control lever is moved out of its neutral position, the physician will feel slightly more resistance as the control
lever reaches its outermost limits. It is recommended to test the device prior to use, to get familiar with the resistance.
When the control lever is moved to a position and released, the distal tip will return to a neutral position. When the con-
trol lever is pressed downwards the distal tip moves up. When moving the control lever upwards, the distal tip moves
down.
Attaching the endotracheal tube on the Ambu® aScope™
The endotracheal tube may be placed on the Ambu® aScope™ either with or without the ISO connection on the green
‘parking’ area.
Important: When the endotracheal tube is railroaded onto the insertion cord, the internal diameter of the endotracheal
tube has to be 6.0mm or more. Check that the endotracheal tube with the ISO connection slides without any resistance.
It is important to handle the distal tip with care, as the parts can be delicate. Carefully protect the lens at the distal tip from damage.


