last revision:
14/05/2018
Project Divison Projet
8
less than [12.00] 1/2”
Recommended
ø 3”
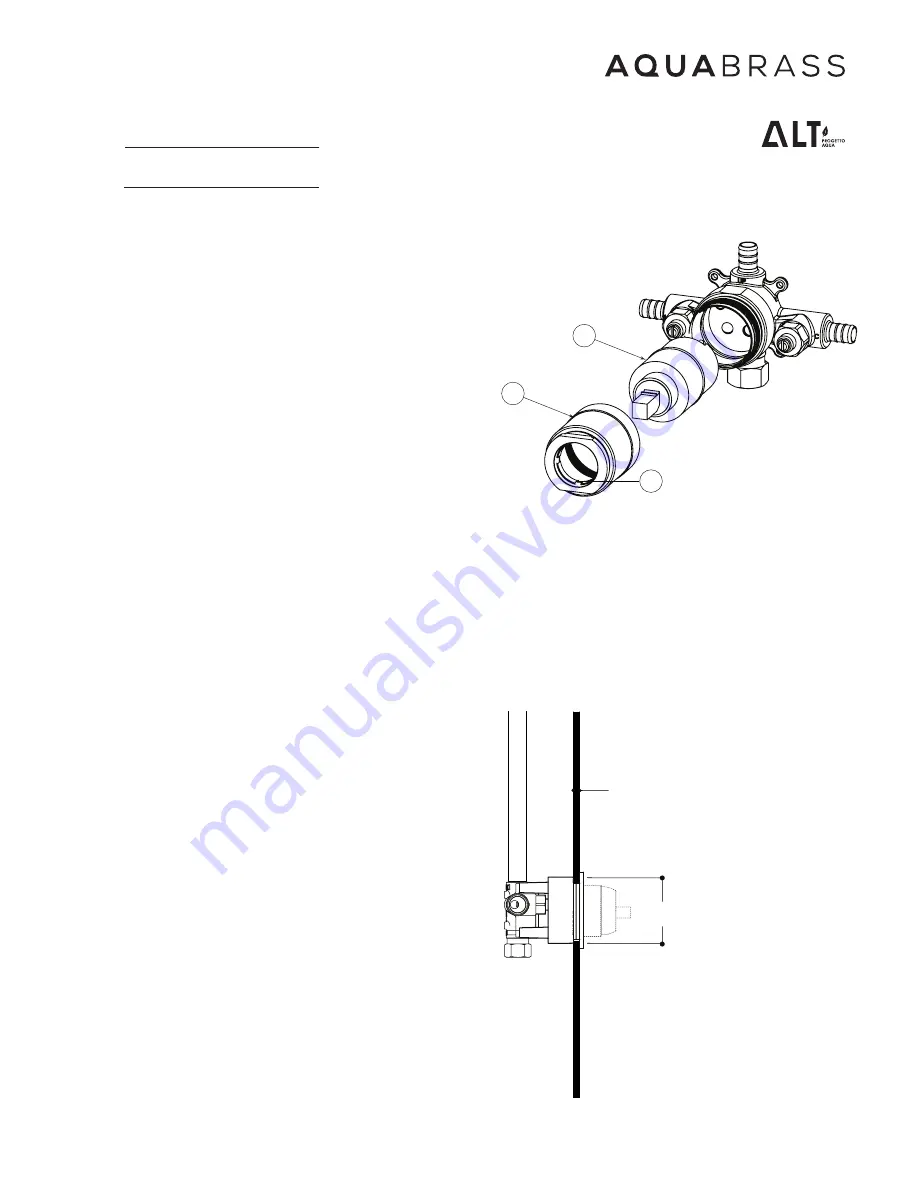
Fig.7
2.
Installing the cartridge
Unscrew the cartridge holder (1) and remove the protective plug.
Fig. 6. Make sure the "top" brass spacer remains in place (3).
Insert the cartridge (2) into the valve body as shown. Fig.6.
Make sure its guiding lugs line-up with the corresponding open-
ings in the rough. Push the cartridge until its surounding O-ring is
firmly engaged. Reinstall the cartridge holder (1). DO NOT OVER-
TIGHTEN.
Installing the rough
Position the rough with the plastic cover surface firmly against the
back of the wall.
Complete the installation by tightly grabbing the thin wall between
the mixer rough and the circular adaptor. Fig. 7.
Screw in place using the top left and bottom right positions. Fig 5.
Installation de la cartouche
Dévisser le manchon de la valve (1) et retirer le capuchon pro-
tecteur. Fig. 6. Assurez-vous de ne pas perdre l'anneau métallique
monté sur le dessus (3).
Insérer la cartouche (2) dans la valve telle qu'illustré. Fig. 6
Utiliser les 2 projections en dessous comme guide pour l'orienter
correctement. Enfoncer la cartouche, jusqu'à ce que le joint
thorique du pourtour soit fermement engagé dans la base. refer-
mer la valve à l'aide du manchon. NE PAS TROP SERRER.
Installation de la plomberie brute
Positionner la plomberie brute avec son capuchon plastique à
l'arrière du mur.
Compléter l'installation en pinçant le mur fin entre la plomberie
brute du mélangeur et l'adaptateur circulaire. Fig. 7.
Visser les composantes en utilisant les emplacements supérieur
gauche et inférieur droit seulement. Fig 5.
2
1
3
Fig.6
INSTALLATION B (Thin wall)


