background image

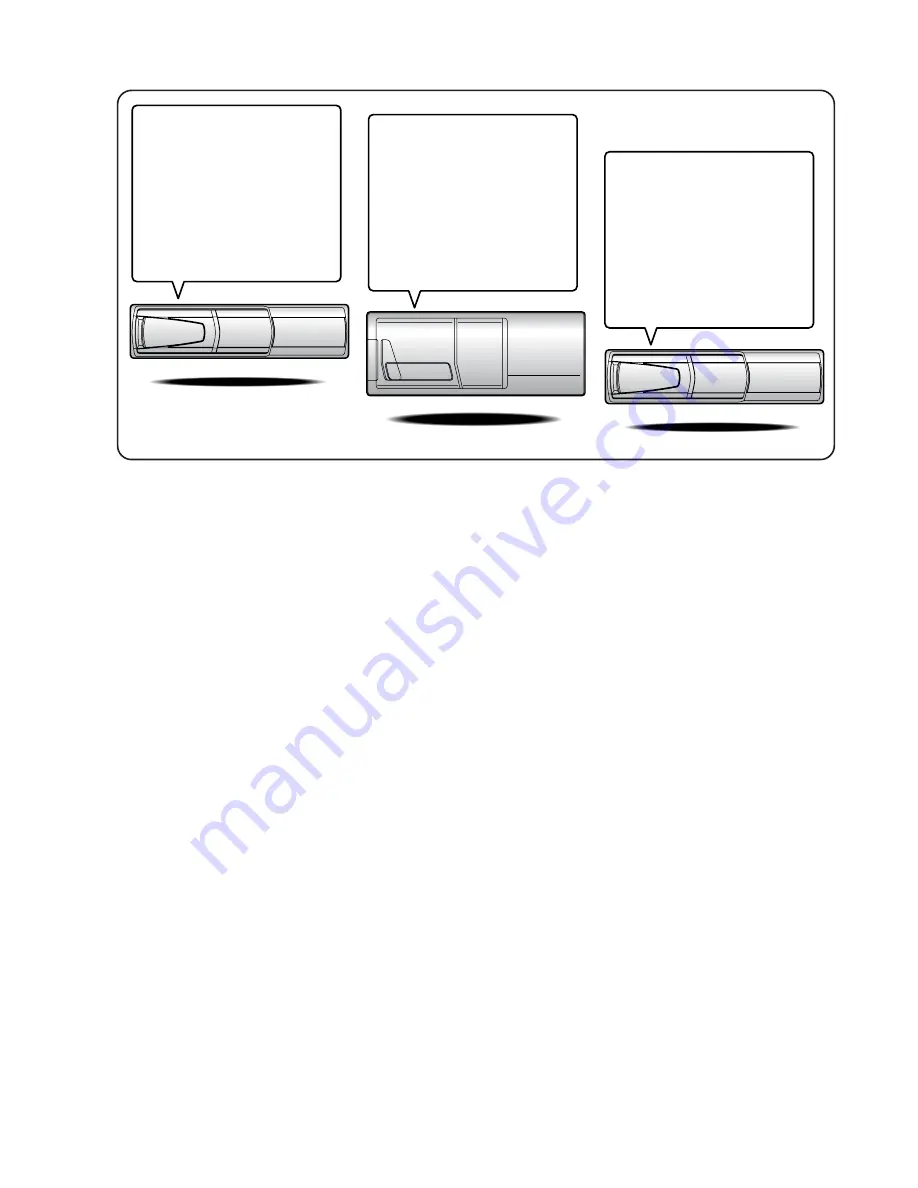
CD changer for CVA-1014R/CVA-
1014RB/CVA-1014RR.
CD-Wechsler für CVA-1014R/CVA-
1014RB/CVA-1014RR.
Changeur CD pour CVA-1014R/CVA-
1014RB/CVA-1014RR.
Cambiador de CD para CVA-1014R/
CVA-1014RB/CVA-1014RR.
Cambia CD per CVA-1014R/CVA-
1014RB/CVA-1014RR.
CD-växlare för CVA-1014R/CVA-
1014RB/CVA-1014RR.

CHA-1214

CHM-S630

You cannot connect to CVA-1014R/CVA-
1014RB/CVA-1014RR.
Il est impossible de se raccorder au CVA-
1014R/CVA-1014RB/CVA-1014RR.
No es posible conectarlo a CVA-1014R/
CVA-1014RB/CVA-1014RR.
Ein Anschluß an CVA-1014R/CVA-
1014RB/CVA-1014RR ist nicht möglich.
Non è possibile effettuare il collegamento
a CVA-1014R/CVA-1014RB/CVA-
1014RR.
Du kan inte ansluta till CVA-1014R/CVA-
1014RB/CVA-1014RR.

Alpine CD Changers Give You More!

More musical selections, more versatility, more convenience.

An Alpine CD Changer adds more musical choices to your sound system. All models except CHM-S630 can be controlled from Alpine head
units and deliver excellent sound quality. The CHA-S634 is a high-performance 6-disc changer with a new M DAC, Ai-NET compatibility,
Optical Digital Output, 150 Disc Title Memory and CD TEXT. The CHA-1214 Ai-NET model holds 12 discs, and the CHM-S630 M-Bus
model is a super-compact 6-disc changer.

Von Alpine CD-Wechslern haben Sie mehr!

Mehr Musikauswahl, mehr Vielseitigkeit, mehr Komfort.

Mit einem Alpine CD-Wechsler erweitern Sie die Musikauswahl Ihres Systems. Sämtliche Modelle außer dem CHM-S630 lassen sich von
einer Alpine-Bedieneinheit aus steuern und liefern hervorragende Klangqualität. Der CHA-S634 ist ein Ai-NET-kompatibler Hochleistungs-
Wechsler für 6 CDs mit dem neuen M-DAC, Digitalausgang für Glasfaserkabel, CD-Titelspeicher für 150 Titel und CD-TEXT. Das Ai-NET-
Modell CHA-1214 nimmt 12 CDs auf, und der M-Bus-kompatible CHM-S630 ist ein superkompakter Wechsler für 6 CDs.

Changeurs de CD Alpine : vous avez le choix!

Plus de sélections musicales, plus de souplesse, plus de confort.

Un changeur de CD Alpine permet d'augmenter la plage des sélections musicales de votre système embarqué. Tous les modèles, l'exception
du CHM-S630, peuvent être contrôlés à partir des autoradios Alpine et offrent une excellente qualité audio. Le modèle CHA-S634 est un
changeur 6 disques ultra performant compatible Ai-NET et équipé d'un convertisseur N/A standard, d'une sortie optique numérique, d'une
mémoire d'une capacité de 150 titres et de la fonction CD TEXT. Le modèle CHA-1214 Ai-NET peut contenir 12 disques. Le modèle CHM-
S630 M-Bus est un changeur 6 disques super compact.

¡Los cambiadores Alpine de CD le ofrecen más!

Más selecciones musicales, más versatilidad y más ventajas.

Un cambiador Alpine de CD añade más opciones musicales a su equipo de sonido. Todos los modelos, excepto el CHM-S630, pueden
controlarse desde las unidades principales de Alpine y proporcionar un sonido de calidad excepcional. El modelo CHA-S634 es un
cambiador de 6 discos de alto rendimiento con el nuevo DAC "M" y compatibilidad con Ai-NET, salida digital óptica, memoria de títulos de
150 discos y TEXTO CD. El modelo CHA-1214 Ai-NET admite 12 discos y el modelo CHM-S630 Bus-M es un cambiador de 6 discos y
tamaño reducido.

I caricatori CD Alpine danno di più!

Più scelta, più versatilità, più comodità.

Un caricatore CD Alpine offre maggiore scelta. Tutti i modelli, eccetto il modello CHM-S630, possono essere controllati tramite le unità di
controllo Alpine e producono un suono di qualità eccellente. CHA-S634 è un caricatore a 6 dischi Ai NET compatibile e dotato di un nuovo
M DAC, di un'uscita ottica digitale, memorizzazione dei titoli di 150 dischi e CD TEXT. Il modello CHA-1214 Ai NET può contenere un
massimo di 12 dischi, mentre il modello CHM-S630 M-Bus è un caricatore a 6 dischi ultra compatto.

Alpines CD-växlare ger mer!

Fler musikval, mer variation, större bekvämlighet.

Med Alpines CD-växlare i systemet får du större musikalisk valfrihet. Alla modeller, utom CHM-S630, kan styras från Alpines huvudenheter
och ger enastående ljudkvalitet. CHA-S634 är en högpresterande växlare för 6 skivor med en ny M D/A-omvandlare, kompatibel med Ai-
NET, optisk digitalutgång, titelminne för 150 skivor och CD-TEXT. Modellen CHA-1214 Ai-NET rymmer 12 skivor och modellen CHM-
S630 M-Bus är en superkompakt växlare för 6 skivor.

CD changer for CVA-1014R/CVA-
1014RB/CVA-1014RR.
CD-Wechsler für CVA-1014R/CVA-
1014RB/CVA-1014RR.
Changeur CD pour CVA-1014R/CVA-
1014RB/CVA-1014RR.
Cambiador de CD para CVA-1014R/
CVA-1014RB/CVA-1014RR.
Cambia CD per CVA-1014R/CVA-
1014RB/CVA-1014RR.
CD-växlare för CVA-1014R/CVA-
1014RB/CVA-1014RR.

CHA-S634

Summary of Contents for CVA-1014R

Page 1: ...ONICS OF AMERICA INC 19145 Gramercy Place Torrance California 90501 U S A Phone 1 800 ALPINE 1 1 800 257 4631 ALPINE ELECTRONICS OF CANADA INC 7300 Warden Ave Suite 203 Markham Ontario L3R 9Z6 Canada Phone 1 800 ALPINE 1 1 800 257 4631 ALPINE ELECTRONICS FRANCE S A R L RCS PONTOISE B 338 101 280 98 Rue de la Belle Etoile Z I Paris Nord Il B P 50016 95945 Roissy Charles de Gaulle Cedex France Phone...

Page 2: ...n Optional Playing DVD Video CD CD 26 Still Pause 26 Chapter DVD Track Video CD Sensor 26 Fast Forward Backward 26 Repeat Play 27 Controlling DVD Changer 27 1 EN Contents Operating Instructions WARNING WARNING 3 CAUTION 3 PRECAUTIONS 3 Basic Operation Detaching the Front Panel 6 Attaching the Front Panel 6 Initial System Start Up 6 Turning Power On and Off 7 Raising the Monitor 7 Lowering the Moni...

Page 3: ...ing Tint of Picture 41 Setting the Background Screen Colour DAY NIGHT 41 Setting the Automatic Background Screen Colour 41 Scroll Setting 42 Setting Automatic Opening Closing of Monitor 42 Turning Sound Guide Function On or Off 43 Setting the Clock Display 43 Displaying Time 43 Setting Time 43 Automatic Time Adjustment 43 Setting the External Expansion Box 44 Rear Monitor Setting 44 Setting the Ex...

Page 4: ... If swallowed consult a physician immediately USE ONLY IN CARS WITH A 12 VOLT NEGATIVE GROUND Check with your dealer if you are not sure Failure to do so may result in fire etc CAUTION This symbol means important instructions Failure to heed them can result in injury or material property damage HALT USE IMMEDIATELY IF A PROBLEM APPEARS Failure to do so may cause personal injury or damage to the pr...

Page 5: ...rive during operation the display will show the warning CAN T OPERATE WHILE DRIVING for 5 seconds This operation is the same as when selecting sources using the remote control Optional When the car is parked the selection is made as described in the Owner s Manual Alpine products equipped with the Ai NET bus connected to the CVA 1014R CVA 1014RB CVA 1014RR can be operated from the CVA 1014R CVA 10...

Page 6: ... operate most of the functions of this unit with the monitor open or closed For operations with the monitor closed refer to page 51 THE MONITOR IS OPEN THE MONITOR IS CLOSED displayed in the sub display displayed in the monitor ...

Page 7: ...ng Wheel Radio Controls If your vehicle has steering wheel controls for the radio an optional steering wheel control interface may be available to connect your Alpine radio For details contact your Alpine dealer Controllable with Remote Control This unit can be controlled with an optional Alpine remote control For details consult your Alpine dealer Point the optional remote control transmitter at ...

Page 8: ... and raises the monitor automatically NOTES The CVA 1014R CVA 1014RB CVA 1014RR is a precision device With gentle handling its unique capabilities can be enjoyed for a long time If the monitor touches an obstacle while it is being raised the unit will stop raising the monitor immediately Should this occur remove the obstacle and press OPEN CLOSE again to raise the monitor When the movable monitor ...

Page 9: ...revious level Adjusting the Monitor Viewing Angle Adjust the monitor s angle for better visibility 1 Press TILT 7 7 7 7 7 8 8 8 8 8 to adjust the monitor s angle so the screen will be in the best viewing position Each press of the buttons produces a beep and changes the screen angle between about 40 and 105 degrees When you press and hold TILT 7 7 7 7 7 or 8 8 8 8 8 for at least 2 seconds the moni...

Page 10: ...ions will be tuned 4 Press g or f to automatically seek for a station downward or upward respectively The unit will stop at the next station it finds Press the same button again to seek the next station Manual Storing of Station Presets 1 Select the radio band and tune in a desired radio station you wish to store in the preset memory 2 Press and hold any one of the preset buttons 1 through 6 for a...

Page 11: ...ocedure began Tuning to Preset Stations 1 Press SOURCE POWER to select the radio mode 2 Press BAND TEL repeatedly until the desired radio band is displayed 3 Press the station preset button that has your desired radio station in memory The display shows the band preset No and frequency of the station selected Selecting a Station from the List You can display the list of your titled stations refer ...

Page 12: ...Stations 1 Press FUNC so that the FUNC indicator appears in the sub display To perform the same operation with the monitor open press FUNC only when the FUNC indicator lights red in the monitor 2 Press 1 AF to activate the RDS mode The display shows AF when the RDS mode is activated 3 Press FUNC to activate the normal mode The FUNC indicator will turn off 4 Make sure that the FUNC indicator light ...

Page 13: ... TP indicator lights up Traffic information is heard only when it is being broadcast If traffic information is not being broadcast the unit is set in the standby mode When a traffic information broadcast begins the unit automatically receives it and the monitor shows T INFO during the traffic information broadcast sub display shows TRF INFO for 2 seconds then returns to the previous display When t...

Page 14: ...sappears NOTE The unit automatically switches to a traffic information announcement even if you are listening to a source other than the radio or CD player e g DVD player PTY Programme Type Tuning 1 Press FUNC so that the FUNC indicator appears in the sub display To perform the same operation with the monitor open press FUNC only when FUNC lights red in the monitor 2 Press 2 PTY to activate the PT...

Page 15: ... 3 Press g or f within 5 seconds while NEWS is being displayed to choose a desired programme type Then press 3 P PTY The PRIORITY PTY function will activate RDS Operation 4 Press 3 P PTY to activate the PRIORITY PTY mode again To change the programme category perform the step 3 To disable the PRIORITY PTY function press 3 P PTY for at least 2 seconds NOTE In the PRIORITY PTY function unlike in the...

Page 16: ... in the Changing the Display Mode section page 19 the display shows the status of the broadcasting stations that have been received as follows Channel No Display The channel numbers of received stations are displayed Ensemble Label Display The Ensemble Label of received station is displayed Service Label Display The Ensemble Label is displayed for 2 seconds and then the Service Label is displayed ...

Page 17: ...at the above steps 1 and 2 NOTES You can memorize up to 18 stations 6 stations for each band DAB1 DAB2 DAB3 If you select a preset button that has already memorized a service the new selection takes it over When you are not receiving DAB the service is not memorized Memorize the service when the DAB reception is good Receiving the Memorized Service 1 Press BAND TEL to select your desired band 2 Pr...

Page 18: ...n the Service Label is displayed for 2 seconds and then the display is changed to the Dynamic Label after receiving the broadcasting station NOTE If no ensemble is received the one that has been received before you perform this automatic memorization is received DAB Operation Optional PTY Programme Type Tuning 1 Press FUNC and the FUNC indicator lights 2 During radio DAB receiving mode press 2 PTY...

Page 19: ...ial news The ON OFF setting of TRAFFIC Traffic News is reflected in the setting of the Turning ON OFF Traffic News Announcement section on page 17 TIPS When an urgent broadcast is received the mode automatically changes to the DAB mode to receive the Alarm Announcement If you adjust the volume level at this time that volume level is memorized and that volume level is applied the next time you rece...

Page 20: ...the character information once NO TEXT is displayed when broadcasting stations which contain no Dynamic Label are received However when a station is waiting for its reception WAITING is displayed Ensemble Label Display Service Label Display Component Label Display 1 Dynamic Label Display 2 Channel No Display Clock Display Ensemble Label Display Service Label Display Component Label Display 1 Dynam...

Page 21: ...he DAB indicator blinks Setting ON OFF for DRC Dynamic Range Control If you set this ON when receiving the sound of a wide Dynamic Range the DRC Dynamic Range Control gain increases when the source sound is small and the DRC Dynamic Range Control gain decreases when the source sound is large making the Dynamic Range narrower to give you better and more comfortable sound even in the vehicle that pr...

Page 22: ...nit CD MP3 Changer Operation Optional Playing Optional CD Player or Changer When an optional Alpine CD player or CD MP3 changer is connected you can control it from the CVA 1014R CVA 1014RB CVA 1014RR This section describes operation assuming that an Alpine CD player is connected When a CD MP3 changer is connected see page 24 to select your desired disc 1 Press SOURCE POWER until the CD appears in...

Page 23: ...to illuminate the FUNC indicator and go to step 1 In case a 12 disc CD changer is connected In changer mode press FUNC twice to illuminate the FUNC indicator and go to step 1 M I X ALL M I X off Repeat Play 1 Press 5 Repeat to play back repeatedly the track being played The track file will be played repeatedly Press 5 again and select OFF to deactivate the repeat play NOTES If a CD Changer or an M...

Page 24: ...l Selecting Folders concerning MP3 1 Press FUNC to illuminate the FUNC indicator and press preset 1 or preset 2 to select the folder File Folder Search concerning MP3 You can select an MP3 file from the file folder name list and play back 1 1 When the monitor is open in MP3 mode press and hold the MODE Rotary encoder for at least 2 seconds during playback The unit switches to File Folder Search mo...

Page 25: ...ected disc number appears in the display and CD playback starts NOTES After selecting the desired disc you can operate in the same way as for the CD player For details please see this section When the FUNC indicator is lit in red in the monitor or is lit in the sub display the disc select buttons become nonfunctional When a 12 disc CD Changer is connected To select discs numbered from 1 to 6 the p...

Page 26: ...ator appears on the display NOTE If the selected CD Changer is not connected the display will show NO CHANGER 4 To operate the selected changer see each operation in this section NOTE If an optional CD DVD player is connected to the unit the disc mode can be switched each time you press BAND TEL see Switching Disc Mode on page 48 Setting the Range of MP3 File Selection When an MP3 compatible CD ch...

Page 27: ...player is connected to the CVA 1014R CVA 1014RB CVA 1014RR you can control it from the CVA 1014R CVA 1014RB CVA 1014RR WARNING It is dangerous and illegal in many states for the driver to watch the TV Video while driving the vehicle The driver may be distracted from looking ahead and an accident could occur Install the CVA 1014R CVA 1014RB CVA 1014RR correctly so that the driver cannot watch TV Vi...

Page 28: ...In DVD changer mode press FUNC to illuminate the FUNC indicator and go to step 1 Chapter repeat play Title repeat play Repeat Off normal play Track repeat play Disc repeat play Repeat Off video CD only Controlling DVD Changer If an optional Alpine DVD Changer is connected to the CVA 1014R CVA 1014RB CVA 1014RR the DVD Changer can be controlled from the CVA 1014R CVA 1014RB CVA 1014RR 1 Press SOURC...

Page 29: ...gation system s voice guidance is not output For details about adjusting volume level refer to Adjusting Volume Balance Fader on page 8 For any other settings press preset 5 or another preset button 4 After setting is completed press MUTE SETUP to return to normal mode NOTES The volume level of the audio will be automatically reduced when the voice guidance of the Navigation system starts When the...

Page 30: ...rching for a desired Song The folder file search function has been modified to accommodate the iPod Folder search Search by Song File search Search by Playlist Artist Album By selecting Disc 1 2 or 3 in CD changer mode you can choose the method by which to search Disc 1 selection Playlist search mode Disc 2 selection Artist search mode Disc 3 selection Album search mode NOTES The maximum number of...

Page 31: ...ts consist of no more than 255 songs Also if all songs in the iPod are associated with a playlist access to each song is more efficient When connected to the adapter and search is first performed be sure to begin the operation from step 1 Searching by Playlist 1 Press 1 AF The playlist search mode is selected 2 When the monitor is open press and hold the MODE Rotary encoder for at least 2 seconds ...

Page 32: ...dly REPEAT off REPEAT Repeat One Repeat One Repeat One A single song is repeatedly played back 3 To cancel repeat play select off with the above procedure NOTE During repeat playback no other songs are selectable by pressing or touching g or f Displaying the Text 1 Press TITLE The mode will change every time the button is pressed iPod mode The monitor is open displayed in the monitor TAG TRACK ALB...

Page 33: ...lephone is possible If there is an incoming call during operation except an outgoing call or talking operation mode will end and switch to the incoming or talking mode An outgoing call from a portable telephone is also possible However you cannot perform different operations at the same time from a portable telephone and CVA 1014R CVA 1014RB CVA 1014RR as malfunction can result With a Junction BOX...

Page 34: ...e displayed in alphabetical order 3 Press g or f to select the addressee from the phone book To skip alphabetically to the next or previous set of name press and hold g or f for at least 2 seconds 4 Press J to place a call when the monitor is closed Or press J twice when the monitor is open At the first press the name and telephone number of the addressee is displayed Then the second press places ...

Page 35: ...y You can place a call to any of the last 999 received calls recorded in memory 1 Press and hold BAND TEL for at least 2 seconds 2 Press BAND TEL again repeatedly to select RECEIVED 3 Press g or f to select the addressee from the incoming history Press and hold g or f to change the addressee continuously 4 Press J to place a call when the monitor is closed Or press J twice when the monitor is open...

Page 36: ...splay CD Video CD mode The monitor is open displayed in the monitor Text is displayed for the CVA 1014R CVA 1014RB CVA 1014RR when a compatible changer with CD text is connected CD Video CD mode The monitor is closed displayed in the sub display MP3 mode The monitor is open displayed in the monitor MP3 files can be played back with the CVA 1014R CVA 1014RB CVA 1014RR if an MP3 compatible changer i...

Page 37: ...d the display will automatically advance to the next character When that character begins to blink you may choose the next letter or symbol of your title 5 Repeat the steps 3 and 4 above to complete the titling Pressing J after entering the 8th character automatically stores the title into memory When entering a title of less than 8 characters for example 3 character title After entering 3 charact...

Page 38: ...rmal mode NOTES If no buttons are pressed within 10 seconds the Bass control setting will be turned off automatically Depending on the type of external audio processors connected to the unit you may not be able to set some settings The settings of the Bass will be individually memorized for each source FM MW LW and CD until the setting is changed Depending on the connected devices some functions a...

Page 39: ...n with the monitor closed You can set the Treble control with the monitor closed 1 Press bass engine 2 Press preset 2 TREBLE is displayed for 2 seconds in the sub display then the value of TREBLE Level blinks 3 Each time you press preset 2 the blinking shifts Example of sub display 4 Press g or f to adjust the selected mode NOTES If no buttons are pressed within 10 seconds the Treble control setti...

Page 40: ...es for the ear s decreased sensitivity to bass and treble sound 1 Press bass engine to turn on the BASS ENGINE mode 2 Press preset 4 to select Loudness mode 3 Press g or f to set LOUD to ON or OFF 4 Press bass engine to return to normal mode NOTES If no buttons are pressed within 10 seconds the Loudness setting will be off automatically When connecting an external audio processor to the unit you c...

Page 41: ... maximum point the display shows MIN or MAX respectively For any other settings press preset 1 or another preset button 4 After setting is completed press MUTE SETUP to return to normal mode NOTE The brightness settings for the video sources AUX DVD NAV will be individually memorized Adjusting Colour of Picture Colour adjustment can be made only to video sources DVD Navigation System etc Colour ad...

Page 42: ... OFF and nighttime use DIMMER ON For details of Dimmer ON OFF refer to Illumination Control on page 40 1 When the monitor is open press and hold MUTE SETUP for at least 2 seconds The SETUP screen appears 2 Press preset 1 to activate the DISPLAY setting mode Press preset 1 again to select B GND DAY or B GND NIGHT 3 Press g or f to select the colour For any other settings press preset 1 or another p...

Page 43: ...OSE is pressed MANUAL Press OPEN CLOSE to manually open or close the monitor For any other settings press preset 2 or another preset button 4 After setting is completed press MUTE SETUP to return to normal mode Scroll Setting 1 When the monitor is open press and hold MUTE SETUP for at least 2 seconds 2 Press preset 2 to select GENERAL Setting mode Press preset 2 to select SCROLL 3 Press g or f and...

Page 44: ...NOTES Selecting any function while in the clock priority mode will interrupt the time display momentarily The function selected will be displayed for about 5 seconds before the time returns to the display The clock time is not shown on both the monitor and the sub display simultaneously Setting Time 1 When the monitor is open press and hold MUTE SETUP for at least 2 seconds The SETUP screen appear...

Page 45: ...ear seat monitor can be selected from the CVA 1014R CVA 1014RB CVA 1014RR 1 When the monitor is open press and hold MUTE SETUP for at least 2 seconds The SETUP screen appears 2 Press preset 3 to activate the AUX setting mode Press preset 3 again to select MONITOR 1 OUT MONITOR 2 OUT 3 Press g or f to select the mode to display on the rear monitor AUX 1 AUX 2 AUX 3 The picture sound of the device c...

Page 46: ...L you cannot adjust the TINT In the Navigation mode the unit automatically switches to NTSC For any other settings press preset 3 or another preset button 4 After setting is completed press MUTE SETUP to return to normal mode Setting the External Input 1 When the monitor is open press and hold MUTE SETUP for at least 2 seconds The SETUP screen appears 2 Press preset 3 to select the AUX setting mod...

Page 47: ...external expansion box is set to OFF when using the CVA 1014R CVA 1014RB CVA 1014RR internal amplifier Note that if the preout is set to ON the volume level will be too high Displaying Spectrum Analyzer When using the optional expansion box KCE 104V you can use this function 1 When the monitor is open press and hold MUTE SETUP for at least 2 seconds The SETUP screen appears 2 Press preset 5 to act...

Page 48: ...onitor is open press and hold MUTE SETUP for at least 2 seconds The SETUP screen appears 2 Press preset 4 to activate the RADIO setting mode Press preset 4 again to select FM CONDITION 3 Press g or f to select the desired setting NORMAL Standard setting HI FI Sound quality priority setting STABLE Noiseless priority setting For any other settings press preset 4 or another preset button 4 After sett...

Page 49: ...or another preset button 4 After setting is completed press MUTE SETUP to return to normal mode NOTES Initial mode is IN INT MUTE ON The Auxiliary device being connected must have an Interrupt wire with a positive trigger for this function to operate automatically Otherwise a separate switch needs to be added to switch manually Changing the Radio Frequencies for each Country For customers not livi...

Page 50: ...page 46 Press TITLE to select the desired SPE ANA mode from 1 through 6 and SCAN 5 The source disc number elapsed time etc are displayed Other Useful Features Operating an External Audio Processor Optional You can operate a connected external audio processor from the CVA 1014R CVA 1014RB CVA 1014RR 1 When an external audio processor is connected press bass engine to activate Audio Processor mode 2...

Page 51: ... to fit in the wide screen monitor by evenly stretching out the picture horizontally In the Mode 2 Zoom the monitor displays a normal picture wider to fit in the wide screen monitor by unevenly stretching out The centre portion of the picture is stretched out only slightly in order to make the important centre portion of the picture look natural Other Useful Features MODE 1 MODE 2 MODE 3 MODE 4 WI...

Page 52: ... CD MP3 Changer Operation Optional Playing Optional CD player or Changer 21 Repeat Play 22 M I X Random Play 22 Scanning Programmes 23 Selecting Folders concerning MP3 23 Controlling CD Changer 24 Playing MP3 Files with the CD Changer 24 Multi Changer Selection 25 DVD Video CD CD Player Operation Optional Playing DVD Video CD CD 26 Still Pause 26 Chapter DVD Track Video CD Sensor 26 Fast Forward B...

Page 53: ...ay Fluorescent tube is exhausted Replace the fluorescent tube The fluorescent tube replacement is not free of charge even within the warranty period for the tube is an article of consumption Radio Unable to receive stations No antenna or open connection in cable Make sure the antenna is properly connected replace the antenna or cable if necessary Unable to tune stations in the seek mode You are in...

Page 54: ...CD Operation System TFT active matrix Number of Picture Elements 280 800 pcs 1 200 234 Effective Number of Picture Elements 99 99 or more Illumination System U shaped cold cathode fluorescent tube FM TUNER SECTION Tuning Range 87 5 108 0 MHz Mono Usable Sensitivity 0 7 µV Alternate Channel Selectivity 80 dB Signal to Noise Ratio 65 dB Stereo Separation 35 dB MW TUNER SECTION Tuning Range 531 1 602...

Page 55: ...rts may damage this unit internally or may not securely install the unit in place This may cause parts to become loose resulting in hazards or product failure ARRANGE THE WIRING SO IT IS NOT CRIMPED OR PINCHED BY A SHARP METAL EDGE Route the cables and wiring away from moving parts like the seat rails or sharp or pointed edges This will prevent crimping and damage to the wiring If wiring passes th...

Page 56: ...B CVA 1014RR into the dashboard When the unit is in place make sure the locking pins are fully seated in the down position This can be done by pressing firmly in on the unit while pushing the locking pin down with a small screwdriver This ensures that the unit is properly locked and will not accidentally come out from the dashboard Install the Supplied Front Frame Removal 1 Use a small screwdriver...

Page 57: ...ct the parking brake lead etc Connection Diagram of SPST Switch Sold Separately If the ACC power supply is not available 1 Vehicle Cable Stopper Monitor Cable Pinch Connector 2 Pliers Battery Red SPST SW Optional Yellow Installation and Connections CVA 1014R CVA 1014RB CVA 1014RR FUSE 5A Optional FUSE 10A Optional NOTES If your vehicle has no ACC power supply add an SPST Single Pole Single Throw s...

Page 58: ...king brake signal lead Ignition key Battery Front Right Rear Right Rear Left Front Left Speakers To the instrument cluster illumination lead Grey Grey Black Violet Black Violet Green Green Black White Black White Blue White Pink Black Yellow Blue PARKING BRAKE REMOTE TURN ON AUDIO INTERRUPT IN Orange ILLUMINATION White Brown REMOTE OUT Blue Red Black POWER ANT IGNITION GND Yellow BATTERY Choke Coi...

Page 59: ... ground on the vehicle Make sure the connection is made to bare metal and is securely fastened using the sheet metal screw provided 9 Power Antenna Lead Blue Connect this lead to the B terminal of your power antenna if applicable NOTE This lead should be used only for controlling the vehicle s power antenna Do not use this lead to turn on an amplifier or a signal processor etc Battery Lead Yellow ...

Page 60: ...er Ai NET Sold Separately Yellow Red White Yellow REMOTE IN White Brown REMOTE OUT White Brown When Subwoofer is set to OFF Output is from Rear speakers When Subwoofer is set to ON Output is from Subwoofer For details on how to set the Subwoofer to ON OFF see Subwoofer Control On and OFF on page 47 When connecting the DVD changer DVD Changer Ai NET Sold Separately To VIDEO OUT terminal Yellow CD C...

Page 61: ...this lead to the remote control input lead This lead outputs the controlling signals from the remote control Ai NET Cable Included with CD Changer Ai NET Cable Included with DVD Changer RCA Extension Cable Included with DVD Changer RGB NTSC Output Switch To display the picture of Navigation system on the external monitor place the switch in the NTSC Output position 3 NVE N055PS NVE N055PV NTSC RGB...

Page 62: ...Yellow TV Tuner Sold Separately Navigation System Sold Separately Rear Monitor Sold Separately CD Changer Ai NET Sold Separately White L ch GND Black Amplifier Amplifier Rear Camera Sold Separately Rear Monitor Sold Separately Red White Yellow To vehicle s reversing lamp White Brown REMOTE OUT REVERSE Orange White REAR SEL 1 Gray Pink REAR SEL 2 Black Pink REMOTE IN White Brown IGNITION Red BATTER...

Page 63: ...battery Ground Lead Black Connect this lead to a good chassis ground on the vehicle Make sure the connection is made to bare metal and is securely fastened using the sheet metal screw provided Fuse Holder 7 5A System Switch When connecting an equalizer or divider using Ai NET feature place this switch in the EQ DIV position When no device is connected leave the switch in the NORM position RGB Inpu...

Page 64: ...odèle CHA S634 est un changeur 6 disques ultra performant compatible Ai NET et équipé d un convertisseur N A standard d une sortie optique numérique d une mémoire d une capacité de 150 titres et de la fonction CD TEXT Le modèle CHA 1214 Ai NET peut contenir 12 disques Le modèle CHM S630 M Bus est un changeur 6 disques super compact Los cambiadores Alpine de CD le ofrecen más Más selecciones musica...

Page 65: ...ndige Firmeninhaber freiberuflich Tätige 2 Leitende Angestellte 3 Sonstige Angestellte 4 Beamte 5 Schulbildung 6 Studium 7 Sonstige Q15 Kommentar Carte d informations sur le produit Français En remplissant volontairement cette fiche et en l envoyant à Alpine vous acceptez que ces informations soient utilisées par Alpine dans le cadre de développement de nouveaux produits Par ailleurs vous autorise...

Page 66: ...o Q7 Modalità acquisto 1 Acquisto 2 Leasing Q8 Scopo acquisto 1 Aggiunta 2 Sostituzione Marca sostituita 1 Installato di fabbrica 2 Alpine 3 Altro Nome marca Q9 Avevate già acquistato prodotti Alpine 1 No 2 Due o tre volte Q10 Nell acquistarlo avete paragonato questo prodotto ad un altra marca 1 Si Nome marca 2 No Q11 SESSO 1 Maschile 2 Femminile Q12 ETÀ Q13 STATO CIVILE 1 Celibe nubile 2 Coniugat...

Page 67: ......

Reviews: