


Section 4
4 - 29
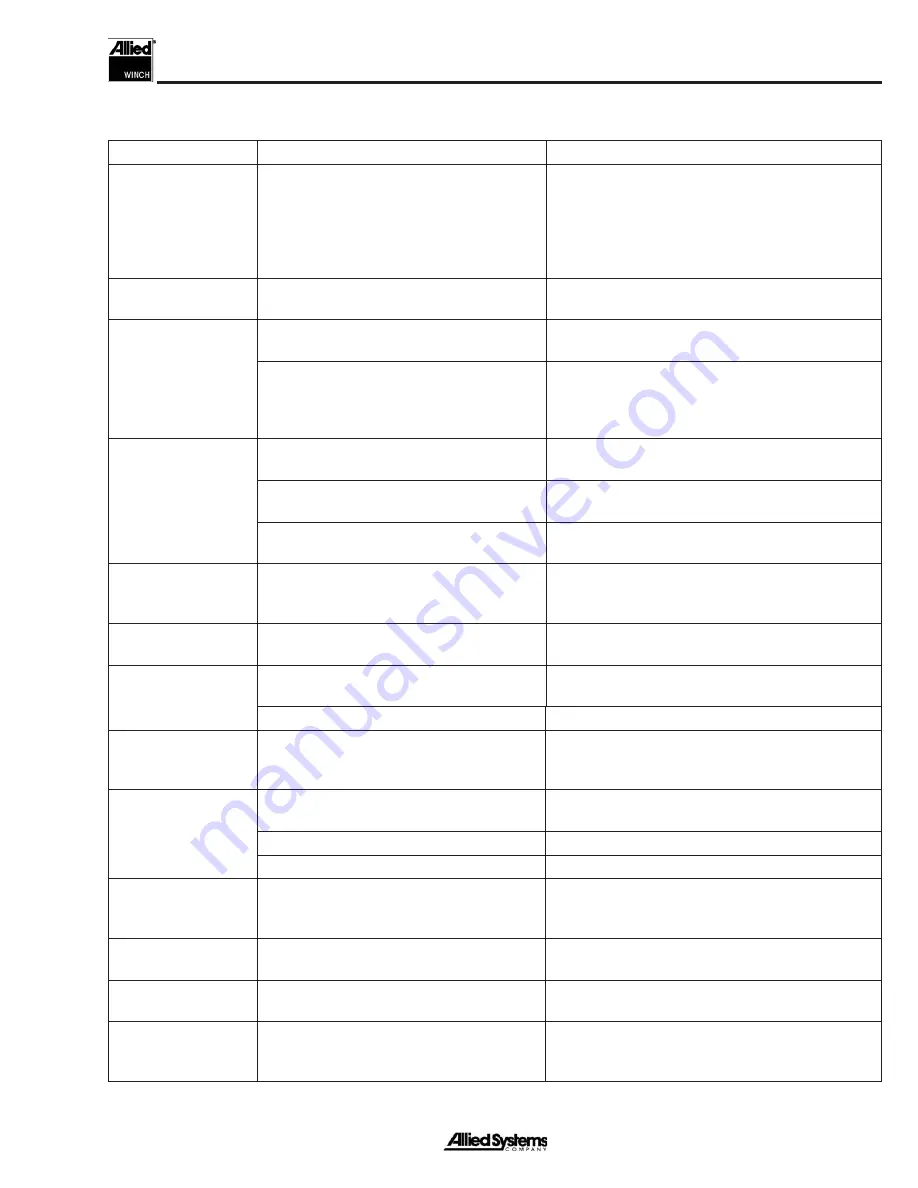
Figure 4-8 Visual Inspection (continued)
ITEM
INSPECTION REQUIREMENTS
CORRECTIVE ACTION
Winch Motor (Cont.)
Inspect stator for wear or damage.
Normal wear results in polishing of cam form
which does not impair motor performance. No-
ticeable wear may be apparent along the corner
of one side of the vane slot. This does not require
replacement of the stator, but may slightly affect
volumetric effi ciency.
D i r e c t i o n C o n t r o l
Manifold
Check that all passages and cartridge
valves are free of contaminants.
Clean or replace cartridge valves. Clean all hy-
draulic passages.
L o g i c C o n t r o l
Manifold
Check that all passages and cartridge
valves are free of contaminants.
Clean or replace cartridge valves. Clean all hy-
draulic passages.
Check torque on solenoid coils. Do not
over-tighten.
Check that solenoid spool moves freely. Replace
cartridge if stiction is present. Torque for solenoid
cartridge is 20 ft-lbs. Torque for coil retaining nut
is 5 ft-lbs.
BRAKE-OFF
Mani-
fold
Check that all passages and cartridge valves
are free of contaminants.
Clean or replace cartridge valve. Clean all hydraulic
passages.
Check that 2-speed switch illuminates
when
BRAKE-OFF
activated.
If no fault in 2-speed switch check or replace wire
harness.
Check that 2-speed switch illuminates when
activated and turns off when deactivated.
Check harness connections or replace relay and
pressure switches.
FREESPOOL
Shifter Check oil level in winch is not over full. This
is an indication that the
FREESPOOL
hose
or piston seals are leaking.
Tighten or replace
FREESPOOL
shifter hose.
Replace piston seals.
FREESPOOL
Dental
Clutch
Check for broken or worn teeth.
Replace dental clutch if teeth are broken or se-
verely worn.
Intermediate Shaft
Check for deep scratches or scoring on
bearing surfaces at each end of shaft.
Dress surface or replace shaft if severely worn.
Check for broken or severely worn splines. Replace if splines are broken or severely worn.
Intermediate Gears
Inspect both gears for broken or severely
worn teeth. Pay particular attention to lead-
ing edges of straight-cut gear teeth.
Replace gears if teeth are broken or severely worn.
Drum Shaft
Check for deep scratches or scoring on
bearing surfaces.
Dress surface or replace shaft if severely worn.
Check O-ring groove and seal surface.
Dress groove or replace shaft if severely worn.
Check for crossthread or damaged threads. Dress threads with thread chaser.
Drum Gear
Check for broken or severely worn gear
teeth. Pay particular attention to leading
edges of straight-cut gear teeth.
Replace gear if teeth are broken or severely worn.
Drum
Inspect quad-ring groove for burrs, scoring
and rust.
Replace drum or rebuild drum groove if a new quad-
ring will not seat properly.
Drum Adapter
Carefully inspect double seal contact sur-
face for deep scratches, burrs and rust.
Replace if damaged.
Winch Frame
Check area around drum and drum adapter
for damage if cable has slipped between
cable guard and winch frame.
Consult the factory.
Summary of Contents for Allied H6G Series
Page 8: ...vi Notes...
Page 25: ...Section 1 1 17 Intentionally Blank...
Page 26: ...General 1 18 Figure 1 19 Sequence of Operation BRAKE ON...
Page 28: ...General 1 20 Figure 1 20 Hydraulic System LINE IN...
Page 30: ...General 1 22 Figure 1 21 Hydraulic System HI SPEED LINE IN...
Page 32: ...General 1 24 Figure 1 22 Hydraulic System LINE OUT...
Page 34: ...General 1 26 Figure 1 23 Hydraulic System HI SPEED LINE OUT...
Page 36: ...General 1 28 Figure 1 24 Hydraulic System BRAKE OFF...
Page 38: ...General 1 30 Figure 1 25 Hydraulic System FREESPOOL...
Page 40: ...General 1 32 Notes...
Page 41: ...Section 1 1 33 Figure 1 26 H6GH B Schematic High Performance Winch H6GH B...
Page 42: ...General 1 34 Figure 1 27 H6GH E Schematic High Performance Winch H6GH E...
Page 43: ...Section 1 1 35 H6GH J Figure 1 28 H6GH J Schematic High Performance Winch...
Page 44: ...General 1 36 H6GT E Figure 1 29 H6GT E Schematic Rescue Winch...
Page 51: ...Section 2 2 7 Notes...
Page 52: ...Troubleshooting 2 8 Notes...
Page 60: ...Service 3 8 Notes...
Page 83: ...Section 4 4 23 12 Remove the spool asssembly...
Page 119: ...Section 4 4 59 Notes...
Page 120: ...Repairs 4 60 Notes...
Page 121: ......


