© Copyright, Alliance Laundry Systems LLC – DO NOT COPY or TRANSMIT
Maintenance
25
1800000
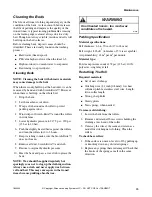
Cleaning the Beds
The life of all ironer clothing depends largely on the
condition of the beds. A clean smooth bed increases
the life of padding and improves the quality of the
ironed linen. A typical ironing problem like creasing
on the leading edge is almost always due to a dirty
bed. Though not always visible, residue and salts will
build up on the bed surfaces.
Before cleaning beds, deposit causes should be
identified. These are usually found in the washing
process:
●
Hard water (lime deposit).
●
PH value higher or lower than the ideal 6.5.
●
High moisture (too much water to evaporate).
●
Bad rinsing (soap residuals).
Cleaning Beds
NOTE: Cleaning the beds with abrasive materials
may cause damage to the beds.
When there is only build-up at the bed inlet, it can be
removed by hand and with Scotch-Brite™. However,
when there is build-up on the whole bed:
1. Drop the beds.
2. Let the machine cool down.
3. Wrap a cloth around each roller to protect
padding against dust.
4. Wind strips of Scotch-Brite™ around the rollers
in wide lanes.
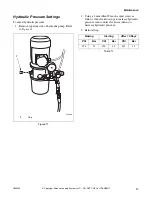
5. Lower hydraulic pressure to 217.5 psi - 290 psi
(15 bar to 20 bar).
6. Push the slightly heated beds against the rollers
and turn the rollers for 2 to 3 hours.
7. Keep watching to make sure the Scotch-Brite™,
does not loosen.
8. Remove all dust, Scotch-Brite™ and cloth.
9. Restore to original hydraulic pressure.
10. Heat the beds and pass a wax cloth to grease the
beds.
NOTE: Wax should be applied regularly but
sparingly so as not to clog up the clothing suction.
Always use a cloth and never apply wax between
roll and bed. This may cause spots in the ironed
items because padding absorbs wax.
Padding Specification
Material specifications:
Felt thickness: .66 to .70 inch (17 to 18 mm)
Felt weight: .8 lbs/ft
2
(tolerance of 5% is acceptable)
Air permeability: 18 m
3
per m
2
per minute
Material type:
For steam pressures under 174 psi (12 bar): 100%
polyester - single layer felt
Reclothing The Roll
Required materials:
●
Set of new clothings
●
Stitching wire (.31 inch [0.8 mm]) low heat,
softened, pliable, stainless steel wire. Length:
twice roller length
●
Strong, sharp knife
●
Sturdy pliers
●
New springs, when needed
To remove old clothing:
1. Lower the beds from the rollers.
2. Remove and retain all brass screws holding the
clothing at each end of the roller.
3. Cut away the wire at the seam and retain as a
model for stitching new clothing. Clean the
rollers.
To check bare rollers:
1. If the surface is uneven, level it off by pulling up
or knocking down any distorted springs.
2. Replace any springs that are damaged. Check that
the hooks of the springs are all in the same
direction.
On oil heated ironers, too much wax
constitutes a fire hazard.
W681
WARNING
Summary of Contents for UL24A118
Page 2: ......

