iLive Reference Guide – Hardware
Part 1 - 32
AP6526-1 iss.5
Installing ES-V1 in RAB2
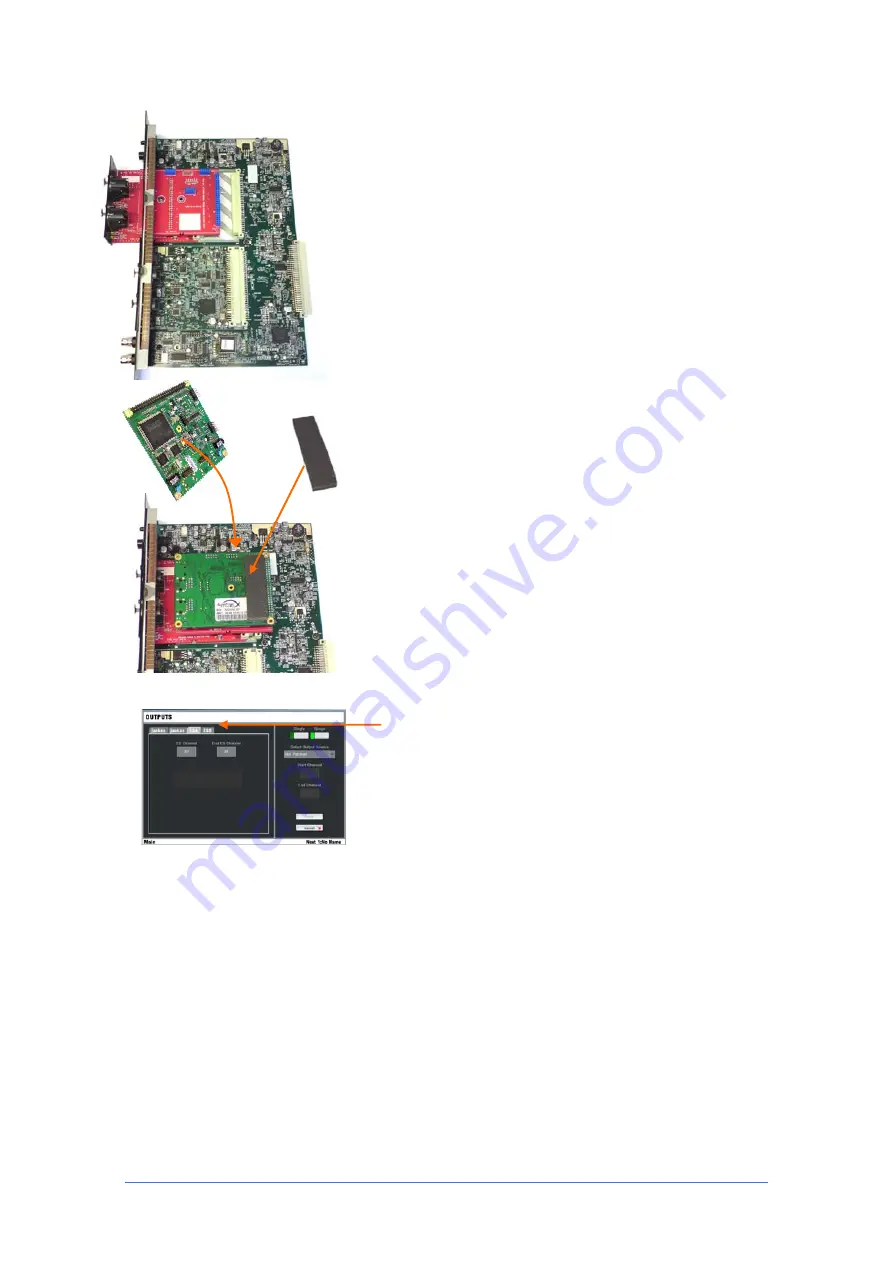
Step 1
Fit the carrier frame into the RAB2 module
Remove the RAB2 module from the MixRack or Surface.
Unscrew and remove the option slot blanking plate. Use Port A (the
top option slot) if you want to use EtherSound as the Surface to
MixRack link. Use Port B (the lower option slot) for system
expansion, digital mic splitting and signal distribution.
Note
Make sure the EtherSound card is not fitted to the carrier at
this stage. The module will not fit through the panel opening with
the AVD card fitted.
Slide the
M-ES-V1-BASE
frame into the option slot and push in
firmly to locate its connector. Screw the module in place.
Step 2
Fit the EtherSound card
Unplug the
Auvitran AVD
EtherSound card from the original Remote
Audio module (if fitted).
With the frame now fitted to the RAB2 module as described above,
invert and plug the EtherSound card on to the carrier card. Be
careful to locate the connector pins correctly and to ensure the card
is fully seated.
Step 3
Fit the protective foam strip
A piece of self adhesive foam strip is provided with the kit. Attach
this to the EtherSound card as shown in the diagram. This protects
the circuit connections from touching adjacent module components.
Assigning the audio
Use the Surface or Editor
OUTPUTS
page to assign sources and
destinations for the EtherSound channels. EtherSound modules
M-
ES-V1
and
M-ES-V2
are fully compatible and are assigned in the
same way.
To find out more about setting up and using EtherSound refer to the
Digigram
and
EtherSound
web sites.


